You've finished the quilt top, the minky is soft and gorgeous, and now the binding feels like the part that could ruin it. The good news is that binding a minky quilt for beginners is very doable if you use the right method for minky, not the method you'd use for quilting cotton.
Minky asks for a little more control and a little less force. If you respect the stretch, manage the bulk, and choose a binding style that fits your project, you can get a clean finish without fighting your machine the whole way.
What Do I Need Before I Start Binding?
You spread the quilt out, smooth the top, and the edges tell the truth. One side waves a little, a corner is thicker than the rest, and the minky backing wants to creep past the quilt top. That is normal. It also decides how easy your binding day will be.
Good binding starts before the first strip is cut. With minky, prep does more than make the quilt look tidy. It keeps the edge from stretching, reduces bulk at the corners, and gives you a cleaner finish whether you plan to use traditional binding, a flange, or self-binding.

Which tools matter for minky
A few tools make a clear difference with plush fabric. I keep these close any time I bind minky in the studio:
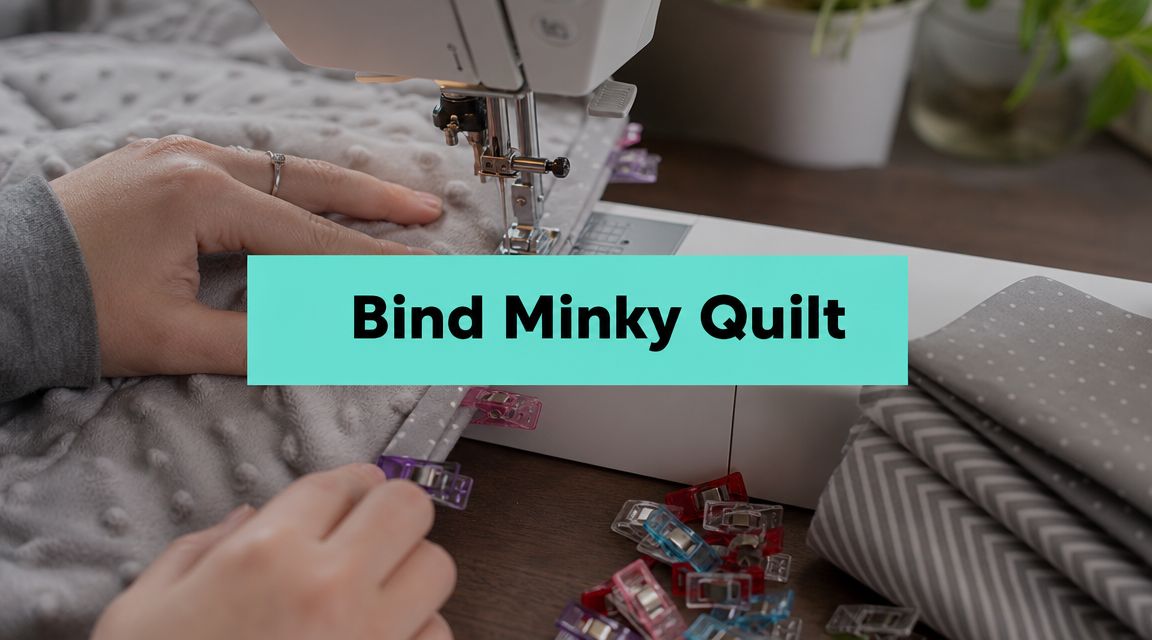
- Walking foot. It feeds the layers more evenly and helps prevent the backing from inching ahead of the top.
- Wonder Clips or binding clips. They hold a thick edge securely without bending the fabric or leaving the distortion that pins can cause.
- Fresh 90/14 needle. If minky starts skipping, dragging, or sounding punchy under the machine, a new needle is often the first fix.
- Polyester thread. It pairs well with polyester plush fabrics and handles abrasion better than low-quality all-purpose thread.
- Rotary cutter and ruler. Straight trimming matters. A wobbly edge is harder to hide on minky than beginners expect.
One more practical habit helps more than any gadget. Support the weight of the quilt so it is not pulling off the machine table while you sew.
Practical rule: If the layers start shifting, add more clips, shorten your reach, and slow the machine down. Minky responds better to control than force.
What should I do before I sew the binding on?
Square the quilt first. Then check the whole perimeter by hand.
Run your fingers around the edge and feel for extra backing, folds in the batting, or places where the quilting has drawn the layers unevenly. Those small problems turn into lumpy binding fast, especially on baby quilts where the corners are handled and washed often.
Trim with intention. If one side bows, fix it now instead of asking the binding to hide it later. Traditional binding gives you the most framed look, flange binding adds a decorative accent, and self-binding is the quickest route for many cuddle-style quilts, but all three methods depend on a straight, consistent edge.
A few prep steps are worth doing every time:
- Trim stray batting so it does not pack into the binding seam.
- Clean up lint early because freshly cut minky sheds and clings to everything nearby.
- Check corner bulk before sewing so you are not fighting four thick layers plus batting all at once.
- Keep the quilt flat and supported while clipping or trimming.
If cutting plush fabric still feels messy, this guide on how to cut minky fabric without the mess will help you prep binding and backing with less cleanup.
Should I pre-wash minky?
Usually, no.
Minky does not behave like quilting cotton, so I do not treat it the same way. Pre-washing often creates extra lint and does not solve the main beginner problems, which are stretch, bulk, and slippage at the edge.
I save the effort for careful trimming, good clipping, and the right binding method for the project. That gives a better result than extra processing.
For supplies, many quilters like to gather their clips, thread, and minky before they begin. On Pins & Needles Quilting Co. carries Shannon Cuddle and Luxe Cuddle textures such as Hide, Snowy Owl, and Fawn, along with tools that work well for minky projects.
How Do I Create a Traditional Minky Binding?
Traditional binding is still my go-to when I want the edge to look classic and framed. It gives the quilt a defined border, works well on baby quilts and lap quilts, and makes it easy to use either matching or contrasting minky.
The difference is that minky binding should be handled like minky, not like cotton binding.

What size should I cut minky binding strips?
This is one place where I stick to a very specific rule. In a detailed minky binding tutorial, the instruction is to cut binding yardage 2 inches wide, not on the bias, because “It is stretchy enough,” and to attach it with a 1/2-inch seam allowance while forming corners with careful 45-degree folds in the mitering process, as shown in this minky binding method.
That one choice solves several beginner problems at once. Straight-grain strips are easier to control, less likely to stretch out of shape, and simpler to sew consistently.
How do I sew traditional binding onto a minky quilt?
Start with enough strips joined end to end for your quilt's perimeter. Keep the joined seam allowances tidy so you're not stacking extra bulk at random points.
Here's the sequence I trust:
- Cut the strips. Cut your minky binding strips straight across the grain at 2 inches wide.
- Join the strips. Sew them together end to end so you have one continuous length.
- Clip to the quilt front. Match raw edges and clip generously, especially near corners.
- Sew with a walking foot. Attach the binding using a 1/2-inch seam allowance.
- Miter each corner. Fold carefully to create the corner shape before continuing.
- Wrap and finish. Bring the binding around to the back and secure it by hand or by careful machine stitching.
Here's a helpful visual walkthrough before you sit down at the machine:
What works well and what usually does not?
Traditional minky binding works best when you keep your hands relaxed. Don't pull the strip to “help” it around the edge. That stretching is what creates ripples later.
What tends to work:
- Clipping often so the layers stay aligned
- Sewing at an even pace instead of racing long edges
- Choosing lower-loft minky for binding if your quilt back is especially plush
- Using a contrasting texture carefully for a framed finish
What usually doesn't:
- Bias-cut binding
- Pins packed tightly along the edge
- Forcing corners flat with heat or pressure
- Trying to sew minky at top speed
If your strips feel slippery, this article on how to sew with minky fabric without it sliding helps with the handling side of the job.
For a classic binding look, a smooth Shannon Cuddle option in a light neutral is often easiest to manage. If you want a soft, simple edge that won't compete with the quilt top, browse a Shannon Cuddle collection or look at extra-wide minky backing options if you're still choosing fabrics for the full project.
Traditional binding is the method I recommend most often when a beginner wants the quilt to look “finished” in the classic quilt sense, not just soft.
Are There Easier or Different Binding Methods?
Yes, and that's good news. There isn't one perfect answer for every minky quilt.
Some beginners want the most familiar finish. Others want the fewest moving parts. Sometimes the quilt itself tells you what makes sense. A baby quilt for daily use may benefit from simplicity, while a gift quilt may deserve a more decorative edge.
Is self-binding easier for beginners?
For many beginners, yes. Self-binding removes the separate strip step, which means less measuring, less joining, and less wrestling with another stretchy piece of fabric.
One beginner-friendly self-binding method trims the excess Minky backing to exactly 1 inch from the quilt top, then folds that margin twice, first by about 3/8 inch and then again so it overlaps the quilt top by about 3/8 inch, as shown in this self-binding tutorial.
That method is appealing because the backing itself becomes the finished edge. You're working from the perimeter you already have instead of manufacturing and attaching a separate binding.
Self-binding is a strong choice when:
- You want fewer steps
- The backing is a color or texture worth showing on the front
- The quilt is small enough to fold and control easily
- You're nervous about making and joining binding strips
If you use clips heavily around the edge, the folding becomes much easier to manage. These quilting binding clips are exactly the type of tool that makes self-binding less frustrating.
What about flange binding?
Flange binding is a nice option when you want a decorative accent without making the whole edge fussy. It creates a tiny peek of contrast that can pull together a quilt top, especially if your palette needs one more strong line at the edge.
With minky, flange binding can look especially good when you mix textures thoughtfully. A subtle body fabric paired with a slightly more dimensional texture can create a custom look without needing complicated piecing. Luxe textures like Luxe Cuddle Fawn or a richer faux-fur style can add personality to a simple quilt.
Which minky binding method should I choose?
| Binding Method | Difficulty | Finished Look | Best For |
|---|---|---|---|
| Traditional | Moderate | Classic framed edge | Quilters who want a standard quilt binding look |
| Self-Binding | Beginner-friendly | Soft, simple, integrated edge | Baby quilts, quick gifts, first minky projects |
| Flange | Moderate | Decorative edge with contrast | Gift quilts, playful designs, texture-focused projects |
A few shorthand decisions help:
- Choose traditional if you want structure.
- Choose self-binding if you want fewer steps.
- Choose flange if you want the edge to be part of the design.
If you're selecting fabrics for that decorative edge, Luxe Cuddle Hide textures and Snowy Owl style minky options are the kinds of plush finishes that stand out nicely in a flange application.
How Do I Get Perfect Mitered Corners on Minky?
Mitered corners are where beginners usually lose confidence. That's normal. Minky gets bulky fast, and corners magnify every little handling mistake.
The fix isn't complicated. It's repetition and control.

What is the actual corner-fold sequence?
The cleanest minky corners come from stopping consistently and folding deliberately. Don't try to improvise the corner once you arrive there.
Use this order:
- Sew toward the corner and stop before the edge at the same seam allowance you're using for the binding.
- Take the quilt out of the machine and fold the binding strip upward so it forms a 45-degree angle.
- Fold the strip back down so the raw edge aligns with the next side of the quilt.
- Clip the fold in place before you start sewing again.
- Resume stitching down the next side with the fold held neatly at the top.
That fold creates the little pleat that becomes the miter once the binding is turned and finished.
Slow corners down more than you think you need to. Minky rarely rewards “good enough” folding at the turn.
How do I keep minky corners from becoming bulky?
Bulk control starts before the last stitch at the corner. If all the plush layers pile into one spot, the miter won't sit flat no matter how neatly you fold.
A few things help immediately:
- Clip instead of pin so you don't distort the layers as you secure them
- Reduce excess fuzz and stray backing before folding
- Finger-press the folds instead of crushing them with high heat
- Check both front and back before final stitching
Shop note: If skipped stitches show up while you're working through corner bulk, a fresh needle often solves it. We keep minky projects happier by treating the needle as a consumable, not a permanent fixture.
If you're unsure whether your needle is part of the problem, this guide on the best needle size for Shannon Cuddle fabric is a useful reference.
Offer: If you're picking up clips, thread, or extra minky for binding, remember the 15% first-order coupon and free U.S. shipping on orders over $70 available through the shop.
Should I hand-finish or machine-finish the corner?
Both work. The better option is the one you can control.
Hand-finishing gives you more precision at the miter and lets you shape the corner neatly from the back. Machine-finishing is faster, but it shows every wobble. If you're very new to binding minky, hand-finishing the corners and machine-sewing the straight runs is a sensible compromise.
What If My Minky Binding Goes Wrong?
You get to the last side, the binding looks fine under the machine, then the quilt flips over and the back tells the truth. The edge is rippled, one corner is bulky, or a few stitches never caught. That is common with minky, especially on a first quilt, and it is usually fixable.
At OPN Quilting, we see the same trouble spots across all three beginner-friendly binding styles. Traditional binding gives you the cleanest framed edge, but it shows uneven feeding fastest. Flange binding is forgiving visually, yet the extra layer can add bulk at the corners. Self-binding is simple and cozy, but it can stretch if the backing is handled too aggressively. The fix depends on which method you chose and what the fabric did while you were sewing.
Why are my quilt edges wavy?
Waves almost always come from stretch. Minky has more give than quilting cotton, so a binding that was cut, pressed, or fed with too much tension can ripple even if the seam line is straight.
Check the cause before you unpick anything:
- The quilt dragged off the table. The weight pulled the edge as you sewed.
- The binding was eased too tightly. This shows up a lot on self-binding edges.
- The top and backing fed unevenly. Traditional and flange bindings are especially sensitive to this.
- The edge was already loose before binding. Quilting can distort the perimeter if the quilt was not squared well.
If the waviness is mild, wash and dry often softens it. If the edge still flares, remove that section and resew it with the quilt fully supported and the binding laid on, not stretched on.
Why am I getting skipped stitches?
Minky exposes small machine problems fast. A needle that was fine on cotton can start missing stitches once it hits plush backing, batting, and folded binding.
Start with the simple fixes:
- Put in a fresh 90/14 needle
- Rethread the top and bobbin completely
- Slow down at joins, corners, and seam overlaps
- Test on a scrap sandwich that matches your quilt thickness
If skipped stitches keep showing up in one specific area, the problem is usually bulk, not timing. Trim the seam allowance slightly, flatten the fold with your fingers, and sew that section again. For beginners, this is one reason flange binding can be easier than a full traditional finish on very plush minky. The decorative flange distracts from tiny inconsistencies that would stand out on a plain edge.
Why do my corners look thick or twisted?
Corners on minky need less material inside them, not more force. If a corner looks stuffed, there is too much trapped in the fold or the folds were stacked out of order.
Open the last few stitches and rebuild the corner if needed. That is faster than fighting a bad miter. Trim stray backing, shave back extra batting, and refold the layers before stitching again. I would rather resew two inches than accept a corner that will annoy me every time the quilt is folded.
A good minky corner feels padded and tidy. It should not feel hard.
When should I stop troubleshooting and send it out?
If you have resewn the same area more than once, the quilt is getting harder to control with every pass. Needle holes build up, minky nap gets roughed up, and frustration usually makes the next attempt worse.
That is a good point to reconsider whether the whole quilt needs to stay on your domestic machine. If the project is oversized, very plush, or too important for more trial and error, this guide to mail-in longarm quilting services with free shipping can help you decide whether professional handling makes more sense before you keep wrestling with the finish.
When Should I Use a Professional Finishing Service?
There's a point where doing it yourself stops being the most practical choice. That doesn't mean you failed. It means you know the project deserves better than a stressful finish.
A professional finishing service makes sense when the quilt is physically hard to handle, when the project matters too much to risk on a first try, or when you want the quilting done before you take on the binding yourself.

Which projects are better sent out?
Some quilts are manageable at home. Some become awkward the minute they're layered with minky.
A service is worth considering when:
- The quilt is large and hard to feed through a domestic machine
- The gift is important and you want a polished result
- The backing is extra plush and the sandwich feels heavy
- Your schedule is tight and the project is stalling unfinished
For those situations, a mail-in longarm quilting service can take over the biggest handling challenge while you stay focused on the parts you enjoy most.
What is the advantage of sending out a minky-backed quilt?
The main benefit is control. Longarm quilting takes the weight and drag issues out of your sewing space, which is often the exact thing making minky projects feel harder than they need to be.
At OPN, the service includes batting, thread, and free return shipping, and there's a pattern gallery to help choose the quilting style. That's particularly useful when a beginner has completed the piecing but doesn't want to wrestle a full minky-backed quilt through a home machine.
We've also earned hundreds of verified reviews, which matters when you're mailing a project you care about.
Can I still bind the quilt myself after professional quilting?
Absolutely. That's a smart middle path for a lot of beginners.
You can outsource the large-scale quilting and still do the binding at home, where you have time to work carefully. If your real goal is learning how to bind a minky quilt for beginners without also managing the hardest part of machine quilting, that split approach makes a lot of sense.
If you want to understand how the process works before deciding, read more about mail-in longarm quilting services with free shipping.
If you're ready to finish your quilt with less frustration, On Pins & Needles Quilting Co. has the minky fabrics, plush Shannon Cuddle textures, and mail-in longarm options to help. For your next step, Get 15% Off Your First Order.