
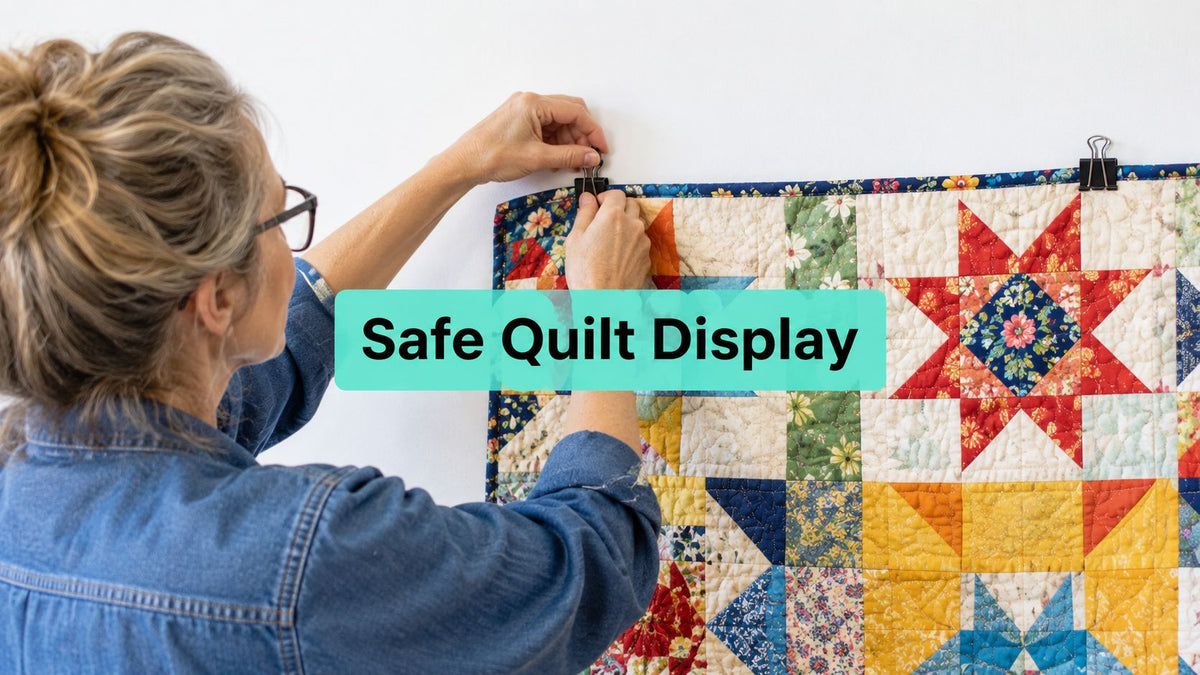
A finished quilt is finally ready for the wall, but the last step can feel surprisingly risky. Hanging clips for quilts work well for temporary, rotation-friendly display when they distribute the quilt's weight carefully, but sleeves, slats, or stitched panels are safer for long-term mounting. That distinction matters even more after investing in professional quilting, especially with a plush minky backing.
What Hanging Clips for Quilts Actually Do
A quilt fresh from OPN's longarm service may be ready to display, but the hanging method still determines how safely it stays on the wall. Hanging clips for quilts grip the finished upper edge with jaws, plates, or a small compression mechanism, giving you a practical way to put a completed quilt up without opening the binding or sewing in a sleeve.
Some clips attach directly to a hook or screw. Others hang from a rod or dowel, so the rod carries more of the horizontal load while the clips hold the quilt in position. That setup makes clips especially useful for a rotating collection of working quilts rather than a permanent museum-style mount.
Use them when you:
- Rotate wall quilts often: Remove one finished quilt and replace it without unpicking a sleeve or altering the backing.
- Want a reversible display choice: A bound quilt can go on the wall without adding a permanent channel or stitched support.
- Need a quick solution: Clips work well for seasonal quilts, customer samples, baby quilts, and pieces moving between a studio and home.
- Have already finished the quilt: A bound edge can still use a practical display system without being reopened.
Clips do have a clear limitation. A small number of grip points concentrates weight along the top edge, while a sleeve, slat, or fabric-covered panel spreads that load across more of the quilt. Museum guidance warns that quilts held by only a few clips can develop stress, distortion, or tears over time, and explains why clips suit secondary display rather than permanent mounting. Museum quilt display guidance
For quilts in regular rotation, that limitation is manageable. I use clips for seasonal display, inspection, and customer samples, then move a treasured heirloom to a sleeve, slat, or panel system. A guide to quilt rack wall mounting reinforces the same practical choice: match the support method to how long the quilt will remain displayed. Clips give you flexibility, but they should not replace broader support when the quilt will stay on the wall for an extended period.
Compression Clamps vs Rod-and-Clip Hangers
A quilt fresh from OPN's longarm service often needs a display method that matches how you plan to use it. For a working quilt that moves between a studio, home, and seasonal display, clips make rotation simple. They are practical supports, not a permanent museum mount.
Compression clamps grip the quilt edge directly. Pressure comes from a spring, screw, or wooden jaw tightened against a matching piece. They are compact and quick to remove, which suits light to medium wall quilts that change regularly. Their drawback is concentrated pressure. Each jaw carries part of the quilt's weight at one small point.
Rod-and-clip hangers use a separate bar or dowel. Clips, a sleeve, or a channel attach the quilt to the rod while the rod carries the horizontal load. This spreads support across more of the upper edge and can keep a wide or heavier quilt straighter than isolated clamps. It also takes more hardware and planning.
A structural art-hanging system may combine a leveling clip and rod with compatible cable or clearline hardware. The rod stays supported while the hanging point helps keep the top edge aligned. That setup fits a studio, quilt show, or home wall where a straight presentation matters. Gallery System's quilt-hanging guide shows this separate rod-and-hanger approach. For more display ideas, this guide to hanging quilted wall art places clip systems within a broader range of wall-mounting options.
| Feature | Compression Clamps | Rod-and-Clip Hangers |
|---|---|---|
| How the quilt is held | Jaws grip selected points along the top edge | A rod carries the span while clips or a sleeve retain the quilt |
| Best suited to | Light wall quilts, baby quilts, and frequently rotated pieces | Wide, heavier, or plush-backed quilts |
| Main advantage | Fast installation and easy removal | Broader load distribution and better leveling |
| Main limitation | Pressure and weight remain concentrated at the jaws | Requires compatible rod, sleeve, or clip hardware |
| What to inspect | Jaw width, grip strength, spacing, and edge thickness | Rod stiffness, support points, and secure wall mounting |
Quilt frames and hanging hardware developed from rope-based tensioning toward clamps, clips, and sleeve-supported systems. Historical examples include frame holes for ropes dating to at least 1813, wooden clamps in use since at least the 1870s, and metal clamps appearing in 1900. This history of quilt frames and clamps puts modern clips in context. They offer convenient rotation, but they are not automatically conservation-grade supports.
For a quilt with thick minky backing, choose a rod-and-clip system or a properly sized wooden hanger instead of a few narrow clamps. The extra setup usually earns better support and a straighter display.
Preparing the Quilt Edge and the Wall
A quilt just finished by OPN's longarm service may be ready for display, but the top edge still needs inspection before clips touch it. Lay the quilt flat, right side down, and examine the upper edge from corner to corner. Clip-hanging works well for rotating quilts through a home or studio display. It is a practical display method, not a permanent museum mount.
Press the binding so it lies flat, remove loose threads, and check that no seam allowance or bulky fold will sit inside the jaws. Clips make a wavy binding line more visible than a sleeve often does, so correct unevenness before mounting.
Check the textile first
Decide whether the quilt will hang horizontally or vertically. Orientation changes the pull on the top edge, and a tall quilt can place more strain on its upper grip points than a compact wall piece.
Inspect the edge thickness, backing texture, and batting loft before choosing hardware. This guide to quilt batting helps explain why the quilt sandwich can vary in bulk. A clamp designed for textiles up to about 1/4 inch thick may not close securely around a lofty sandwich, plush binding, or several folded layers.
This wooden quilt wall hanger listing describes that thickness limit and shows how to insert the fabric, place the clamp on a screw, and tighten the knob. If the quilt still needs finishing, follow OPN's quilt preparation instructions before sending it for longarm work. A square, properly prepared quilt hangs more cleanly.
Prepare the wall carefully
For a substantial quilt, locate a stud before mounting the supports. Mark the centerline, draw a level reference line in pencil, and test each anchor or screw before attaching the textile.
The same load-planning principle applies to mounting a horseshoe indoors or outdoors. The object differs, but the support should be selected before the visible mounting point.
Lay the clips beside the quilt and space them evenly across the top edge. A common guide recommends 12 to 15 inches between clamps, with extra clamps for heavier quilts, as described in these quilt hanger product instructions. Transfer those positions to the wall only after the edge and hardware align.
Matching Clip Size to Quilt Weight and Thickness
A quilt fresh from OPN's longarm service may look ready for the wall, yet its finished edge can still vary considerably. A flat cotton wall quilt needs different hardware from a lofty, minky-backed piece that you plan to rotate through your studio displays. Edge bulk, backing texture, batting loft, and the clamp's opening all affect whether the grip remains secure. See this guide to common quilt batting types before matching the clip to the finished edge.
Some wooden hanger systems are sold in standardized sizes. One supplier lists an original size of 1-11/16 by 3-3/16 inches and a mini size of 1-1/8 by 1-7/8 inches, with hardwood choices such as ash and walnut. Wooden quilt hanger sizing information also describes use on quilts of different sizes and on flat or curved walls.
Use the following framework, then check the manufacturer's load and thickness limits:
| Quilt Weight | Edge Thickness | Clip Type | Jaw Size | Rod Length |
|---|---|---|---|---|
| Light wall quilt | Slim, flat cotton edge | Small compression clip or paired decorative hanger | Narrow jaw that closes fully | Short rod or direct wall support |
| Medium quilt | Moderate binding and batting bulk | Screw compression clamp or rod-and-clip hanger | Wider jaw with stable contact | Rod sized to span the supported edge |
| Heavy or plush-backed quilt | Thick, soft, or slippery edge | Broad wooden clamp or rod-and-clip system with padded contact | Opening must accommodate the full edge without forcing it | Rigid rod with multiple support points |
Finished dimensions can mislead. A small wall quilt with thick plush backing may need a broader grip than a larger cotton quilt with a thin, firm edge. If the clip closes only by crushing the binding, it is too small.
Wooden compression hangers work differently from simple decorative clips. Some systems accommodate quilts of different sizes, flat walls, curved walls, and corners, as described by this wooden quilt hanger supplier. That flexibility suits a rotation-friendly display in a home or studio, rather than a permanent museum mount, but the clamp opening and load path still need checking.
For a minky-backed quilt, test one clamp on a hidden edge first. Watch for sharp nap compression, slipping, or a jaw that cannot close without distorting the binding. Change the hardware before hanging the full quilt.
Spacing Your Clips for an Even Hang
A heavy minky-backed quilt may look level at first, then the top edge bows between clips as the fabric settles. The nap can show pressure marks, and an outer clip may twist when the load is uneven. Set the support pattern before hanging the quilt, especially after finishing it with OPN's longarm service and preparing it for rotation between walls, rooms, or storage.
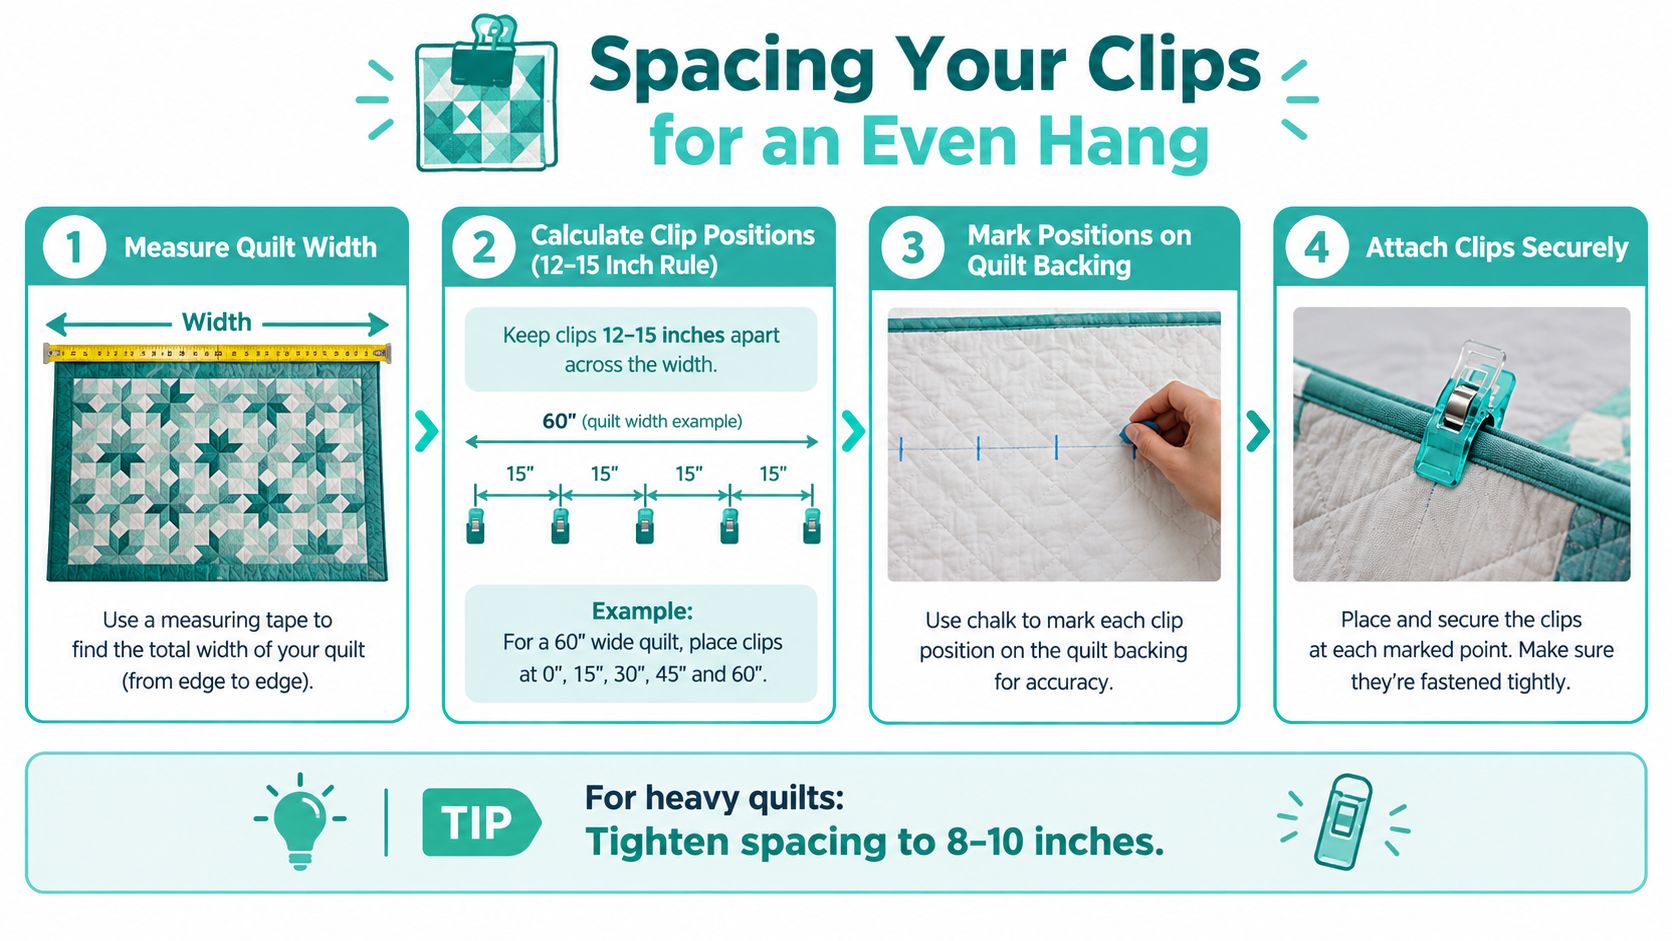
Start with 12 to 15 inches between clips. A slippery or particularly heavy quilt needs closer support, not fewer clips carrying more fabric. Check the hanger manufacturer's recommended spacing for the quilt's weight and construction.
Square the quilt top first with this guide to squaring a quilt top, so the upper edge lays flat and true. Then measure from the corners inward rather than centering clips on the rod and assuming the quilt will balance.
- Measure the finished top edge.
- Mark the first grip point near each corner, leaving enough stable edge for the clamp to close securely.
- Divide the remaining span into even spaces within the recommended range.
- Mark matching positions with painter's tape on the wall or floor.
- Dry-fit the quilt and inspect the top edge before tightening the clips.
- Lift gently at each grip point and check whether the fabric bows between supports.
The corners set the visual level for the entire quilt. If one sits high, recheck the wall marks, rod, and clip positions instead of pulling the textile sideways.
Frequent repositioning is a sign that a rod-and-clip hanger may suit your rotation better than separate compression clamps. Remove the quilt by releasing the supports evenly, without repeated tugging on one edge.
Common Mistakes That Cause Sagging and Tears
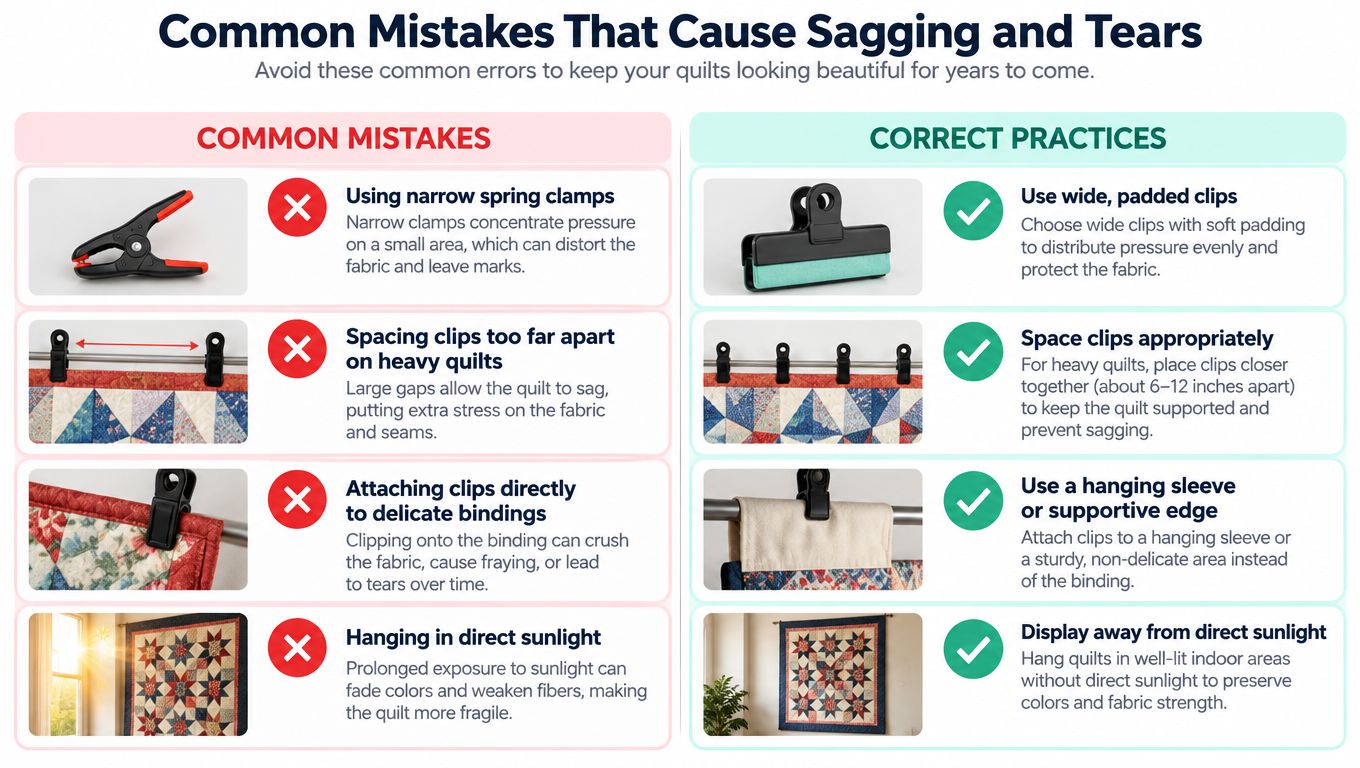
A narrow spring clamp placed too far from its neighbor can create a predictable chain of problems. The binding stretches, the plush nap shows a compressed patch, and the clamp may torque sideways as the quilt's weight shifts.
The fix isn't just tightening the same clamp harder. Use wider contact points, reduce the distance between supports, and consider a rod-and-clip hanger with a suitable grip surface. The aim is to distribute the load before the quilt begins to deform.
Avoid these failure points
- Clipping through a delicate binding seam: Place the grip where the edge has enough stable structure, and don't pierce the quilt with pins to compensate for a weak clamp.
- Using too few supports: Concentrated weight can distort the top edge, especially when the backing is slippery or thick.
- Choosing a clamp with a narrow mouth: If the jaws barely close around the quilt, friction and holding power suffer.
- Hanging above a heat vent or near a sunny window: Heat, moving air, and light can accelerate wear and fading.
- Skipping the level check: A tilted rod can make one side carry more load, allowing the quilt to creep downward.
- Leaving the quilt on clips indefinitely: Gravity continues pulling at the same grip points, even when the display looks stable.
Museum practice generally favors sleeves, slats, or stitched panels because those methods support more of the quilt's surface. That doesn't make clips useless. It defines their proper role. Use clips for display rotation, not as the default permanent mount for an important quilt.
A finished quilt has already passed through piecing, quilting, binding, washing, and handling. The hanging method should be the gentle final step, not the place where shortcuts undo that care.
Caring for a Quilt on Display
Clip-hanging works best as a rotation method. It lets you enjoy a finished quilt on the wall, then take it down before light, dust, gravity, and changing humidity put constant stress on the textile. I use clips for quilts that move between a home, studio, and seasonal display. For a permanent installation, sleeves, slats, or a supported panel distribute weight more evenly.
Choose indirect natural light whenever possible. If the quilt must remain in a bright room, UV-filtering protective glazing can reduce exposure, but it does not remove the need to rotate the display. Keep the quilt away from heat vents, fireplaces, kitchens, bathrooms, and sunny windows.
Dust with a soft brush. For vacuuming, place a mesh screen over the quilt and use low suction. Do not drag the vacuum directly across the fabric. Plush Shannon Fabrics textures, including Hide, Snowy Owl, and Fawn, require extra care because their nap can show pressure marks or catch against a tool.
Build a seasonal inspection habit
- Inspect the clips: Check for slippage, rust, loose knobs, and compressed areas in the nap.
- Check the wall support: Confirm that the hook, screw, rod, and anchor remain secure.
- Rotate the quilt: Change the piece on display so one quilt does not carry the same stress continuously.
- Refold carefully: Avoid placing a sharp fold through an area compressed by a clip.
- Review the room: Watch for fluctuating moisture, heat, and direct light.
Conservation guidance recommends positioning a displayed quilt so its center sits roughly 5 to 5 feet 6 inches from the floor for comfortable viewing. The museum resource discussing sleeves and quilt placement also explains why broader support is preferable when a quilt will remain mounted for an extended period.
Include the display method in the finishing plan. If a quilt is going to a mail-in longarm service, decide whether it will become a wall quilt, bed quilt, or rotating studio sample before selecting the final support. On Pins & Needles Quilting Co. offers mail-in edge-to-edge longarm quilting with batting, thread, and free return shipping. The shop also has hundreds of verified customer reviews. Its quilted wall hanging guidance helps when a quilt moves from professional finishing to a display system.
A minky-backed quilt needs a plan that respects its texture and weight. Clips make seasonal rotation convenient. A sleeve or supported panel is the better choice when the quilt deserves extended, low-stress display.
Choose professional finishing before mounting the quilt, then visit On Pins & Needles Quilting Co. for mail-in longarm quilting, Shannon Cuddle fabrics, and display-ready project support. Use the 15% first-order coupon, and remember that U.S. orders over $70 qualify for free shipping.