
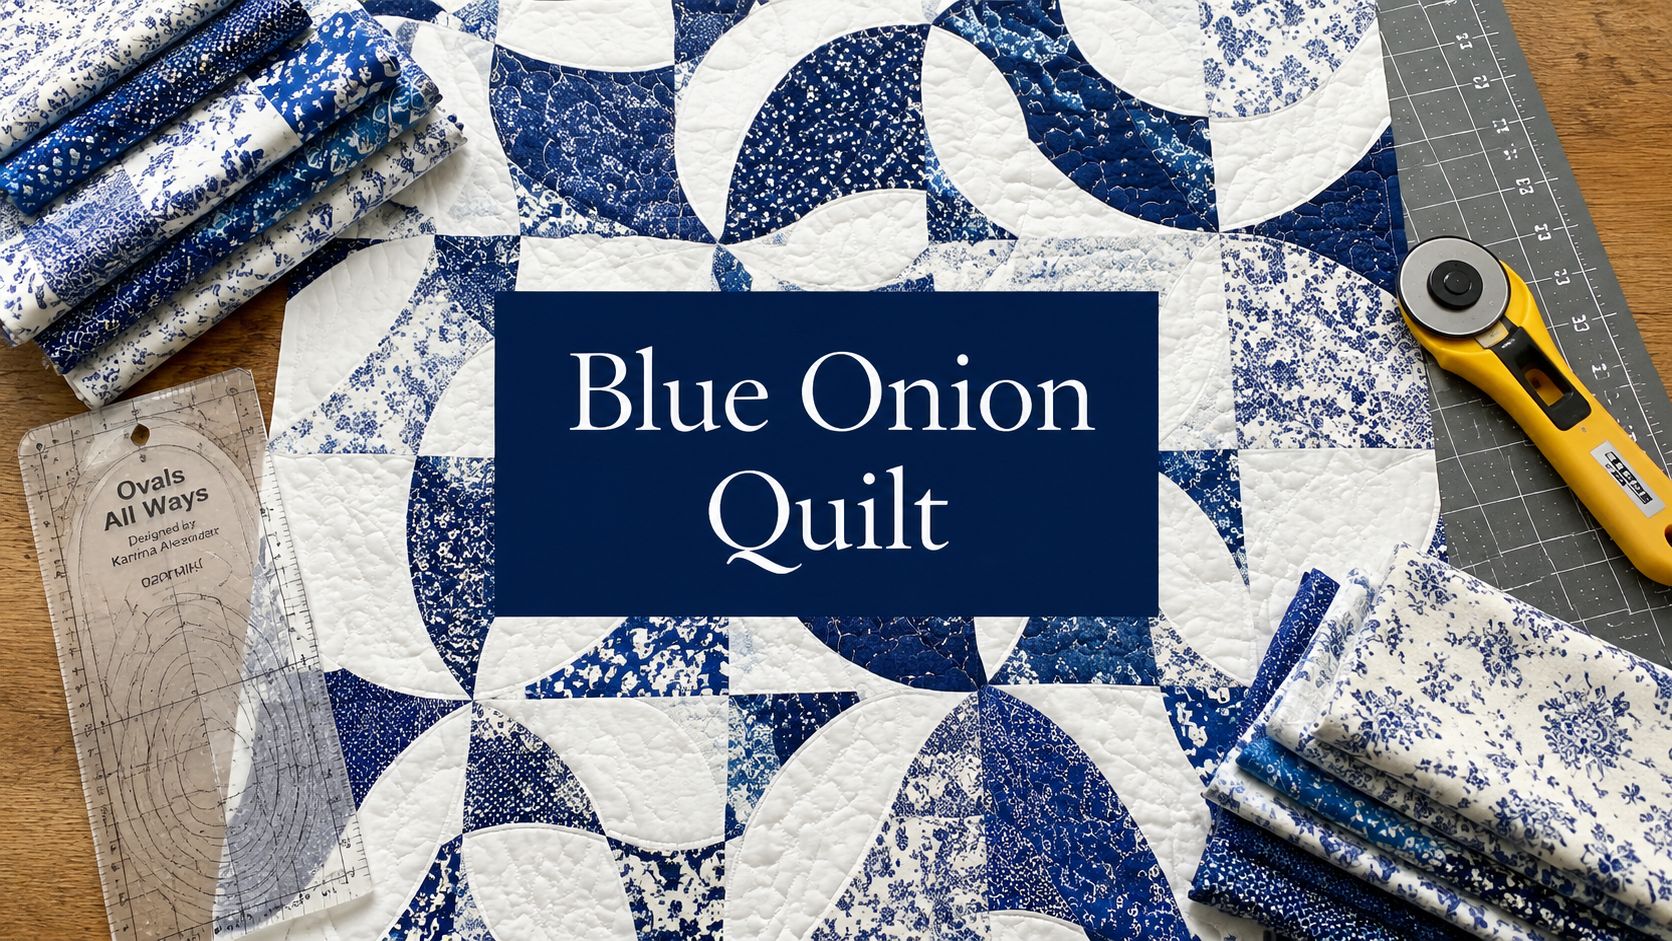
Yes. The Blue Onion quilt pattern is absolutely doable if you're a confident beginner who's ready to sew curves carefully and choose fabrics with intention. The trick isn't bravado. It's setting yourself up for success before the first cut, especially with contrast, waste control, and a finish that does the quilt justice.
You may be staring at a stack of fabric right now, loving the swirling look of this design and perhaps wondering if those curves are going to eat your afternoon. That's a normal place to start. This is one of those patterns that looks dramatic on the wall but becomes much more manageable once you understand what matters most.
What Is the Blue Onion Quilt Pattern
You spread out your pieces, step back, and the quilt already feels alive before a single block is sewn. That is the appeal of the Blue Onion quilt pattern. It uses large curved shapes and angled elements to create a strong sense of motion, and the finished quilt without borders measures 50" × 70", according to the Blue Onion quilt pattern listing.

Why does this pattern stand out
The design comes from bold shape, not tiny piecing. That matters.
Broad curves give the quilt its swirl, but they also change how you plan the project. You need enough contrast for the shapes to read clearly, enough fabric to account for curved cuts, and a finishing plan that suits a graphic top. I have found that quilts like this look best when the back and binding feel intentional instead of like afterthoughts, especially if you want a polished finish with soft minky on the back.
This pattern also rewards accuracy in a very visible way. A slight wobble in a curve can disappear into the overall movement, but weak value contrast cannot. The eye notices that right away.
Practical rule: Most trouble with Blue Onion starts at the cutting table, where fabric waste, grain direction, and pairings are decided.
Is the Blue Onion quilt pattern beginner friendly
A confident beginner can make this quilt successfully. The pattern asks for careful cutting, steady seam allowances, and patience with curved piecing, but it does not depend on improvisation.
That makes it a good project for a quilter who wants to stretch past straight-line blocks and come away with something that looks more advanced than the individual steps feel. The learning curve is real, yet manageable.
A documented version made with Quilt As You Go finished at 49" × 69", which shows how seam allowance and trimming choices can shift the final size, as shown in this quilter's completed Blue Onion project.
For fabric behavior and wear in real home use, The Sofa Cover Crafter's fabric guide is a useful reference. If you want to start sorting prints for this kind of high-contrast layout, fat quarter bundle inspiration can help you organize color families before you cut.
How Should I Choose Fabric For This Quilt
You can feel the difference at the cutting table. Two fabrics look pretty together in a stack, then the first curved block goes together and the whole design falls flat because the values are too close, the print scale is too busy, or the fabric was too precious to cut with confidence.
That is why I plan Blue Onion fabric in layers. First, I choose contrast. Then I check print scale. Then I decide which fabrics I am willing to spend on curved cuts, because this pattern can waste more fabric than quilters expect.

What fabric combinations work best
The blocks read best when value contrast does the heavy lifting. Start there before worrying about whether every print belongs to the same collection.
Good candidates include:
- Light versus dark pairs: Clear separation makes the onion shape show up from across the room.
- Tone-on-tones and subtle prints: These add interest without breaking up the curve.
- A controlled palette: A few related colors usually look more intentional than a pile of unrelated stash pulls.
- A mix of solids and quiet prints: Solids sharpen the shape. Soft prints keep the quilt from feeling flat.
If you need help pulling coordinated options, fat quarter bundle ideas for quilt planning can help you spot where your lights, mediums, and darks are out of balance.
For fabric behavior, texture, and everyday durability, The Sofa Cover Crafter's fabric guide is a useful outside reference. It is not written for quilting, but it does help you think more clearly about surface feel and wear.
What usually goes wrong with fabric planning
The biggest mistake is cutting beautiful fabric without a waste plan.
Curved pieces leave more odd-shaped leftovers than strip piecing, so expensive yardage disappears fast if you recut even a few units. I like to separate fabrics into working categories before I cut anything. That keeps the special prints from getting used in places where a basic blender would do the same job.
| Fabric role | What to look for | What to avoid |
|---|---|---|
| High-contrast stars | Lightest lights and darkest darks | Midtones that blend together |
| Supporting prints | Quiet texture, small-scale movement | Large novelty or busy directional prints |
| Risky fabrics | Premium or limited cuts you cannot easily replace | Anything you hesitate to trim into curves |
Directional prints deserve extra caution. Curves can turn motifs sideways or upside down, and forcing them to match usually increases waste. For this pattern, small-scale prints and non-directional blenders are often the smarter choice.
Should you use minky on the back
A plush backing suits Blue Onion especially well because the quilt top already has plenty of movement. The back does not need more piecing lines competing for attention.
Extra-wide minky also solves a practical problem. On larger quilts, a one-piece backing means fewer joins, less bulk, and a cleaner finish. That matters when you want the quilt to feel polished in use, not just look good folded up.
If you like a softer, understated look, textures such as Shannon Luxe Cuddle in Fawn or Hide pair nicely with a bold curved top. If comfort matters as much as appearance, shop extra-wide minky backing options and browse 110-inch minky for one-piece quilt backs.
A high-motion quilt top usually looks better with a calm backing. One wide, soft fabric keeps the finish smooth and refined.
What Tools and Prep Are Required
The right setup makes this pattern feel far less dramatic. You don't need a crowded cutting station. You do need consistency.

Which tools matter most
Keep your tool list tight and practical:
- Sharp rotary cutter: Dull blades drag on curves and fray your confidence along with the fabric edge.
- Large cutting mat: You need room to rotate fabric instead of twisting your body around the ruler.
- Fine pins or clips: Curves behave better when the layers stay matched at key points.
- Reliable thread: Choose a thread that runs cleanly in your machine and doesn't tempt you into constant tension fiddling.
- A hot iron and pressing surface: Pressing is where a lot of curved piecing gets cleaned up.
- Oval All Ways Ruler: This is the make-or-break tool for most quilters working this pattern style.
The block construction in this pattern depends on accurate curved shapes. Trying to fake it freehand usually costs more fabric than it saves in time.
How should you prep before cutting
I like to do prep in one uninterrupted pass. That means press fabric first, square up anything skewed, and decide whether you're prewashing based on your usual habits and the specific materials you're mixing. If you rarely prewash and your fabrics are stable quilting cottons, consistency matters more than changing your process mid-project.
The finished curved block is trimmed to about 10.5 inches square before assembly, according to this Blue Onion tutorial video reference. That tells you something important right away. Your cuts and seams need enough control to leave room for final cleanup without shrinking the block into trouble.
Before you start cutting, remember you can get 15% off your first fabric order from OPN Quilting! We also offer Free Shipping on all orders over $70.
What prep step gets overlooked most often
Labeling stacks.
That sounds almost too simple, but with multiple prints and repeated curved units, it's easy to mix up your intended pairings. I'd rather spend a few extra minutes labeling light and dark groups than unsew a curve later.
If you're planning to send the finished top out for quilting, it also helps to review quilt prep instructions for longarm-ready tops before assembly is complete. Small choices in trimming, pressing, and thread cleanup make finishing smoother.
For backing and texture planning while you prep, browse Shannon Cuddle collections or look at Luxe Cuddle textures so your finish is already decided before the top is done.
How Can I Master Sewing the Curves
You sit down at the machine with two curved pieces that looked fine on the cutting table, then they suddenly feel harder under the needle than they did in your hands. That moment decides a lot with Blue Onion blocks. A calm setup and a steady seam usually matter more than raw speed.

Blue Onion curves behave best when the fabric is handled lightly. The goal is to ease one shape into the other without stretching either piece out of true. I get better results when I focus on accuracy at a few control points, then let the machine feed the seam in one consistent pass.
How should you pin and feed the seam
Pin for control, not for decoration.
Start by matching the two ends. Then match the midpoint. Those three points do most of the work. After that, add only enough pins or clips to keep the curve from shifting as you sew. Too many can force the fabric into little bumps, which is one reason curved seams start to look choppy.
A practical approach looks like this:
- Match the ends first. If the ends miss, the block usually twists by the time you reach the center.
- Anchor the midpoint. That keeps the easing balanced across the curve.
- Add a few support pins between those points. Use the minimum that keeps the layers from drifting.
- Test which piece belongs on top. Many quilters prefer the concave piece on top because it is easier to see and guide.
- Sew with an even feed. Slow is fine. Stopping every few stitches usually creates more trouble than it solves.
Keep your hands close to the presser foot and flatten only the small section you are sewing right then. Curves are easier to manage in short increments.
What kind of motion works best
A smooth rhythm wins here. The machine does not need force. It needs consistent feeding and gentle guidance.
Watch the section under the needle, not the whole arc. If you stare too far ahead, you tend to pull the fabric into position instead of easing it there. That is where puckers and stretched edges start.
For quilters planning a minky-backed finish later, this habit matters even more. Distorted blocks are harder to square up cleanly, and extra fullness can show once the quilt is layered with a plush backing. Some of the same handling principles show up in this guide to sewing stretchy fabric without distortion, especially supporting the fabric instead of tugging it through.
What about stitch length and pressing
Use the stitch length your machine makes cleanly on quilting cotton. Tiny stitches are not the goal. A balanced seam that holds its shape is.
Pressing can save a good seam or spoil one. I recommend:
- Set the seam first. A light press while the unit is still closed helps the stitches settle.
- Press up and down. Sliding the iron back and forth can stretch the curve.
- Clip only when the seam allowance fights you. Some Blue Onion units open nicely without any clipping at all.
- Check bulk before trimming. If one area feels thick now, it will still feel thick later.
This is also where material choices show their trade-offs. A crisp quilting cotton usually presses into submission more easily than a softer, looser weave. That softer fabric can still work, but it asks for more restraint at the iron and less handling at the machine.
This video can be helpful if you want to watch curved piecing in motion before tackling your next set of blocks.
What separates a smooth block from a frustrating one
Usually, it comes down to rhythm and restraint.
Here's the troubleshooting chart I'd want beside the machine:
| Problem | Likely cause | Better fix |
|---|---|---|
| Puckers at the curve | Fabric was pushed or stretched | Ease the top layer gently and lighten hand pressure |
| Wavy seam | Too much stop-start sewing | Sew the curve in one steady pass |
| Ends don't match | Alignment started off wrong | Match ends and midpoint before stitching |
| Block won't lie flat | Pressing distorted the curve | Press up and down instead of sliding the iron |
If a block finishes slightly imperfect but still trims correctly, keep going. Blue Onion has enough movement in the design that small inconsistencies often disappear once the blocks are assembled.
How Do I Finish My Quilt Professionally
You've sewn the last curved block, pressed the top, and spread it across the table. This is the point where a Blue Onion quilt can either keep its clean, rounded movement or lose some of that polish under heavy quilting, bulky seams, or a backing that shifts around. Finishing well protects all the careful work you already put in.
The top usually goes together faster than the blocks did, but the finish deserves the same attention. Curved designs read best when the quilting supports the shape instead of competing with it. I look at three decisions before anything gets basted. Quilting density, backing choice, and edge treatment.
Should you quilt it yourself or send it out
Both options can work. The better choice depends on your machine, your patience for managing bulk, and how you want the quilt to feel when it's finished.
Quilting on a domestic machine gives you full control, and it can be satisfying if you enjoy the whole process. It also asks more from you physically once the quilt gets larger. Curved tops can distort if they are pulled, rolled too tightly, or overhandled under a small throat space.
Sending it to a longarmer makes sense when you want even texture across the quilt and less wrestling at the machine. That matters with Blue Onion because the piecing already provides movement. The quilting should add texture and structure, not flatten the design with lines that are too dense or too busy.
A professional-looking finish usually comes from a few simple choices:
- Keep the quilting pattern in scale with the blocks. Tiny, dense motifs can crowd curved piecing.
- Watch the batting loft. Too much loft can puff the seams and make the curves look less crisp.
- Test thread on a scrap sandwich. High-contrast thread shows every wobble. That can be beautiful, but it should be intentional.
- Square the quilt after quilting, not before binding. That final trim is what gives the edge a clean line.
What backing and edge choices work well
Backing changes the character of the whole quilt. If you want a finished piece that feels special the second it's picked up, minky is a strong choice. I like plush backings on modern curved tops because they soften the graphic look without making the front feel fussy.
Shannon Luxe Cuddle Snowy Owl is a beautiful option if you want a refined texture rather than a shiny or overly busy surface. Browse Luxe Cuddle Snowy Owl and similar textures if you want the backing to feel memorable and still suit the clean lines of the pattern.
Minky does come with trade-offs. It adds weight, shows needle holes more than quilting cotton, and needs careful basting so it does not creep during quilting. The payoff is worth it if softness is part of the goal. A smooth finish with minky on the back feels polished and gift-worthy, especially on a pattern that already has strong visual appeal on the front.
For the edges, decide whether the binding should quietly disappear or give the quilt a frame. A low-volume binding keeps the eye moving through the onion shapes. A darker binding sharpens the outside edge and can help define the design if the top uses many soft prints. If you want help choosing between those looks, this guide to quilt edge finishing options lays out the practical differences clearly.
The best professional finish is usually the one that respects the design. On Blue Onion, that means clean trimming, quilting that does not overpower the curves, and a backing that feels as considered as the pieced top.
What If My Quilt Blocks Aren't Perfect
They probably won't all be perfect, and that's fine. Curved quilts have a way of teaching humility and patience in the same afternoon.
I've seen blocks with a little puckering, points that don't land exactly where expected, and units that are just shy of square. Most of the time, the fix is less dramatic than the fear. A careful trim, a little easing during assembly, or a strategic block placement can solve more than you'd think.
Which imperfections matter and which ones don't
Some flaws are cosmetic. Some are structural. Cosmetic issues include slight waviness that disappears once the quilt is layered and quilted. Structural issues are things like a block trimmed too small to align cleanly with its neighbors.
A few practical saves:
- If a block is slightly off square: Trim consistently and keep like-sized blocks together when joining rows.
- If one seam puckers: Check whether pressing can relax it before you unpick it.
- If the layout feels unbalanced: Move high-contrast blocks around before sewing rows permanently.
When a top needs one last cleanup pass, this guide to squaring a quilt top is a helpful reference.
Quilters finish challenging projects every day with less-than-perfect blocks, and many of them are thrilled with the final result. That's the true benchmark. A handmade quilt should look cared for, not factory sterile. The Blue Onion quilt pattern rewards persistence, and if you need reassurance, shops with hundreds of verified reviews have seen again and again that support and finishing guidance make a real difference in helping quilters cross the line.
If you're ready to turn your Blue Onion quilt pattern into a finished quilt you'll use and love, On Pins & Needles Quilting Co. is a smart next stop for plush backing, Luxe Cuddle textures, and practical finishing help. Browse Luxe Cuddle Fawn, Luxe Cuddle Hide, explore the Mail-in Longarm Service, or Get 15% Off Your First Order.