
Wide quilt backing fabric is the cleanest way to finish a queen or king back without fighting a center seam. If your quilt top is too wide for standard cotton, extra-wide backing gives you a smoother finish, less bulk, and less time under the needle.
A finished top can look great on the front and still turn into a headache on the back. The fix is usually simple, choose a width that matches the quilt and survives the roller pass, especially if you're working with plush minky.
Why Quilters Choose a Wide Quilt Backing Fabric
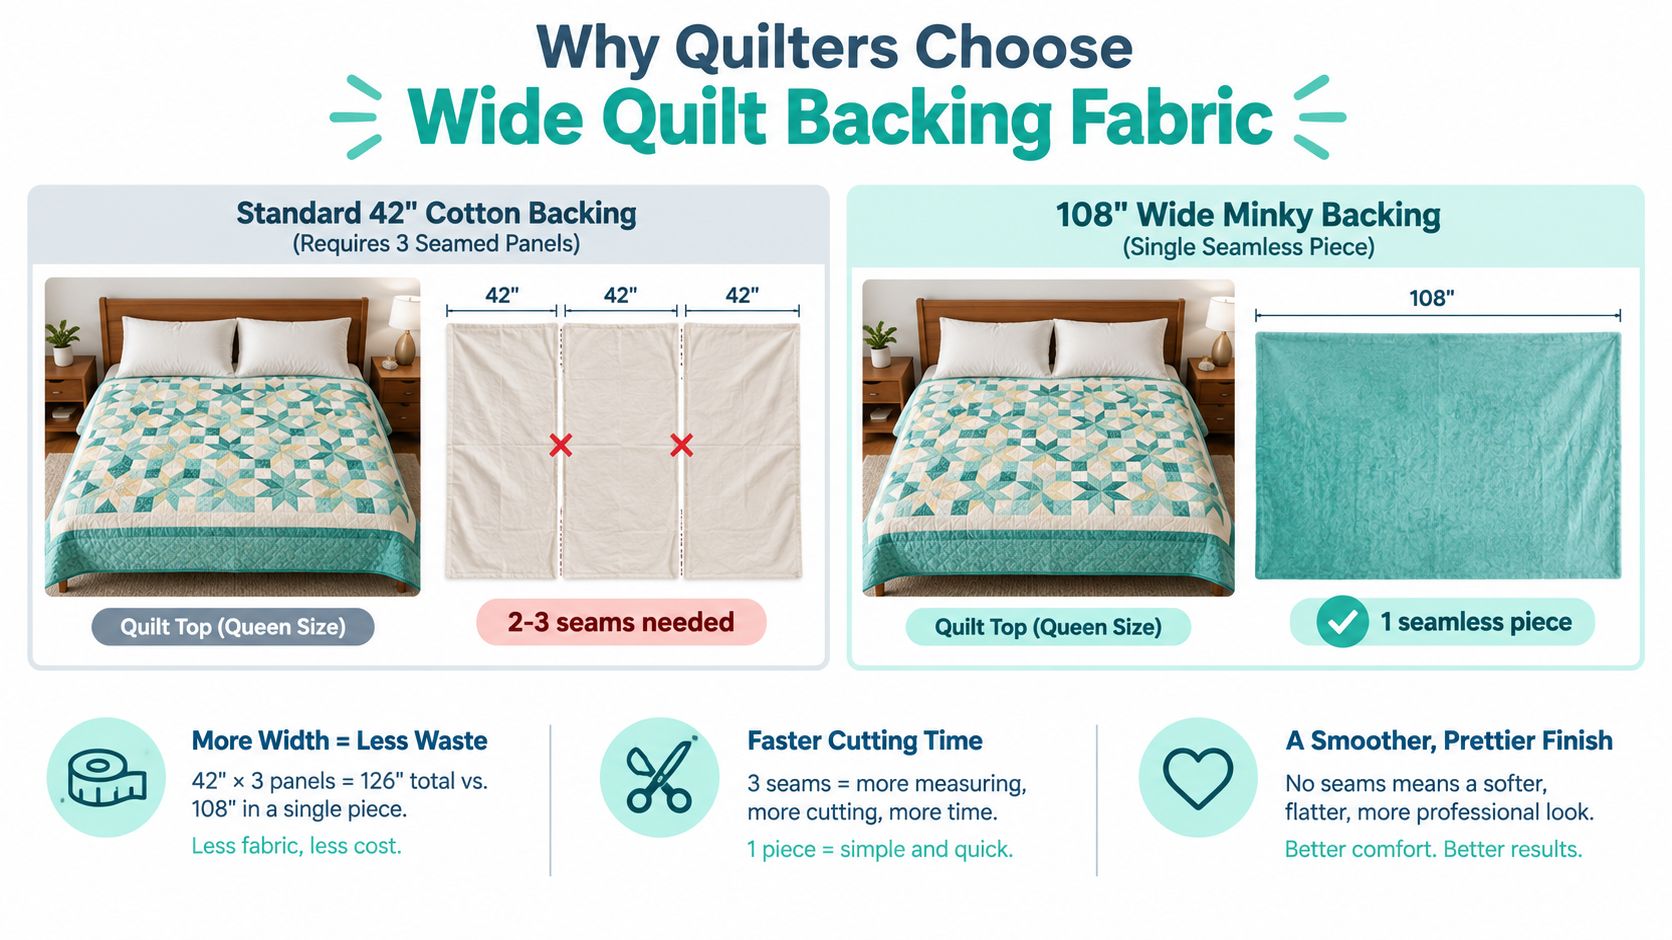
You know the moment. The quilt top is finished, the binding is waiting, and the back goes on the cutting table. With standard 42-inch cotton, a queen or king back usually means more panels, more seams, and more chances for a ridge, a pucker, or a print break you did not plan for.
What the width solves
Wide quilt backing fabric covers more of the quilt in one piece. Historical quilting references show the shift from ordinary cloth to wider sheeting as bed quilts grew, with 81-inch sheeting appearing in 1935 and 72-inch backing-suitable sheeting in the 1940s, followed by today's 90-, 108-, and 110-inch options (quilt sizes guide). That change matters because a seam is more than a visual break. It adds bulk, interrupts the surface, and can make longarm loading fussier.
Why the seam matters on the frame
A queen quilt often finishes around 90 by 108 inches, and a king quilt around 108 by 108 inches, while standard quilting cotton is typically 42 to 44 inches usable width (quilt sizes). That gap is why large backs so often get pieced unless you choose a wideback. On the frame, every join asks for more pressing, more alignment, and more care at the rollers. Minky pile makes that even more obvious, because any extra ridge has to travel through the rollers cleanly or it will fight you during loading.
Practical rule: If the quilt is large enough to need a center seam, the back usually wants extra-wide fabric instead of a workaround.
I also like how widebacks change the finish on the front. Fewer seams on the back usually means less distortion in the quilting field, which is why many longarmers prefer them for bed-size work. If you are comparing backing styles for the first time, our best fabric for quilt backing guide is a useful next stop.
What Wide Quilt Backing Fabric Actually Means
Wide backing fabric is manufactured to cover large quilt backs with fewer joins. In bed-quilt widths, the practical range usually sits in the 90, 108, and 110-inch zone. Standard cotton at 42 to 44 inches does not span a queen or king back in one pass, which is why extra-wide backing earns its place on the frame. The extra-wide backing collection shows the options clearly, and the same width logic applies to the best fabric for quilting projects across a lot of stitched work.
Width versus common quilt sizes
| Quilt Size | Finished Quilt (in) | 90" Backing | 108" Backing | 110" Backing |
|---|---|---|---|---|
| Throw | Smaller than bed sizes | Often enough for many throws, depending on overhang | Usually more than enough | Usually more than enough |
| Queen | About 90 x 108 | Can work for many queen projects with margin checked carefully | Often aligns well with bed-size backing needs | Often aligns well with bed-size backing needs |
| King | About 108 x 108 | Usually too narrow for one-piece coverage | Can match the width dimension in one piece | Can match the width dimension in one piece |
Those widths matter most once the quilt moves into bed-size territory. A queen quilt usually needs backing that extends beyond the finished top for loading and trimming, and a king asks for even more room. In practice, that means a wideback often saves you from piecing across the middle, which is where extra handling starts to show up on the rollers.
Fabric choice changes the work on the frame, too. A wideback that feeds flat is easier to load than one that fights tension at the edges, and that difference gets more obvious with plush surfaces. If you are comparing the texture and hand of wide fabrics, Hide, Snowy Owl, and Fawn are the Luxe Cuddle textures mentioned earlier, and they behave differently from plain cotton under a longarm.
A queen or king back in 108 or 110 inches also broadens the finish options without forcing a center seam. That is the main reason a lot of quilters compare the wideback side of the shop before they cut anything.
Calculating Yardage Without the Math Headache
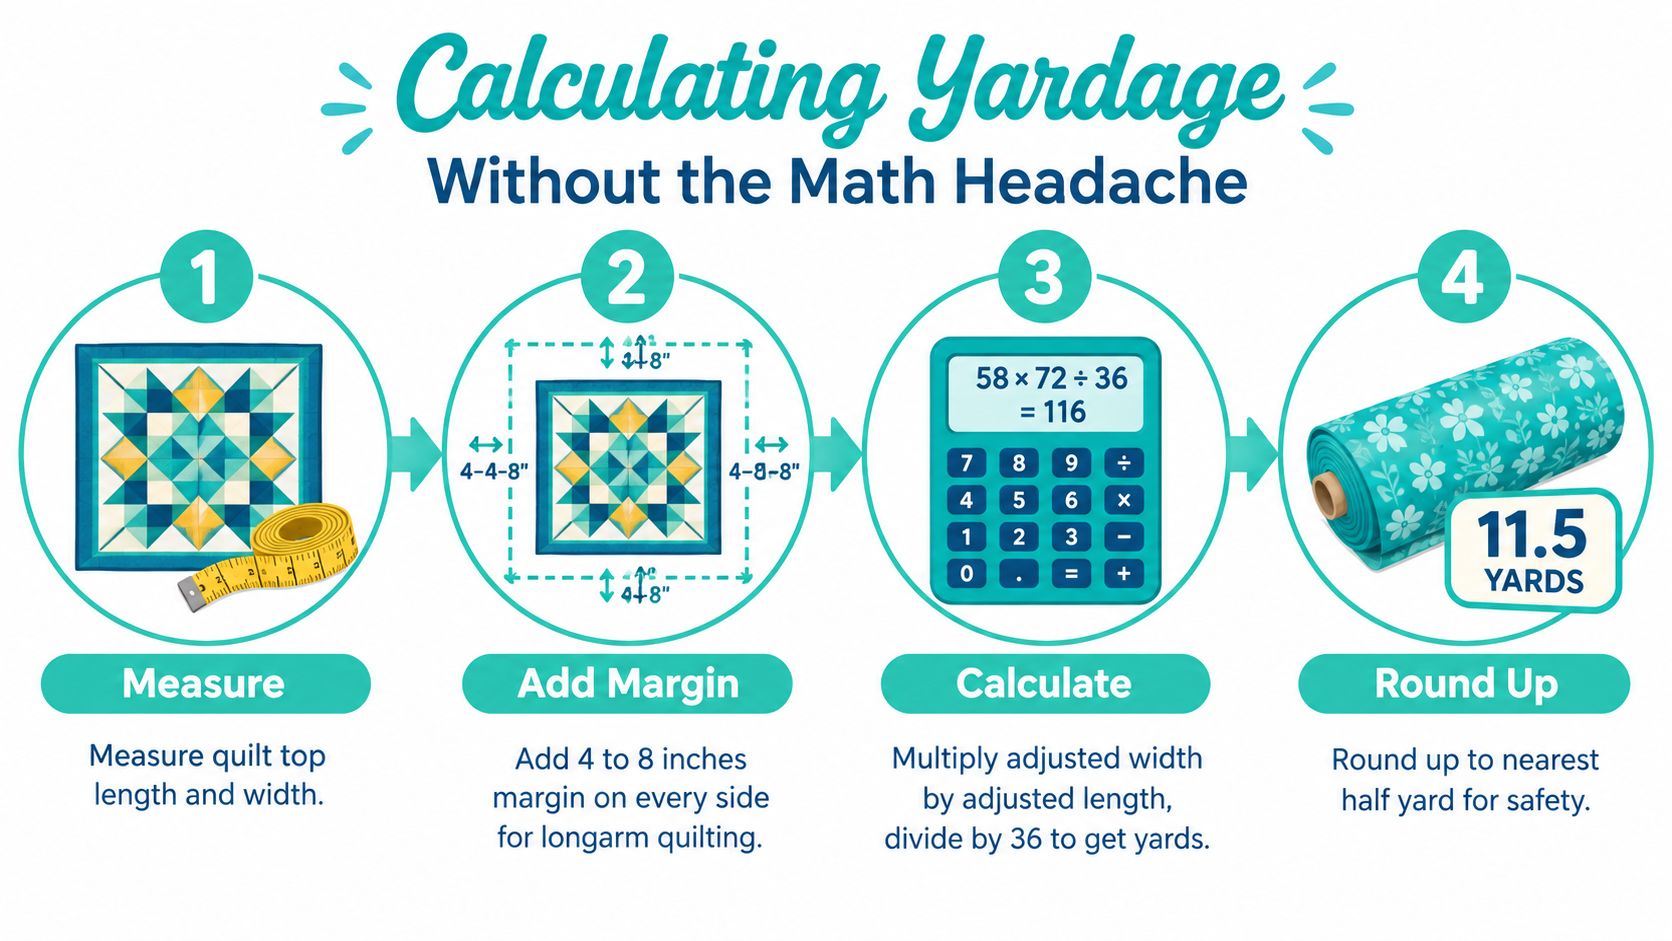
A backing that is the same size as the quilt top usually comes up short on the frame. Start with the finished top's actual measurements, then add room for quilting, loading, and trimming so the fabric survives a longarm pass without pulling tight at the edges.
The repeatable method
- Measure the quilt top. Record the width and length.
- Add overhang. Longarm prep usually calls for extra room. Practical guidance ranges from 4 inches beyond the top on all four sides to 6 to 8 inches beyond the quilt top on every side, depending on the setup, as outlined in the longarm prep guide.
- Check the usable fabric width. Bolt labels can be misleading, especially with plush backing that shifts when handled.
- Convert the needed length to yardage. Divide the total inches by 36.
A 60 by 80-inch quilt top needs at least 68 by 88 inches of backing before quilting when you add 4 inches per side. If the backing is 108 inches wide, one piece covers the width, so the purchase comes down to length rather than panel count.
A queen gets easier with wideback. A 90 by 108-inch queen quilt may need about 8 to 8.5 yards of standard-width fabric with two seams, compared with roughly 3.25 yards of 108- to 110-inch backing. A king at 108 by 108 inches follows the same pattern, with about 9.5 yards of standard-width fabric with two seams versus roughly 3.25 yards of wide backing.
Trade-tested note: I square the backing to the frame I'm using, not to the number on the bolt. Plush fabric can look flat until it is loaded, then the edges tell the truth.
For a clean walkthrough of the math, our calculating yardage for quilts article lays out the same planning logic with fewer guesswork points. The check comes after cutting. Square the backing before it goes on the rollers, because a crooked edge shows up fast once the fabric is under tension.
Extra-Wide Backing vs Seamed Standard Backs
A clean back helps on the frame, but the cleanest option is not always the right one. For small quilts, directional prints, or a tight budget, a seamed back still works. The better choice depends on how the fabric behaves once it is loaded, not just how it looks on the cutting table.
Side-by-side trade-offs
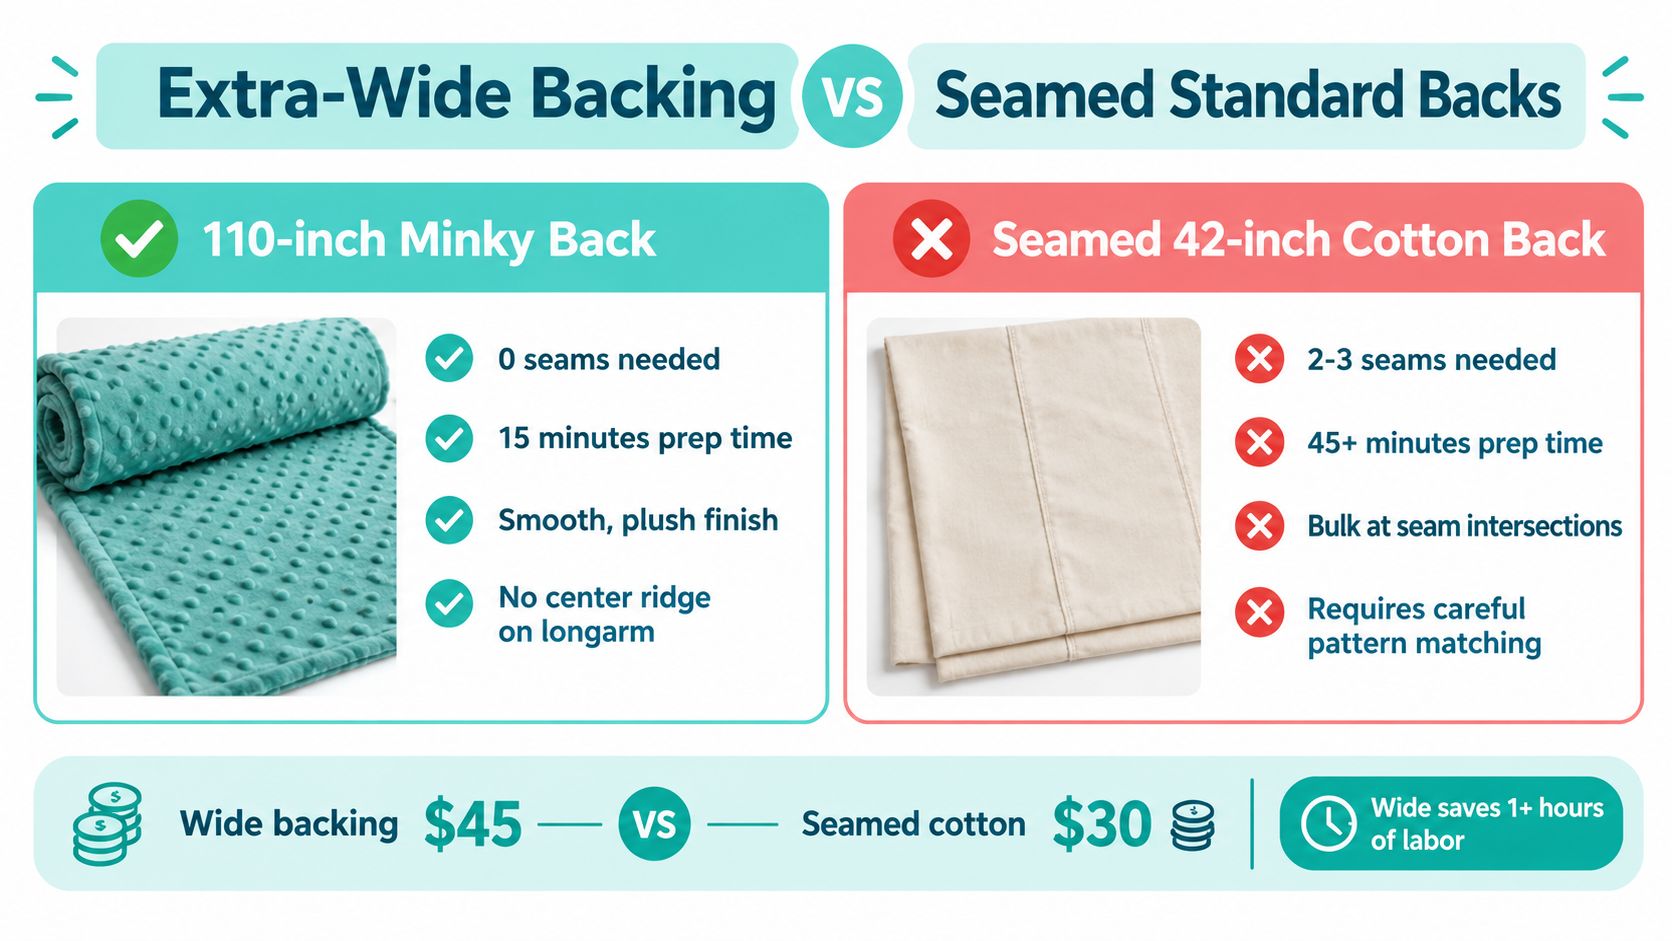
| Criterion | 110-inch Minky Back | Seamed 42-inch Cotton Back |
|---|---|---|
| Seams needed | None on many bed quilts | Usually multiple panels |
| Prep time | Faster once squared | More cutting, joining, pressing |
| Finish quality | Smooth, plush finish | Seam ridges can show through |
| Longarm setup risk | Lower center-seam risk, but heavier to manage | More bulk and alignment points |
| Cost per project | Often higher per yard, lower in yardage needed | Lower per yard, more labor and more fabric used |
The seam-free route removes a ridge that can pucker or interrupt stitch flow. It also cuts down the number of places where the needle crosses a join. On the frame, that matters. Extra-wide plush backing is heavier and slipperier, so it still needs careful loading and even tension if you want it to lie flat.
A seamed back still makes sense when the quilt is small enough that width never becomes a problem. It also fits projects where print direction matters more than seam count. If budget is the main constraint, standard cotton can be the practical pick, especially for utility quilts that will be used hard rather than displayed.
If the back is going to fight you on the frame, the seam you saved often returns as extra time during loading.
Choose seamed cotton under about 60 inches of width, and go wideback once the top crosses throw size.
Handling and Cutting Tips for Wide Minky Backing
A wide minky back can look easy on the table and act very differently on the frame. The pile shifts the light, the stretch changes how it feeds, and the nap decides whether the backing glides or grabs. On the frame, nap direction and stretch decide the result, and the width only gets the panel there.
How to keep the panel square
Start by finding the nap and keeping the whole backing running in one direction. That choice affects how the finished quilt reads and how the surface feels after quilting. Then make a straight crosswise edge. Tear it if the fabric allows it, or square it carefully if it does not.
Keep the quilt top with the backing before you cut. That makes it easier to check orientation, grain, and whether the usable width really covers the quilt. With minky, the bolt width on the label is not the same as safe working width.
What matters on the rollers
A longarm frame responds to calm handling. Load the backing gently, keep tension even, and do not pull the plush layer tighter than the top can follow. Uneven pull creates fullness and distortion, and that shows up fast once the carriage starts moving.
A few habits help in the shop:
- Press or smooth before loading: Remove fold memory so the panel feeds evenly.
- Use secure temporary stabilization: Basting pins or temporary spray can help keep layers from drifting.
- Check the edge margin: The longarm prep guide recommends 6 to 8 inches beyond the quilt top on every side.
- Watch the seam direction if you must piece: A horizontal seam usually behaves more predictably than a vertical one on the frame.
The trick is to avoid over-handling the fabric. Wide minky behaves well when it is squared cleanly and allowed to move naturally, not when it is stretched into shape and hoped into place. If you want a closer look at the cutting side of the job, our guide to cutting minky fabric cleanly covers the workshop side of the process.
Finishing With OPN Mail-In Longarm Quilting
A wideback gets easier when the finishing plan is settled first. OPN's usual workflow is simple, choose the backing fabric, send in the quilt top and backing, then let the longarm service handle the quilting, batting, thread, and return shipment. That works well when you want a seam-free back without wrestling a large plush panel through your own machine.
The shop's wideback options include textures such as the Luxe Cuddle textures covered earlier, along with 90-inch and 110-inch Cuddle widths. Those widths help when the quilt top already pushes bed-size dimensions and you want to avoid the extra joins that standard cotton would force.
Backing choice and quilting pattern need to work together. An edge-to-edge design from the gallery can spread the finished look evenly across a large surface, which matters when the back is plush and the top needs to drape cleanly. The service page also lists customer reviews, which gives you another layer of confidence before you send out a nearly finished quilt.
If you want to compare the service details, look at the Mail-in Longarm Quilting service, then pair that with a wideback from the site's collection. For large quilts, that combination cuts down on the usual friction, especially when the alternative is piecing a back and managing the seam under the rollers.
Quick Answers for Wide Backing Questions
Should I prewash polyester minky backing? Test a swatch if the quilt needs exact sizing or if wash behavior matters. Polyester wide backing usually shifts less than untreated cotton, but heat, pile, and handling still change how it behaves, so guessing invites trouble.
Does wide backing eliminate every seam? No. It removes many seams on queen and king projects, but the final answer still depends on the quilt's size, the overhang you need, and the usable fabric width.
How much overhang does longarm quilting need? Use 4 inches beyond the quilt top on all four sides. Some setups call for 6 to 8 inches beyond the quilt top on every side, see the longarm prep guide linked in the handling section.
How do I confirm nap direction on Luxe Cuddle textures? Brush the surface both ways and see which direction feels smoother and looks richer. Align the full backing before cutting, especially on the Luxe Cuddle textures named earlier. A quick brush test and a careful layout save more time on the frame than fixing a twisted nap later.