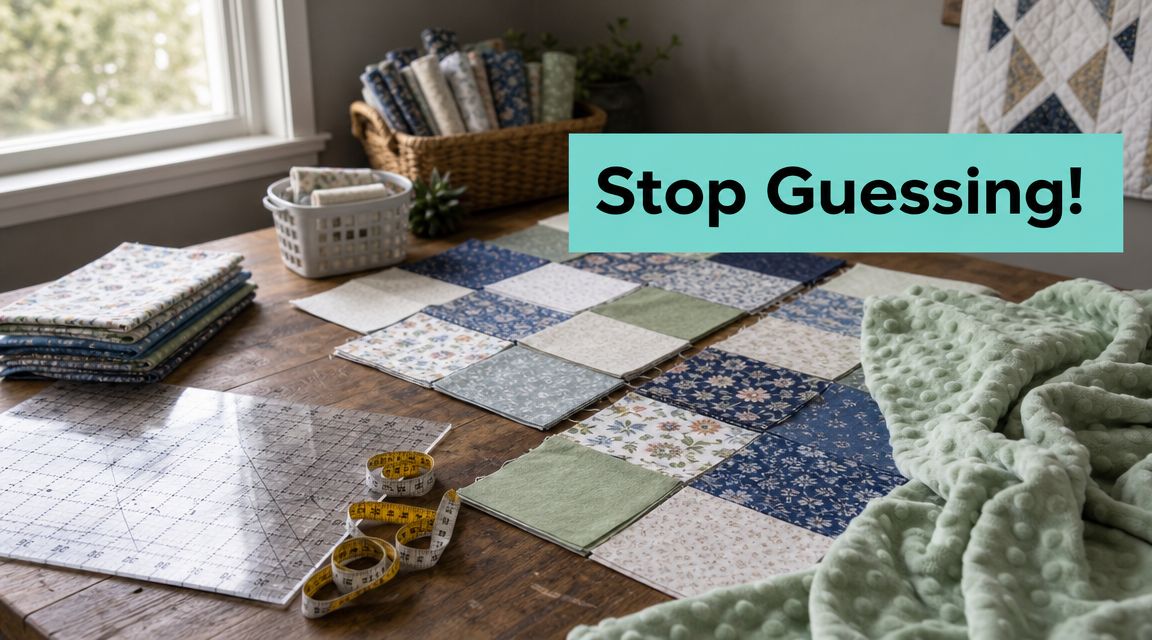
To accurately calculate yardage for quilts, measure your finished quilt top's length and width, then add 8 total inches for backing, 6 inches for batting, and enough 2.5-inch strips to go around the full perimeter for binding. That sounds simple until you're standing over a finished top, trying to decide whether to buy standard quilting cotton, extra-wide backing, or a plush minky that behaves nothing like cotton.
That's where most yardage mistakes happen. The top is done, the exciting part feels finished, and suddenly the math gets messy. Quilters who feel confident piecing blocks often second-guess themselves at the backing counter, especially when the project is large or the backing fabric has stretch, pile, or nap.
Good yardage planning isn't just about avoiding an extra trip to the fabric shop. It affects seam placement, drape, quilting ease, and whether your finished quilt looks polished or slightly off. If you're calculating yardage for quilts with minky in the mix, the decisions matter even more.
Introduction
A finished quilt top gives you real numbers to work from. That's the moment to stop guessing and start measuring the quilt you completed, not the size you intended at the beginning.
The core pieces are straightforward. You need yardage for the top, backing, batting, and binding. Each one has its own logic, and backing is usually where generic advice starts to break down.
If you've ever ended up with too little backing, too much waste, or binding cut from the wrong direction, you're not alone. The fix is a repeatable process, not better luck. Once you know what to measure and how fabric width changes the math, calculating yardage for quilts gets much less intimidating.
Practical rule: Measure the finished top after pressing and squaring it. Quilt plans change, borders grow, and blocks rarely finish at the exact draft size.
What Are the Essential Quilt Components to Measure
Before you calculate anything, identify what you're buying fabric for. Quilters often talk about “yardage” as if it's one number, but it's really several separate calculations.
What counts in the total
- Quilt top. This is the pieced or wholecloth face of the quilt. If you're still planning it, you'll calculate fabric by blocks, borders, sashing, and any accent units.
- Backing. This is the rear layer. For small quilts, standard width fabric may work fine. For larger quilts, width matters as much as length.
- Batting. This middle layer needs to extend past the quilt top so the quilt can be loaded and stitched without coming up short.
- Binding. These are the strips that wrap the raw outer edge of the quilt.
Batting trips up a lot of newer quilters because it isn't cut the same way backing is. If you want a simple primer on what batting does and how it differs from backing fabric, this overview of quilt batting is a useful reference.
Common quilt sizes and dimensions
These are typical planning sizes, not rules. Always calculate from your actual finished top.
| Quilt Size | Typical Dimensions (Width x Length) |
|---|---|
| Crib | 36 x 52 inches |
| Throw | 60 x 72 inches |
| Twin | 70 x 90 inches |
| Queen | 90 x 108 inches |
| King | 110 x 110 inches |
What to measure first
Use a tape measure or a long quilting ruler and write down:
- Finished width
- Finished length
- Any directional fabric requirements
- Whether your backing must avoid seams
That last point matters more than many guides admit. A cotton backing with a center seam may be perfectly acceptable. A plush backing with visible pile shift or added bulk at the seam can feel completely different in the finished quilt.
If you're planning a soft-backed project, compare your top dimensions against the actual backing width you intend to use before converting anything to yards. That one habit prevents a lot of unnecessary piecing.
How Do You Calculate Yardage for a Quilt Top
Top yardage starts with the design, not the bed size. Even quilts that finish at the same dimensions can require very different amounts of fabric depending on block style, contrast placement, and border treatment.
Start with the units, not the total
Break the top into parts:
- Blocks
- Sashing
- Borders
- Cornerstones or accent pieces
For each part, calculate how many cut pieces you need. Then determine how many of those pieces fit across the usable fabric width. Once you know how many strips or sections you need, convert the total inches to yards.

If you work often with precuts, this fat quarter size guide helps when converting a pattern written for yardage into stash-friendly cuts.
A simple working example
Say you're making a quilt with:
- 12 blocks
- Sashing between blocks
- A border all the way around
You'd calculate each fabric separately.
For block fabric, determine the cut pieces needed per block and multiply by 12. Then figure out how many of those pieces fit across the usable width of fabric. If the math says you need several strips, add those strip heights together and convert to yardage.
For sashing, calculate the number of strips needed based on your layout. Horizontal and vertical sashing can use different lengths, so don't lump them together too early. Border yardage comes last, because the quilt has grown by then.
Cut plans fail when quilters estimate from finished sizes alone. Always calculate from cut sizes with seam allowance included in the pattern you're following.
Where people come up short
A quilt top usually needs a little breathing room in the purchase quantity. That extra fabric helps with:
- Squaring up blocks
- Directional print alignment
- Recutting a missed unit
- Border straightening
For cotton tops, that extra allowance is mostly convenience. For tops that include trickier cuts or fabric with a strong print repeat, it becomes practical insurance.
The cleanest approach is this: calculate each fabric separately, write the results down, then round up in a way that matches how you cut. If you know you prefer room for trimming, buy with that reality in mind.
How Much Backing Fabric Do You Really Need
Backing is where the widest gap exists between traditional quilt math and modern materials. Most yardage guides assume 42-inch fabric and built-in piecing. That's workable for many cotton backs, but it doesn't answer the question quilters often have with larger projects. Can you avoid a seam entirely?
The traditional backing method
The standard method is simple in theory:
- Measure the quilt top.
- Add extra for quilting overage.
- Figure out how many fabric widths are needed.
- Multiply by the backing length.
The problem is that standard width backing often forces seams on larger quilts. That means more cutting, more matching, more pressing, and more opportunities for distortion. On a cotton back, it's mostly a construction choice. On a premium plush back, it affects bulk and drape.

If you want a focused look at seam-free planning, this extra-wide quilt backing guide is worth bookmarking.
When extra-wide backing changes everything
A key issue many beginner guides miss is that most yardage guides assume 42-inch fabric and require piecing seams for larger quilts. However, using 90-inch or 110-inch extra-wide backing often costs less and eliminates bulky seams entirely, which matters for the drape and feel of premium minky quilt backs, as noted in Broadcloth Studio's discussion of backing calculations and assembly.
That changes the decision. You're no longer just asking “how many yards do I need?” You're asking:
- Can I cover the width in one piece?
- Will seam avoidance improve the feel of the quilt?
- Am I wasting more fabric by piecing than I would with a wider cut?
- Is this quilt headed to a longarm where smooth loading matters?
A better way to choose backing width
Use this decision framework instead of defaulting to standard width.
| Backing choice | What works well | What usually doesn't |
|---|---|---|
| Standard width cotton | Smaller projects, scrappy backs, intentional pieced backs | Large quilts where seam placement becomes awkward |
| Extra-wide cotton | Broad coverage with less piecing | Less useful if you specifically want a designed pieced back |
| Extra-wide minky | Large quilts, plush finishes, seam avoidance, smoother drape | Poor choice only if nap direction is ignored |
| Narrow plush cuts pieced together | Small nursery projects where seams won't matter much | Queen and king projects where bulk and stretch create headaches |
What I'd do on a queen or king plush-backed quilt
I'd check the actual top dimensions and compare them against the available backing widths before I even think in yards. For large quilts, 90-inch and 110-inch extra-wide backing can completely change the plan because the math shifts from panel count to seam avoidance.
That matters even more with minky. The hand feel is part of the reason people choose it. If softness and fluid drape are the goal, a bulky seam down the back works against the whole point of the material.
Seamless backing isn't just a convenience upgrade. On a plush quilt, it's often the cleaner finish.
What Are the Rules for Batting and Binding
Batting and binding are easier to calculate than backing, but they still need their own numbers. If you use the backing math for everything, you'll overbuy in one place and come up short in another.
Batting needs overhang
Batting should extend beyond the quilt top. The rule you're using here is 6 total inches, which gives you room around the edges for quilting and trimming.
That means if your finished top is measured first, your batting cut should be larger in both directions. This isn't optional if the quilt is going to a longarm. The machine needs enough batting beyond the top to keep the quilt stable during quilting.

If you want a refresher on finishing the edge once quilting is done, this beginner quilt binding tutorial breaks down the process clearly.
Quilters who send tops out for quilting often save themselves stress by choosing a service that includes batting. It removes one more variable from the cutting table.
Offer note: First orders often qualify for a 15% coupon, and many quilters wait to place a fuller supply order until they cross the $70 free shipping threshold.
Binding is perimeter math
Binding is one of the cleanest calculations in quilting:
- Add the quilt's width and length.
- Multiply by two for the full perimeter.
- Determine how many 2.5-inch-wide strips you need to cover that distance.
- Convert the strip count into yardage based on usable fabric width.
Straight-grain and cross-grain binding work well for many quilts. Bias binding is useful when the quilt has curved edges, but most square and rectangular quilts don't need that extra step.
What makes binding calculations go wrong
The usual mistakes are practical, not mathematical:
- Forgetting corners. You need enough length to turn each corner cleanly.
- Ignoring joins. Strip joins take a little length.
- Using the wrong strip width. Your formula only works if you cut consistently.
- Cutting before measuring the final quilt. Quilting and trimming can change the finished edge slightly.
If you want fewer leftovers, calculate after the quilt is quilted and trimmed. That final measurement is the one binding has to fit.
How Do Minky Fabrics Change the Math
Minky changes the cutting plan because it doesn't behave like quilting cotton. If you use the same assumptions, the fabric can shift on the table, stretch during handling, and show nap differences in the finished project.

Nap direction is part of the yardage decision
With plush fabrics, the surface has direction. Unlike stable quilting cotton, plush minky fabrics have a directional nap and significant stretch. Failing to account for this by purchasing slightly more yardage and cutting all pieces in the same direction can lead to a finished quilt with an inconsistent sheen and distorted shape, as discussed in QuiltSocial's article on yardage-related planning for quilting projects.
That's especially important with luxe textures. Deep-pile surfaces such as Hide, Snowy Owl, and Fawn can make directional inconsistency easier to see and feel. If one panel runs the opposite way, the light catches it differently.
What changes when you cut plush fabric
Minky requires a more forgiving purchase plan because the usable finished area can shrink in practical terms, even when the nominal width looks generous. That happens when:
- The fabric stretches while being laid out
- The nap must all run one direction
- A directional print limits rotation
- You need cleaner edges after slippage at the cutting table
Exact formula-only shopping begins to fall short. Plush fabrics reward a decision-making approach, not just arithmetic.
A short visual demo helps if you haven't worked with extra-wide plush before:
What works better than perfect math
For minky-backed quilts, I'd use these rules of thumb qualitatively rather than trying to squeeze every inch:
- Buy for orientation first. Nap direction comes before cut efficiency.
- Avoid unnecessary seams. Wide backing usually gives a cleaner finish.
- Handle the fabric minimally. Extra repositioning adds distortion.
- Choose convenience when the project is large. Curated cuts and extra-wide options often reduce mistakes.
If you're planning a larger plush-backed project, this guide to 110-inch extra-wide minky fabric is a good next read because width is often the factor that simplifies everything.
The best minky yardage decision is often the one that gives you a reliable cut and a smooth quilt back, not the one that uses every last inch on paper.
From Math to Masterpiece
Calculating yardage for quilts gets much easier when you separate the job into four parts and let the fabric type guide the decision. Measure the finished top first. Add the right overage for backing and batting. Calculate binding from the perimeter, not the pattern estimate.
The bigger lesson is this. Yardage isn't only math. It's also material behavior. Standard cotton backing, extra-wide backing, and plush minky don't ask for the same strategy, and the best result usually comes from choosing the fabric width and cut plan that make construction simpler.
If your quilt will be backed in minky, seam placement, nap direction, and stretch control deserve just as much attention as the final yard total. That's where a polished finish starts.
If you're ready to turn the measurements into materials, shop with On Pins & Needles Quilting Co. for premium plush backing options, curated cuts, and quilting support that makes calculating yardage for quilts easier from the start. Use the 15% first-order discount, remember the free U.S. shipping on orders over $70, and take the next step with a direct, practical choice: Shop the Luxe Cuddle Collection.