The standard stitch length for quilting on a home machine is 2.5 to 3.5 mm, while quilt piecing usually uses a shorter 2.0 to 2.5 mm stitch. If your quilt includes thicker layers or plush backing, you'll usually need to go a bit longer, and if you're piecing seams that must hold up to pressing and handling, you'll usually go shorter.
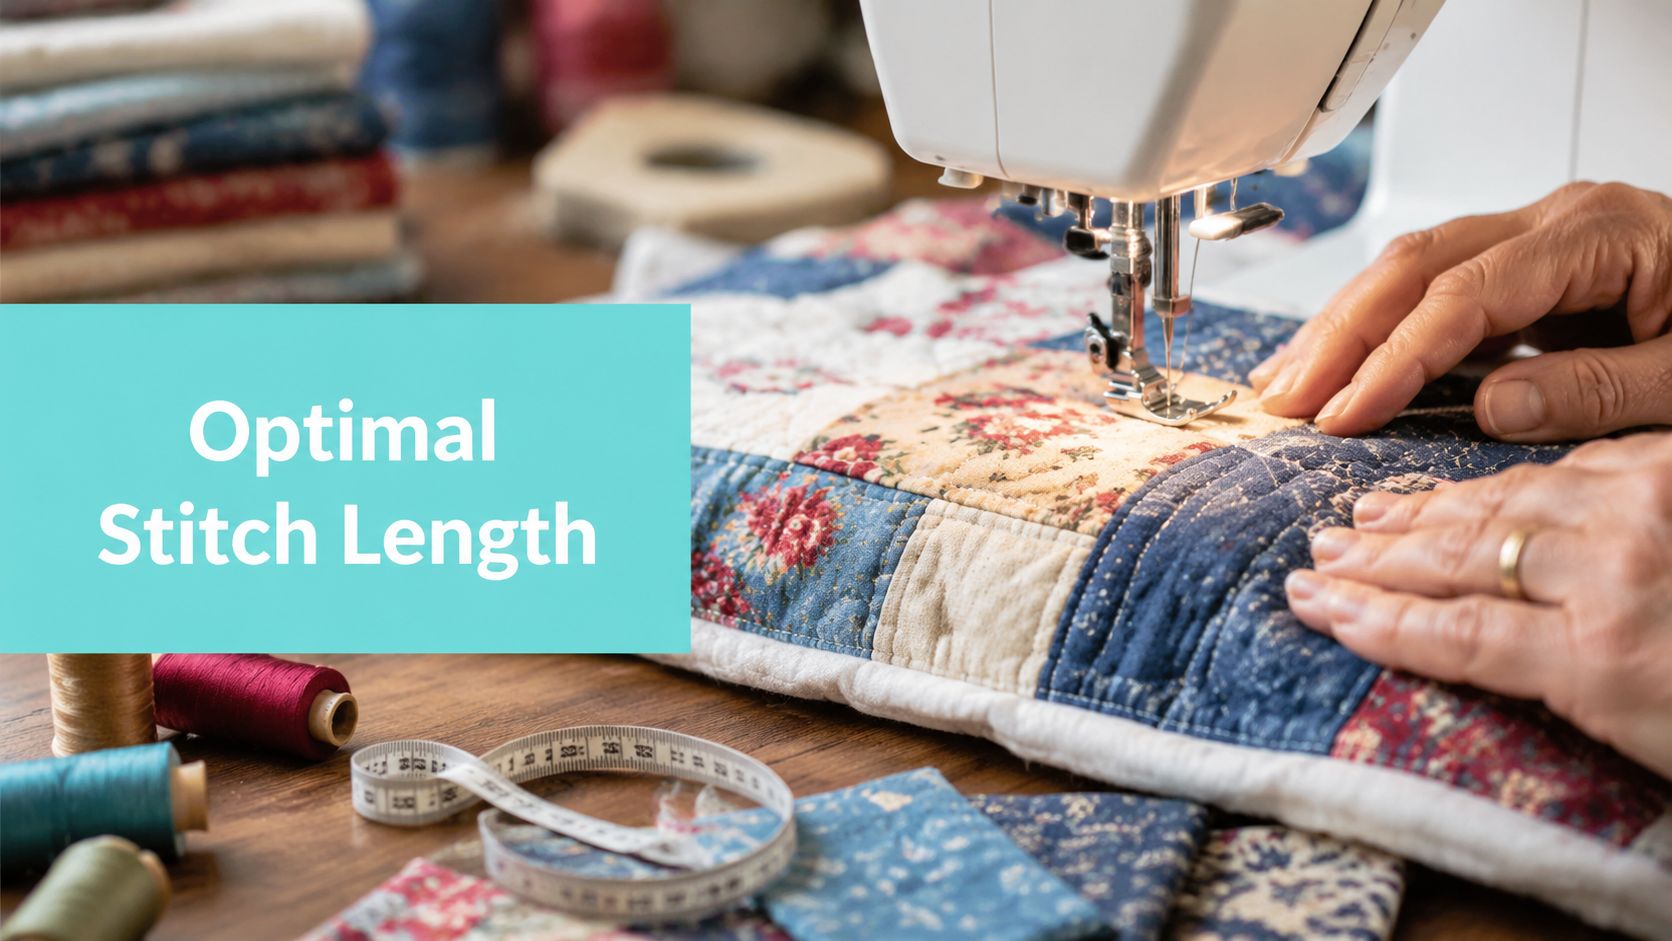
If you're staring at your machine with a basted quilt under the needle and wondering why one setting works beautifully for piecing but looks tight, stiff, or puckered in quilting, you're asking the right question. Stitch length seems like a small dial, but it changes how your quilt feeds, how the layers hold together, and how the finished piece drapes in real life.
At OPN Quilting, we see this most often when quilters move from cotton piecing into bulkier quilt sandwiches, plush backings, or mail-in longarm prep. The number itself matters, but the bigger secret is understanding why you change it and how to test before you commit.
What Is Stitch Length and Why Does It Matter?
You notice stitch length fast when a quilt starts fighting back. A cotton throw may quilt nicely at one setting, then the next project with lofty batting or minky backing suddenly puckers, drags, or feels board-stiff. The stitch length did not just change the look. It changed how the whole quilt moved under the needle.
Stitch length is the distance from one needle penetration to the next. Most sewing machines show that setting in millimeters, while many quilters still talk about stitches per inch, or SPI. Both describe the same thing. They just use different measuring systems.

How is stitch length measured?
The practical difference is simple:
- Shorter stitch length puts more stitches into the same space.
- Longer stitch length puts fewer stitches into that space.
- Millimeters are what many machine dials and screens display.
- SPI is the language you will still hear in classes, patterns, and longarm conversations.
Batting affects how those stitches settle into the quilt and how much the finished piece can flex. If you want a clearer picture of how loft and fiber content change stitch behavior, our guide to what quilt batting is is a useful place to start.
Practical rule: Stitch length affects seam strength, drape, feeding, surface texture, and how hard it is to remove a mistake.
Why does one small setting change so much?
A quilt sandwich is rarely uniform. Cotton top, batting, backing, seam allowances, and any specialty fabric all feed a little differently. A short stitch puts in more needle penetrations, which can help control one job and create trouble in another.
On a thick quilt, a stitch that is too short can perforate the fabric more heavily, build drag, and make the quilting line look tight or puckered. On the other hand, a stitch that is too long may leave the quilting looking loose and less deliberate, especially in curves or detailed fills. This matters even more for mail-in longarm clients. If the top, batting, and backing were prepared with different behaviors in mind, the final result is easier to quilt cleanly and easier to predict.
Many quilters get tripped up in this area:
| Stitch setting effect | What you often see |
|---|---|
| Too short for thick quilting | Puckering, stiffness, drag |
| Too long for piecing seams | Weak seams, less control |
| Balanced for the project | Smooth feed, clean look, better drape |
At OPN Quilting, we treat stitch length as a working adjustment, not a fixed rule. The right choice depends on what the stitch needs to do. Hold a seam firmly, travel through a bulky quilt sandwich, behave on plush minky, or give a mail-in longarm project enough stability to quilt without distortion. That practical why is what keeps you from guessing.
What Is the Best Stitch Length for Piecing a Quilt Top?
For piecing, the job is structural. You're not trying to create a decorative surface line. You're building seams that can survive pressing, trimming, pinning, and the stress of being quilted later.
A widely cited quilting benchmark separates structural stitching from quilting stitches. Quilt block seams are often described as 12 to 15 stitches per inch, while quilting is often around 10 SPI at 2.5 mm, as explained in Quilting Daily's discussion of stitch length.
Why piecing usually needs a shorter stitch
Shorter piecing stitches do a few things well:
- They lock the seam more firmly so edges are less likely to fray open during handling.
- They give better control when matching points and intersections.
- They keep seams flatter because the stitching line holds the fabric with less shifting.
That's why piecing commonly sits around 2.0 to 2.5 mm, and some quilters go shorter still for especially delicate control. The key is not chasing tiny stitches for their own sake. The key is making seams that stay secure without chewing up the fabric.
Piecing and quilting are not the same job
This is the distinction that solves a lot of confusion. Piecing stitches act like framing nails. Quilting stitches act more like the fasteners that hold a finished layered structure together while still allowing some movement.
Use this quick comparison:
| Task | Main goal | Typical direction |
|---|---|---|
| Piecing quilt top | Strength and precision | Shorter |
| Quilting the sandwich | Flexibility and layer security | Longer |
If your seams have ever popped while pressing or while you were wrestling a larger quilt under the machine, your piecing stitch may have been too long for that stage. Before quilting, it also helps to make sure the top is flat and true. Our article on how to square a quilt top is worth checking before you baste.
A piecing stitch should feel secure, not decorative. If the seam opens too easily when handled, start by shortening the stitch before blaming the fabric.
For cotton piecing, this is also where clean fabric quality matters. If you're pairing pieced tops with plush backings later, accurate seam construction early on makes the quilting stage much easier.
How Do You Choose a Stitch Length for Machine Quilting?
You finish the quilt top, baste the layers, sew a few lines, and the stitching still looks off. In the shop, that usually points to one of two things. The stitch length does not match the job, or the quilt is fighting the machine because of bulk, drag, or poor support.
For machine quilting, 2.5 to 3.5 mm is a practical working range. Straight-line quilting with a walking foot often lands in that window because a slightly longer stitch travels through the quilt sandwich more cleanly and leaves a balanced-looking line, as noted in Quilting Wemple's guide to quilting stitch length.

What works for walking-foot quilting
Walking-foot quilting usually looks best when the stitch is long enough to cross batting and backing without looking cramped. On a thin cotton quilt, 2.5 mm is a solid starting point. On a thicker quilt, dense batting, flannel, or a heavier backing often respond better to 3.0 to 3.5 mm.
The trade-off is straightforward. Shorter stitches can look crisp, but they punch more holes and can make a thick quilt feel stiff. Longer stitches glide better through bulk, but if you go too long, the line can start to look loose or slightly underfilled.
Use this starting protocol:
- Set 2.5 mm for a standard cotton top, cotton backing, and low- to mid-loft batting.
- Increase toward 3.0 mm if the quilt feels resistant under the foot.
- Try 3.5 mm for bulkier sandwiches or if puckering starts along straight lines.
- Sew a sample on the same layers first, not just on spare quilting cotton.
That last step saves a lot of frustration.
What about free-motion or hand-guided quilting?
Free-motion quilting is different because your hands control how fast the quilt moves while the machine controls how fast the needle cycles. Angela Walters regularly teaches quilters to focus on matching hand speed to machine speed for consistent results, as discussed in this video lesson on quilting control and stitch consistency.
Uneven stitches don't always come from the wrong setting. They often come from mismatched speed, quilt drag, or the weight of the quilt pulling away from the needle area.
If the stitches get long and short in the same motif, check support before changing the dial. Spread the quilt weight over the table, slow your hands, and stitch another sample. We see many quilters chase the number when friction is the problem.
For quilters planning to use a longarm service, testing still helps. A quick sample tells you whether your thread, batting, and backing are behaving well before you pack the quilt. Our longarm quilting top prep tips help prevent the issues we most often see in mail-in quilts, especially fullness, skewed backing, and avoidable tension trouble.
How Should You Adjust Stitch Length for Minky Fabric?
You finish a clean cotton quilt top, load minky on the back, and the project suddenly behaves like a different quilt. The backing stretches a bit, the pile shifts under the foot, and stitches that looked balanced on cotton can disappear into the nap or pull the layers out of line. That is why minky usually needs a different stitch-length choice, not just more patience.
For thicker or plush materials, guidance commonly recommends increasing to about 3.5 mm or longer to help prevent puckering and improve needle penetration, as described in Fabric and Reason's quilting tip on even stitch length.

Why longer usually works better on plush backing
A slightly longer stitch solves several real problems at once.
- It reduces over-perforation on soft, stretchy backing.
- It keeps the stitch line from looking cramped once the pile settles around it.
- It helps bulky layers feed more evenly through a domestic machine.
- It leaves quilting lines easier to see on fabrics with loft or direction in the nap.
On most domestic machines, we start minky tests around 3.5 mm for straight-line quilting and adjust from there. If the stitch line still sinks too far into the pile, go a little longer. If the layers start shifting or the quilting design needs tighter control, shorten slightly and test again. The right answer depends on the loft of the minky, the thickness of the batting, and how visible you want the quilting to be on the back.
A walking foot also helps. It does not fix every issue, but it gives the top, batting, and backing a better chance of advancing together.
That matters even more with Shannon textures that have more body, like Hide, Snowy Owl, or Fawn, and with extra-wide backs where you want to avoid piecing. Different textures do not just feel different in your hands. They also change how clearly the stitch line shows and how much drag the machine feels during quilting.
A practical test protocol before you quilt the real thing
For minky, guessing costs time. Build a test sandwich from the same quilt top fabric, the same batting, and the same backing you plan to use on your quilt. Then stitch three short lines at different lengths, such as 3.0 mm, 3.5 mm, and 4.0 mm, and compare them side by side.
Check four things:
- Does the stitch line show clearly on the minky side?
- Are the layers staying aligned, especially at the edges?
- Do you see puckering or drag along straight lines?
- Does the backing look chewed up or heavily perforated?
That quick test gives you the practical why behind the number. A shorter stitch may hold a design neatly on the quilt top but look buried on the back. A longer stitch may look better on plush fabric but lose definition around tight turns. We would rather see a quilter spend ten minutes on a sample than spend hours unpicking minky.
If slipping is the main problem, our guide on how to sew with minky fabric without it sliding covers the handling steps that keep the layers under control.
Mail-in longarm customers should test too. Even if we do the quilting, your sample tells you whether the backing, batting, and top are cooperating before you box the quilt. That is especially helpful with plush backings, because they can exaggerate small prep issues that a cotton backing would forgive.
Here's a quick product look if you're choosing plush yardage for quilting practice or a full backing:
For tactile projects, many quilters prefer choosing by texture instead of shopping for a generic soft backing. Luxe Cuddle Fawn, Luxe Cuddle Hide, and Luxe Cuddle Snowy Owl each handle a little differently under the needle because the pile height and surface texture are different.
How Do Needles Thread and Tension Affect Stitch Length?
Stitch length never works alone. If you change the number on the screen but ignore needle condition, thread behavior, or tension balance, you can still end up with skipped stitches, loops, or an ugly back.
The process operates as a three-part system. Stitch length, needle, and thread tension have to cooperate. If one part is off, the others can't fully compensate.
What goes wrong when the system is out of balance
A few common examples:
- A dull or wrong needle can cause skipped stitches, especially on thick or plush sandwiches.
- Thread that doesn't suit the project can exaggerate tension issues or make the stitch line look harsh.
- Poor tension balance can create loops on one side even if the stitch length itself is reasonable.
This is why quilters sometimes keep changing the stitch length and get nowhere. The line still looks bad because the machine is struggling with a different variable.
What to check before changing the length again
Use this troubleshooting order:
- Replace the needle if it has stitched through a full project or hit bulky seams.
- Re-thread the machine completely with the presser foot up.
- Check top and bobbin tension on a scrap sandwich.
- Support the quilt's weight so the machine isn't fighting drag.
- Then fine-tune stitch length.
A lot of stitch-quality issues are really handling issues. That aligns with the earlier point about hand-guided quilting. Consistent movement and reduced drag often improve the line faster than chasing a different number.
A beautiful quilting line comes from a balanced setup. The machine can't make clean stitches if the needle, thread, and feed are all working against each other.
If you're unsure whether your thread choice suits the project, a thread weight chart for quilting and sewing helps narrow down the likely cause before you start adjusting everything at once.
For plush fabrics, many quilters also find that a fresh, appropriate needle matters more than they expect. The stitch length may be fine, but if the needle isn't penetrating cleanly through pile and batting, the result won't look fine.
How Can You Test Your Stitch Length Before Quilting?
Testing is the habit that separates a smooth quilting session from a frustrating one. The goal isn't to make a perfect miniature quilt. The goal is to test the exact combination of top, batting, backing, thread, and machine setup before you commit to the actual project.
Multiple quilting guides recommend testing on scraps first because small stitch-length changes can affect tension, appearance, and how the quilt handles. That advice is practical, not fussy.
A simple test protocol that works
Build a small sandwich from the same materials you'll use in the quilt.
- Use the actual fabrics from the top and backing whenever possible.
- Include the actual batting instead of a substitute.
- Thread the machine exactly as planned for the final quilt.
- Test several lines at different stitch lengths rather than sewing one line and guessing.
- Check both sides before deciding what to use.
Then evaluate the sample for four things:
- Appearance on the quilt top
- Tension balance on the back
- Drape when you bend the sample
- Ease of feeding under the machine
Recommended quilting stitch lengths
| Quilting Task | Recommended Stitch Length (mm) | Equivalent Stitches Per Inch (SPI) |
|---|---|---|
| Piecing quilt top | 2.0 to 2.5 mm | Qualitatively shorter than quilting; structural stitching is often 12 to 15 SPI |
| Machine quilting | 2.5 to 3.5 mm | 2.5 mm is about 10.16 SPI |
| Curves or detailed quilting | 1.5 to 2.0 mm | Qualitatively denser |
| Faster or simpler quilting designs | 3 to 4 mm | Qualitatively longer |
| Hand quilting contexts | 3.5 to 4.0 mm | Qualitatively longer |
| Thick or plush backing | About 3.5 mm or longer | Qualitatively longer |
What to send or prepare for a longarm finish
If you're sending your quilt out, include useful notes from your own test if you have them. That can help with matching expectations for thread visibility, density, and overall feel.
For prep details, this related guide on how to prepare your quilt for longarm services is worth reading before you box anything up. If you're buying backing and prep supplies at the same time, Quilting Cuddle and minky fabric by the yard are practical places to compare texture and width options.
What Are Common Stitch Length Problems and How Do You Fix Them?
A quilt can look fine for the first few inches, then start puckering, skipping stitches, or feeling board-stiff. In the shop, that usually means the stitch length is out of step with the materials or the machine setup, not that the whole quilt is a lost cause.
The fix starts with reading the symptom correctly. Short stitches can draw up a lofty sandwich and make the surface ripple. Long stitches can leave piecing seams under-supported or make quilting lines look too open. On plush backings such as minky, a stitch that works on cotton often sinks in or disappears, so the answer is not always “go shorter.”
Why is my quilt puckering?
Puckering usually shows up when the stitch is too short for the thickness and drag of the quilt sandwich. It also happens when the quilt's weight hangs off the table, the layers were not basted securely, or the presser foot is not feeding all layers evenly.
Start with the simplest correction.
- Lengthen the stitch slightly if the quilting line looks tight or crowded
- Support the quilt on the table so the machine is not fighting the bulk
- Check your basting before blaming the stitch setting
- Use a walking foot for straight-line work if the layers are shifting
If you are quilting a top that will be mailed to a longarmer next time, keep a note of what happened here. Puckering on your home test piece often points to a batting, backing, or density choice worth changing before you send the full quilt out.
Why do my seams or quilting lines look weak?
Weak-looking stitching has two different causes, and the fix depends on which one you are seeing.
For piecing, the seam may be too long. That can let the seam work open with handling or make points less secure during pressing. For quilting, the line may only look light because the thread is sinking into loft or plush backing. In that case, shortening the stitch can make the quilt stiffer without improving the appearance.
Use this rule in practice:
- Shorten slightly for piecing seams that are pulling apart
- Keep quilting stitches long enough to preserve drape
- On high-loft batting or plush backing, test thread visibility before changing to a shorter stitch
- Match the stitch to the job, not to a single favorite setting
Why are my stitches uneven or looping?
Uneven stitches often come from speed changes, drag, poor threading, or a dull needle. Looping on the back usually points to top tension or threading trouble before stitch length enters the picture.
Work through the machine in order:
- Rethread with the presser foot up
- Insert a fresh needle in the right size and type
- Check that the quilt is fully supported
- Sew at a steady pace on a scrap sandwich
- Adjust stitch length only after the stitch formation looks balanced
That order saves time. We see plenty of quilts where the owner keeps changing stitch length when the underlying issue is a worn needle or thread that never seated in the tension discs.
What if the problem only happens on minky or other plush backing?
That is common. Plush fabric adds drag, hides stitches, and exaggerates every tension issue. A stitch length that looks clean on cotton can look choppy on minky, especially on curves or dense quilting.
For those backings, test one small sample with your planned thread, batting, and design style. If the line disappears, go a little longer before you change everything else. If the backing tunnels or shifts, reduce drag and check support first. The practical goal is a clean line that holds well without chewing up the pile.

Good stitch length troubleshooting is less about chasing a perfect number and more about following a repeatable test. Change one variable, sew a short sample, then check the top, the back, and the feel of the quilt in your hands. That approach pinpoints the actual cause faster and gives you better information if you decide to hand the project off to a professional longarm service later.