
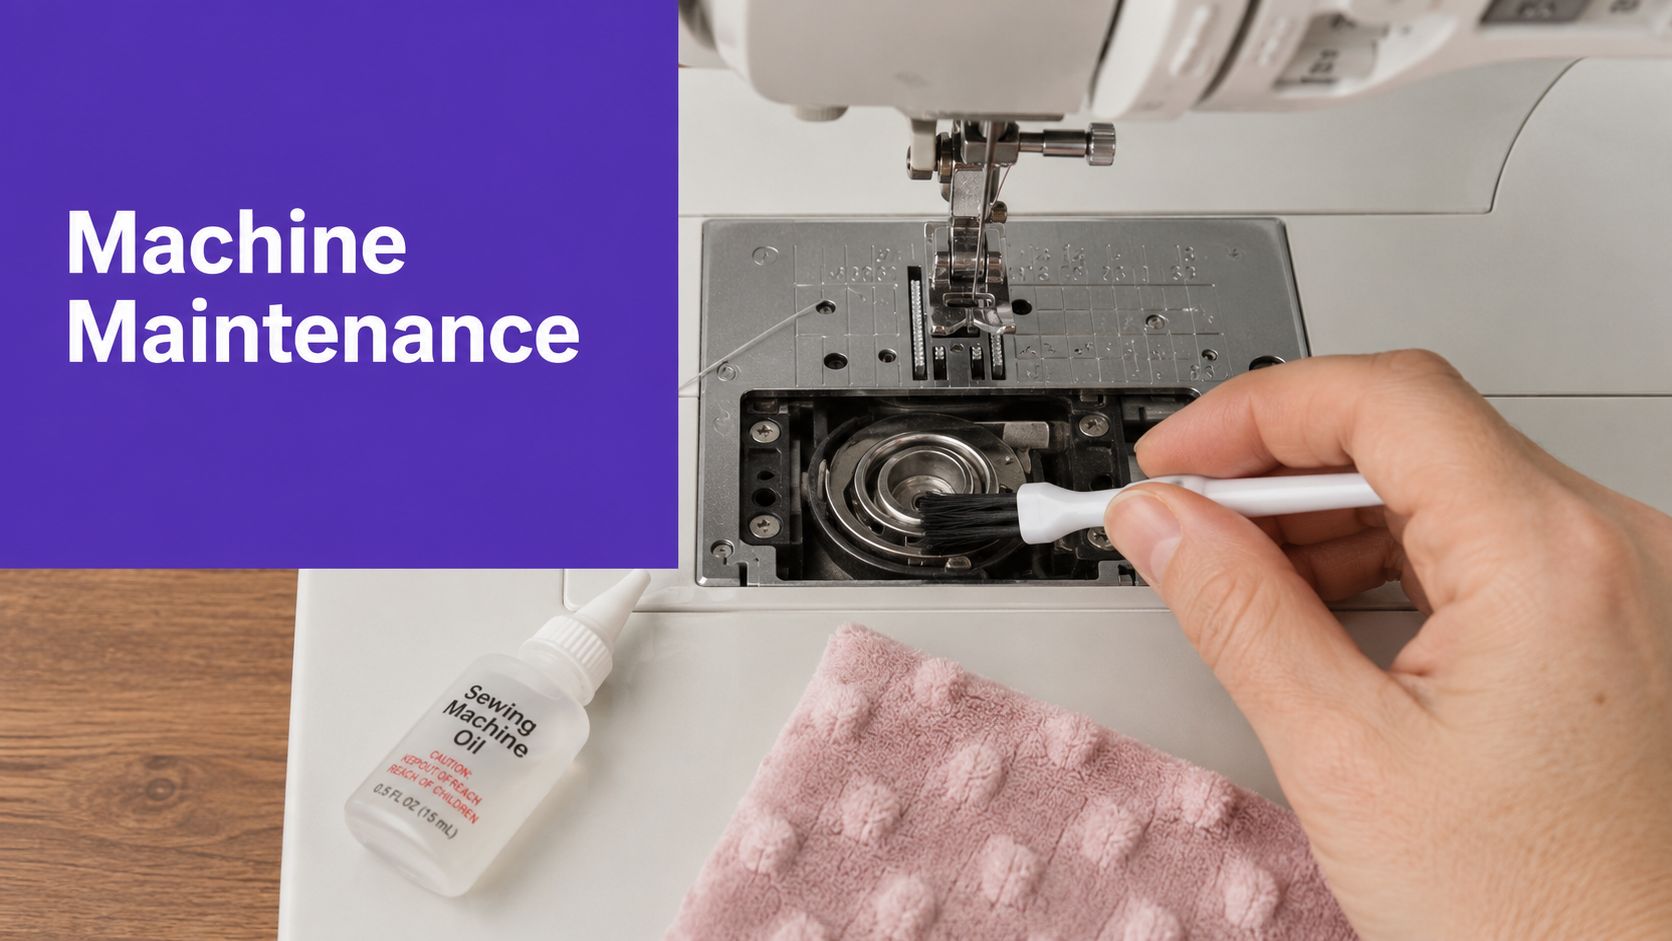
Clean lint from the bobbin area and feed dogs, oil only the metal-on-metal points your manual allows, change your needle every 8 to 10 hours of sewing, and plan on professional service every 2 to 3 years. If you quilt often or sew with minky, that routine matters even more because plush fibers and long stitching runs expose machine problems fast.
Good sewing machine maintenance keeps stitches balanced, reduces lint-related jams, and helps minky and quilting projects run smoothly instead of turning into a fight with skipped stitches and thread nests. If you've ever been halfway through a quilt sandwich and watched your machine suddenly start chewing thread, you already know this isn't a small issue.
Quilters often blame tension first. Minky sewists often blame the fabric. In practice, the machine usually needs attention before it needs blame.
Why Your Minky Project Demands Better Maintenance
You piece the quilt top without a hiccup, add batting and a minky backing, and halfway through the first quilting pass the machine starts skipping stitches or packing lint around the bobbin case. That pattern is common. Cotton piecing lets a machine hide small maintenance problems. Minky and quilting expose them fast.
Plush fibers shed into the hook area. Batting adds resistance. Long quilting lines keep the machine running under load much longer than short garment seams do. A machine that sounded fine during piecing can start struggling once it has to feed a thick quilt sandwich with a slippery nap on the back.
I see this most with textured minky, especially Hide, Snowy Owl, and Fawn. Those fabrics are beautiful on a finished quilt, but they create more drag and more fuzz than standard quilting cotton. On a longarm, the issue shows up differently. High stitch counts and long passes reveal small timing, needle, or tension weaknesses sooner than a quick test seam ever will.
Generic garment-sewing advice misses that trade-off. A blouse seam and a bed quilt do not ask the same thing from the machine. Quilters need a cleaner bobbin path, a sharp needle, and a machine that is already running well before the quilt sandwich goes under the foot.
One practical habit prevents a lot of unnecessary tension tweaking. If stitch quality changes after sewing plush fabric, inspect lint buildup, the needle, and the thread path first. The problem is often a combination of fiber buildup, extra friction, and a needle that was good enough for cotton piecing but not for minky and batting together.
Fabric choice matters here. If you're newer to plush quilt backings, it helps to understand what Cuddle minky fabric is and why it behaves differently from woven cotton once it starts moving through the machine.
Why plush fabrics expose problems faster
Minky has a nap. That changes how it feeds. It can creep against cotton, hold onto lint, and put more demand on the needle and hook system, especially in bulky seams or dense quilting areas.
Quilting adds its own stress. Bigger projects spend more time under the needle, and long runs of stitching give heat, lint, and minor tension imbalance more time to build into obvious trouble. That is why a machine can sew a few sample scraps well, then start acting up on the actual quilt.
What helps:
- Checking the machine sooner: Stop at the first sign of skipped stitches, shredding, or rough sound.
- Respecting fabric drag: Slow down over bulky joins and heavy quilting zones.
- Testing on the same stack: Use the quilt sandwich, not just a scrap of top fabric.
What causes trouble:
- Blaming tension first: Many minky stitch problems start with lint, needle wear, or poor feeding.
- Treating plush backing like ordinary cotton: It sheds more and shifts more.
- Pushing through warning signs: A few bad inches can turn into thread nests, puckers, or a chewed-up backing.
Good maintenance gives you a wider margin for error. That matters even more with minky, where softness and stretch make every small machine issue easier to see on the finished quilt.
What Is Your After-Sewing Maintenance Routine
The most useful sewing machine maintenance habit is the one you'll repeat. For most quilters, that means a short reset after every few sewing sessions, not a heroic overhaul once the machine is already acting up.
For minky and batting-heavy work, I'd keep this routine close and make it automatic.

What should you do after regular sewing sessions
Expert guidance recommends cleaning the bobbin area every 8 to 10 hours of sewing and changing your needle just as frequently, especially for home quilters and heavy users of plush fabrics, as noted in this machine issue prevention guide.
Use that as your practical benchmark.
- Brush out lint: Open the bobbin area and clear out fuzz from the bobbin case and feed dogs.
- Look at the needle: If it has handled several sessions, replace it before it starts causing subtle stitch issues.
- Wipe the machine exterior: Plush fibers cling to everything.
- Cover the machine: Dust and airborne lint don't help the tension path.
- Unplug when finished: Simple, safe, and good practice.
Needle Selection Guide for Quilting and Minky Fabrics
| Fabric Type | Recommended Needle | Recommended Size | OPN Quilting Tip |
|---|---|---|---|
| Quilting cotton piecing | Quilting needle | 75/11 or 90/14 | Use a fresh needle before precision piecing if seams must match cleanly. |
| Cotton quilt sandwich with batting | Quilting or Microtex needle | 90/14 | If stitches start looking uneven through bulk, change the needle first. |
| Smooth minky backing | Stretch or ballpoint-style option your machine likes | Match your machine manual | Test on scraps before quilting the full sandwich. Plush nap can hide early stitch problems. |
| Luxe Cuddle textures like Hide or Snowy Owl | Fresh needle suited to thicker, plush fabric | Match your machine manual | Heavier texture means more drag. Don't keep an old needle in “just one more project.” |
| Extra-thick mixed project with cotton and minky | Start with a new needle and test | Match your machine manual | The right answer depends on your machine, thread, and loft. Test before committing. |
Not every machine prefers the same needle family on minky. Some machines love a stretch needle. Others behave better with a quilting needle on a basted sandwich. That's why scrap testing matters more than blanket rules.
A fresh needle often fixes what people think is a tension problem.
Which habits pay off fastest
These are the maintenance habits that usually give the best return:
- Change the needle on schedule. A tired needle can rough up plush fibers and miss stitches in thicker spots.
- Clean before storing. Don't put the machine away with lint packed inside.
- Test after any change. New thread, new batting, new minky texture, new needle. Always test.
- Keep plush fibers in mind. Minky blankets and quilt backs leave more behind than many sewists expect.
If you also sew finished plush projects, it helps to know how to wash mink blankets so the fabric keeps its softness after all that careful stitching.
Shop note: If you're ordering supplies for your next quilt, many sewists like to bundle enough fabric to qualify for free U.S. shipping on $70+, and first-time customers can use the 15% first-order coupon.
The point of an after-sewing routine isn't perfection. It's catching the small things before they become the reason your machine starts fighting a beautiful quilt.
How Do You Properly Clean and Oil Your Machine
Halfway through a minky quilt, the machine starts sounding different. Stitches look fine for a few inches, then the bobbin area packs with fuzz and the whole stitch path gets inconsistent. That is a cleaning problem until proven otherwise, especially if you sew plush backings or push bulky quilt sandwiches through a domestic machine.

Garment sewing leaves lint. Minky leaves drifts of it. Add batting dust, thread flakes, and the drag from quilting through seam intersections, and small deposits in the hook area start affecting stitch quality faster than many sewists expect. On longarm projects, I see the same pattern in a different scale. Plush fibers travel, collect, and eventually interfere with smooth movement.
Where should you actually clean
Start with the places that directly affect stitch formation and feeding. Unplug the machine, remove the needle and presser foot, then open the area your manual says you can safely access.
On most home machines, that means:
- Under the needle plate
- Between and around the feed dogs
- Inside the bobbin area and hook race
- Around the bobbin case, if your machine allows removal
- Along the thread path openings your manual says are user-serviceable
Use a small brush or a vacuum attachment made for sewing machines. Skip canned air. It tends to drive lint deeper into the machine, which is the opposite of what you want on a quilt that already sheds. If the machine has been skipping stitches on plush fabric, check the needle while you are there. A fresh needle and the right size for cuddle-style fabrics solve a lot of problems before you ever touch the tension dial. OPN Quilting has a solid guide on the best needle size for Shannon Cuddle fabric.
I also look closely at the feed dogs after sewing minky. Plush fibers like to wrap and pack into the corners. A quick surface brush will miss that.
How much oil is enough
Very little, and only where your manual says to apply it.
Older machines often expect routine oiling. Many newer machines do not, or they limit oil to a specific hook point. If you guess, you can create a mess that transfers onto pale fabric or attracts more lint in the exact place you just cleaned. One drop in the correct spot is usually plenty. Then turn the handwheel by hand a few times to distribute it, and wipe away any excess before the first test seam.
Good practice looks like this:
- Clean first, then oil if your manual calls for it
- Use a single drop in the designated spot
- Turn the handwheel to spread the oil
- Wipe the hook area and needle plate before sewing
Problems usually come from habits like these:
- Oiling every shiny metal part
- Adding more oil because the machine sounds dry
- Leaving residue in the bobbin area
- Skipping the test sew and finding the oil on your quilt top
For another practical resource on keeping stitches cleaner after maintenance, B-Sew Inn shares tips for flawless stitches that pair well with a careful home cleaning routine.
A quick visual can also help if you learn better by watching the process.
What should you test before sewing the real quilt
Test on scraps that match the actual job. For quilting, that means a small sandwich with the same top fabric, batting, backing, thread, and as much bulk as you can mimic. A single layer of cotton will not tell you how the machine will behave when it hits minky nap, batting loft, and a seam junction all at once.
Check four things:
- Stitch formation on both sides
- Feeding across bulky spots
- Any sign of oil transfer
- Sound and feel at normal sewing speed
If the machine still sounds labored after cleaning, stop and look again before you keep sewing. On minky, a little leftover lint can cause more trouble than people expect.
How Can You Diagnose and Adjust Bad Tension
You finish a few inches of quilting on minky backing, flip the piece over, and see loops, little nests, or bobbin thread pulling to the top. The first impulse is usually to turn the tension dial. On quilts, that often sends you in the wrong direction.
Tension trouble on a quilt sandwich is rarely just one setting. Minky sheds. Batting adds drag. Seam joins and dense quilting lines change how the layers feed. A machine that stitched plain cotton well can start looking inconsistent as soon as plush backing and quilt bulk enter the picture.

What are your stitches telling you
Read the stitch pattern before you adjust anything. The side that looks messy is not always the side causing the problem.
- Loops underneath the fabric: The top thread is often not seated correctly in the tension discs. Re-thread with the presser foot up so the thread can drop into place.
- Bobbin thread showing on top: The top tension may be too tight, or the machine may be fighting the thickness of the sandwich.
- Skipped stitches: Start with the needle. This shows up often with minky, plush backings, and thicker batting.
- Intermittent nesting at the start of a seam: Check thread tails, threading path, and the bobbin area for packed lint.
Test on a small scrap sandwich that matches the quilt. For minky projects, that means using the same top, batting, backing, thread, and as much thickness as you can reproduce. I do not trust a tension test on plain woven cotton if the actual job is a quilt with loft and nap.
A simple process for testing tension on quilts and minky
Use a set order so you only change one variable at a time.
- Re-thread the top path with the presser foot raised.
- Insert a fresh needle that fits the fabric and thread.
- Sew a short line on a matching quilt sandwich.
- Check both sides before touching the tension dial.
- Make one small adjustment, then test again.
Small changes matter here. If you jump the dial too far, you lose track of what was effective.
On longarm quilts, I see the same pattern. Quilters blame tension when the issue started with lint buildup, the wrong needle for the thread, or a backing that is adding more resistance than expected. Minky can exaggerate every weak point in the setup.
When is the bobbin the actual problem?
Sometimes the upper tension is fine, and the inconsistency starts below.
Inspect the bobbin and bobbin case closely if the stitch changes from one pass to the next without a clear reason. A rough spot, a bent bobbin, or an uneven wind can snag thread and mimic a tension problem. That kind of issue is especially frustrating on quilting because the machine may sew one row cleanly, then misbehave on the next row over the same materials.
Look for:
- Nicks, scratches, or rough edges on the bobbin case
- A bobbin wound loosely or unevenly
- The wrong bobbin style for your machine
- Thread caught under the bobbin case spring or in the hook path
Needle choice also affects what looks like tension trouble. If you sew plush backing often, this guide to the best needle size for Shannon Cuddle fabric will help you match the needle to the job.
For thick quilt sandwiches, good tension comes from the whole system working together. Clean thread path, correct needle, sound bobbin, and realistic testing matter more than chasing one dial setting.
When Should You Seek Professional Service
You finish a few rows on a minky-backed quilt, and the machine starts sounding different. The stitch line looks acceptable for a minute, then the needle hits, the motor strains, or the machine begins to knock on every pass through the thickest areas. That is the point to stop pushing.
Quilters put far more stress on a machine than light garment sewing does. Dense piecing, batting, long seams, and plush backing expose problems that stay hidden on simple cotton. On minky projects, I do not recommend endless home troubleshooting once the machine shows clear mechanical symptoms. A small issue can turn into a damaged hook, repeated needle strikes, or timing that drifts further out with every test.
Why professional service is worth it
A good technician handles the jobs routine maintenance cannot reach safely.
They can:
- Check and correct timing
- Inspect belts, gears, and internal wear
- Clean packed lint from areas owners should not open casually
- Find damage that looks like a tension problem from the outside
- Test the machine under load after adjustment
This matters even more if you quilt often. Minky sheds. Batting dust works its way inside the machine. Repeated sewing over bulky seam intersections adds shock to parts that have to stay precisely aligned to form a clean stitch.

Which signs mean stop and call a technician
Some problems are no longer maintenance issues. They are repair issues.
Stop sewing and book service if you notice any of these:
- Persistent knocking, grinding, or a new metallic sound
- Repeated needle strikes, especially after changing the needle and reseating the bobbin
- Timing symptoms that do not improve on a plain cotton test
- Stitch formation that stays inconsistent after careful rethreading and basic cleaning
- A handwheel that feels tight, catches, or does not turn smoothly
- Electrical behavior that seems abnormal, including flickering lights or inconsistent power
One bad result on a thick quilt does not always mean the machine needs the shop. Consistent failure on simple test fabric usually does. That distinction saves a lot of frustration.
High-use machines need service sooner. Longarm owners know this already. A machine can be clean, correctly threaded, and still need a trained set of eyes because wear has started where you cannot see it.
If your domestic machine is fighting every large quilt and you would rather finish the project than force it, mail-in longarm quilting with free shipping can be a practical option.
A service appointment is part of responsible sewing machine maintenance.
Order perk: If you're planning fabric or batting purchases alongside your next project, remember the 15% first-order coupon and free shipping on orders over $70 can make a larger prep order easier to justify.
How to Troubleshoot Common Sewing Frustrations
Most everyday sewing problems connect back to a small group of maintenance issues. If you know the pattern, you can usually solve the problem faster and get back to quilting.
Why is my machine skipping stitches
Start with the needle. If it's old, bent, dull, or wrong for the fabric stack, skipped stitches are common.
Then check whether plush lint is building up near the hook area. Minky projects are especially good at exposing this problem.
Why am I getting thread nests under the fabric
Re-thread the upper path completely with the presser foot raised. Then inspect the bobbin area for lint or stray thread tails.
Thread nesting often looks dramatic, but the fix is usually simple. A dirty bobbin area and incorrect threading are frequent culprits.
Why does the machine sound strained on a quilt sandwich
Bulk changes everything. Thick seams, batting, and minky backing create more resistance than flat cotton piecing.
Try these checks:
- Use a fresh needle: Old needles struggle through loft.
- Test on a scrap sandwich: Don't diagnose on your project quilt.
- Slow down: Let the machine form stitches cleanly.
- Clean before trying again: Hidden lint adds drag.
Why does minky keep shifting while I sew
This is partly handling and partly machine setup. A machine that isn't feeding cleanly will make a slippery fabric feel even worse.
If the project keeps creeping, revisit your needle, your presser-foot pressure if your machine allows adjustment, and your cleanliness around the feed path. It also helps to review practical handling advice for how to sew with minky fabric without it sliding.
If the problem appears suddenly, assume maintenance first and machine failure second.
What should I check before blaming the machine
Use this quick list:
- Needle condition
- Threading path
- Bobbin seating
- Lint in feed dogs and hook area
- Recent oiling mistakes
- Scrap-test results
Good sewing machine maintenance doesn't guarantee you'll never troubleshoot. It does mean most problems become smaller, clearer, and easier to fix, especially when you work with minky, thick batting, or large quilts.
If you're ready to skip the machine struggle and get a beautiful finish on your next quilt, On Pins & Needles Quilting Co. is a trusted place to start. Browse the Mail-in Longarm Quilting Service, explore plush backing options like 110-inch extra-wide Cuddle, shop soft textures inspired by favorites such as Hide, Snowy Owl, and Fawn at OPN's minky collection, pick up project-ready supplies through the quilt shop collection pages, and read more quilting guidance on the OPN blog. With hundreds of verified reviews, a 15% first-order coupon, and free shipping on $70+, it's a practical next step for quilters who want fewer headaches and better results. Book Your Longarm Service Today