

You've got soft minky on the cutting table, but the finished scarf keeps developing a bulky twist or wavy seam. A well-cut minky infinity scarf pattern solves that by creating a soft, continuous loop with minimal waste and a polished finish, provided you control the nap, avoid pulling the fabric, and use settings suited to plush fabric.
Introduction to Minky Infinity Scarf Pattern
An infinity scarf is a long rectangular loop sewn closed. That construction makes it approachable for beginners, quick to assemble, and especially well suited to plush textiles that feel luxurious without requiring complicated shaping. Unlike a traditional straight scarf, the loop can be wrapped and draped without managing loose ends, while the closed seam keeps the accessory tidy.
The style has roots in a much older family of practical scarf-like wraps, but the infinity scarf became a mainstream fashion item in the early 2000s and gained particular popularity around 2010. By 2019, “how to wear an infinity scarf” had become one of the leading fashion-related searches, a sign that the accessory had moved beyond a short-lived trend into a familiar styling category. The history of the infinity scarf also helps explain why its simple shape remains commercially useful.
At OPN Quilting, we work extensively with Shannon Cuddle and Luxe Cuddle textures, including plush options that give a handmade scarf a finished, giftable feel. Customers have praised the drape and durability of our extra-wide minky in hundreds of verified reviews, and the store also carries ready-made options such as the Buffalo Check Steel/Snow Minky Infinity Scarf.
The recurring problem is seam bulk. A conventional scarf can leave thick folded ends or an awkward join, while this pattern distributes the fabric around a continuous loop. New customers can use the 15% first-order coupon, and orders over $70 qualify for free U.S. shipping, subject to current shop terms.
For fabric background, start with what Cuddle minky fabric is, then choose your texture based on drape, pile, and the way you plan to wear the finished scarf.
Gather Materials and Choose Your Fabric
A successful scarf begins before the machine is threaded. Gather a sharp rotary cutter, a self-healing mat, a clear ruler, fabric clips or plenty of fine pins, a fabric marker, a new ballpoint or stretch needle, polyester thread, and a walking foot. A lint roller or small vacuum is also useful because cutting plush fabric releases loose fibers.
The basic workflow uses one yard of Luxe Cuddle to make three scarves. For one scarf, cut a strip 18.5 inches wide by 36 inches long, which gives a substantial loop without creating an unnecessarily heavy neckpiece. If you want a smaller, closer-fitting loop, shorten the length while keeping enough room for comfortable turning. A larger loop needs additional length, so plan the finished proportions before cutting rather than trying to stretch the fabric into shape.
Width matters as much as texture. OPN Quilting stocks standard 44 to 45 inch Quilting Cuddle, 80 inch Mirage, and extra-wide 90 inch and 110 inch Luxe Cuddle options. Those widths are especially useful when you're buying fabric for both scarves and larger quilt projects, although a scarf maker should still judge the fabric by pile and drape rather than width alone.
| Fabric Type | Width | Drape and Bulk | Price per Yard |
|---|---|---|---|
| Standard Quilting Cuddle | 44 to 45 inches | Flexible and generally easier to handle, with moderate pile | Compare current shop pricing |
| Mirage | 80 inches | Broad yardage with a soft drape and less need to piece | Compare current shop pricing |
| Luxe Cuddle | 90 inches | Plush, warm, and potentially bulkier at the twist | Compare current shop pricing |
| Luxe Cuddle extra-wide | 110 inches | Generous width for large projects, with texture varying by finish | Compare current shop pricing |
The trade-off is straightforward. A lower-pile Cuddle can produce a cleaner everyday scarf, while a high-pile texture looks more dramatic but may crowd the twist and make stitching less precise. Shannon Fabrics textures such as Hide, Snowy Owl, and Fawn create noticeably different surfaces, so order a curated cut or compare available minky fabric yardage before committing to a large project.
Fabric decision: Choose the most luxurious texture you can sew cleanly, not simply the highest pile available.
Use the best thread for sewing minky as a reference before starting, and browse OPN's minky infinity scarf kits if you want the fabric selection and project planning handled together.
Prepare and Cut Minky for Your Scarf
Minky behaves like a directional-nap fabric. The pile lies in a particular direction, and reversing it can change the surface sheen, softness, and visual consistency. Lay every piece with the nap running the same way, using a “with nap” layout rather than assuming the fabric can be turned freely.
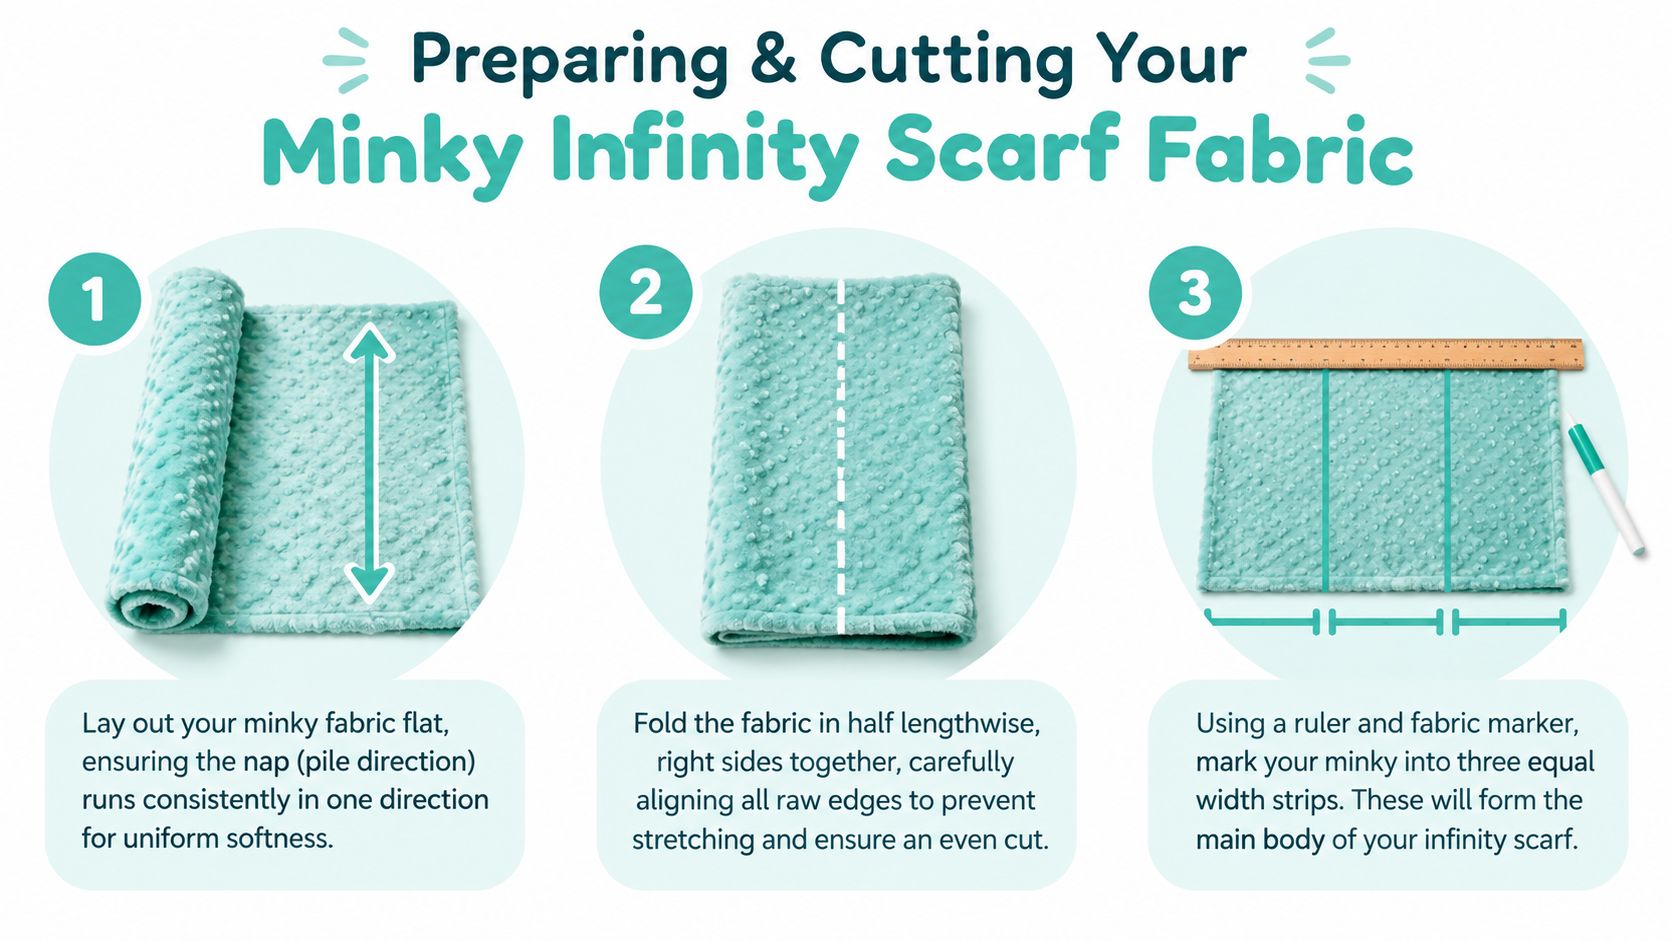
Work from the backing side whenever possible. Minky has a knit backing with a dense polyester nap, and cutting the backing reduces disturbance to the pile. Keep the fabric flat on the mat, don't let yardage hang off the table, and avoid shaking or dragging it, since those actions can stretch the backing and scatter fibers.
How do you mark the scarf pieces accurately?
For the standard workflow, mark a 36-inch length and divide the available fabric into equal strips. Each scarf strip should measure 18.5 inches by 36 inches. If you're cutting a single yard into three scarf pieces, mark the width carefully rather than relying on the fabric's cut edge, which may not be square.
- Smooth first: Place the backing side up and flatten the fabric without pulling.
- Anchor gently: Use clips, weights, or a ruler to hold the material in position.
- Cut with control: Make long, light passes with a sharp rotary cutter, or use sharp scissors for thicker Luxe Cuddle textures.
- Check the nap: Mark an arrow on the backing so every piece faces the same direction.
A single-layer cut is often more reliable than folding plush fabric, because the pile can shift between layers. For additional handling guidance, use how to cut minky fabric without the mess. The cleanest cut is the one made with minimal pressure and no tugging.
Sew and Finish Your Infinity Scarf
Once the strip is cut, fold it lengthwise with right sides together and align the long edges. Clip frequently, especially along the plush edge, because pins can disappear into the pile and make it harder to see whether the layers remain aligned.
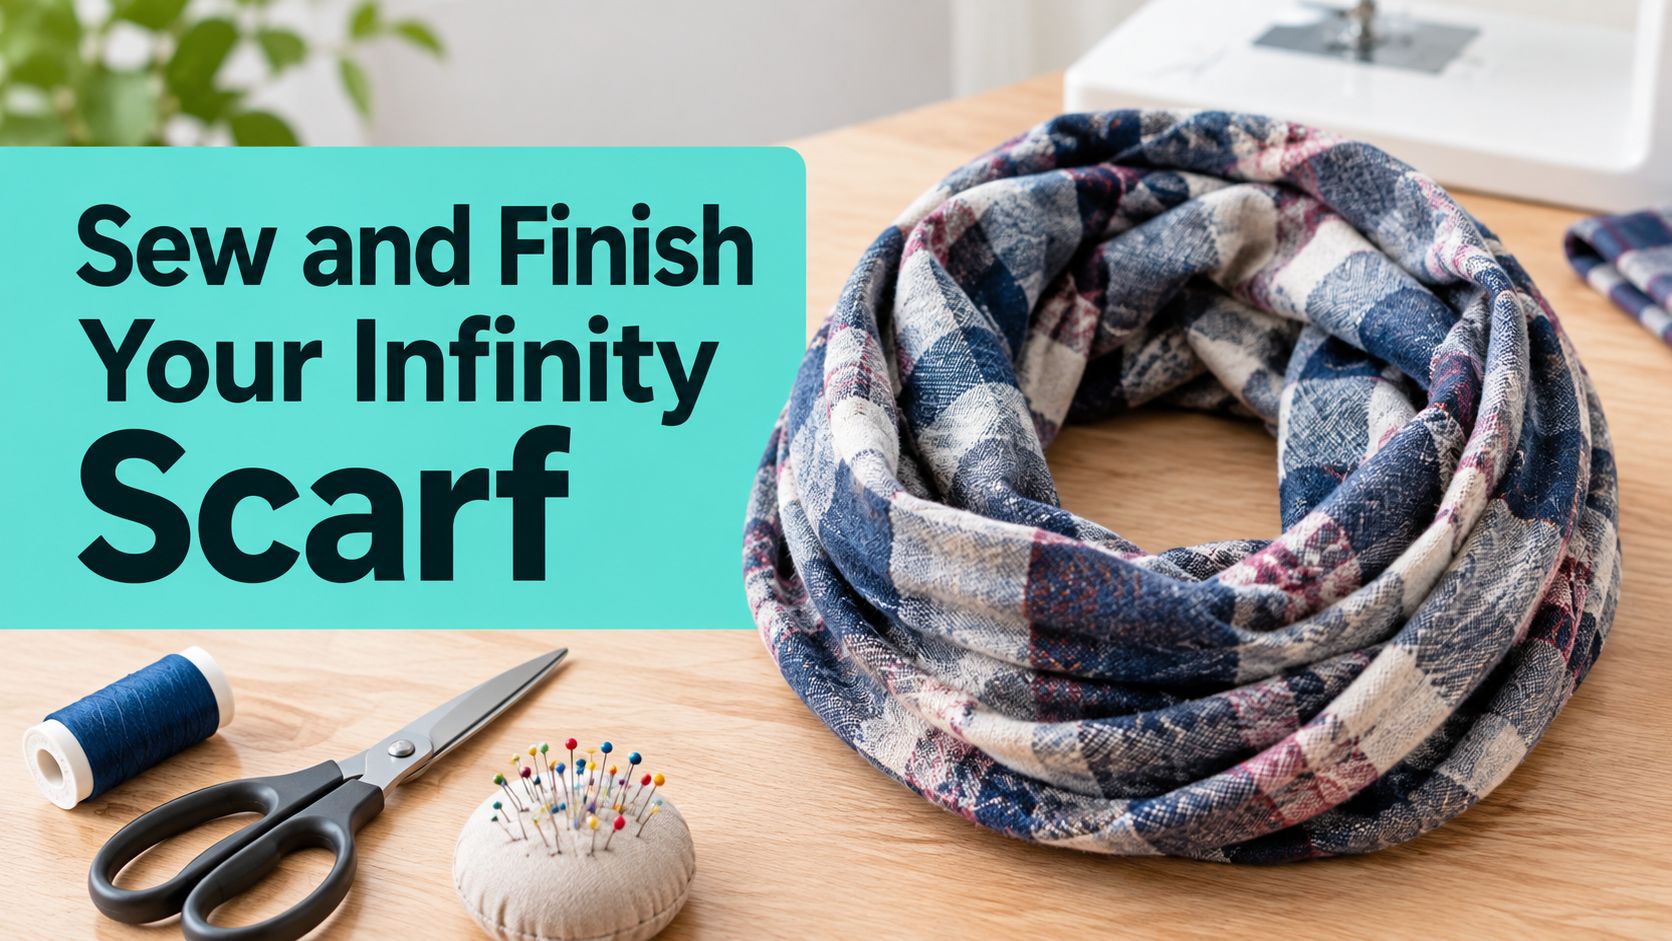
Use a 3/8-inch seam allowance and set the stitch length between 3.0 and 3.5. The longer stitch helps reduce drag through the pile and limits the tendency of the seam to become tight or distorted. Put the minky against the feed dogs, use a walking foot when available, and let the machine move the fabric instead of pulling from behind.
What is the correct order for making the loop?
- Sew the long seam. Backstitch at both ends, then sew steadily along the full length. Keep your hands on either side of the foot to guide the fabric, not stretch it.
- Turn the tube right side out. Work slowly and push out the seam without using a sharp tool that could damage the backing.
- Add one twist. This single twist gives the finished scarf its infinity shape. Too many twists create an uneven drape and make the ends difficult to align.
- Join the short ends. Bring the ends together so the seam lines sit opposite each other. Clip around the circle and leave a 2-inch turning gap.
- Secure and close. Backstitch at the start and end of the joining seam, turn the scarf through the gap, then hand-stitch the opening closed with small, secure stitches.
The final hand-stitched gap is worth the extra few minutes. Machine-closing the opening often leaves a visible ridge, especially on a high-pile texture. More guidance is available in how to sew with minky fabric without it sliding.
The video below shows the construction sequence visually.
For a more polished machine setup, pair a walking foot with a durable topstitch thread option. The goal isn't decorative stitching. It's a stable seam that won't open when the loop is wrapped and unwrapped.
Troubleshoot Common Minky Sewing Issues
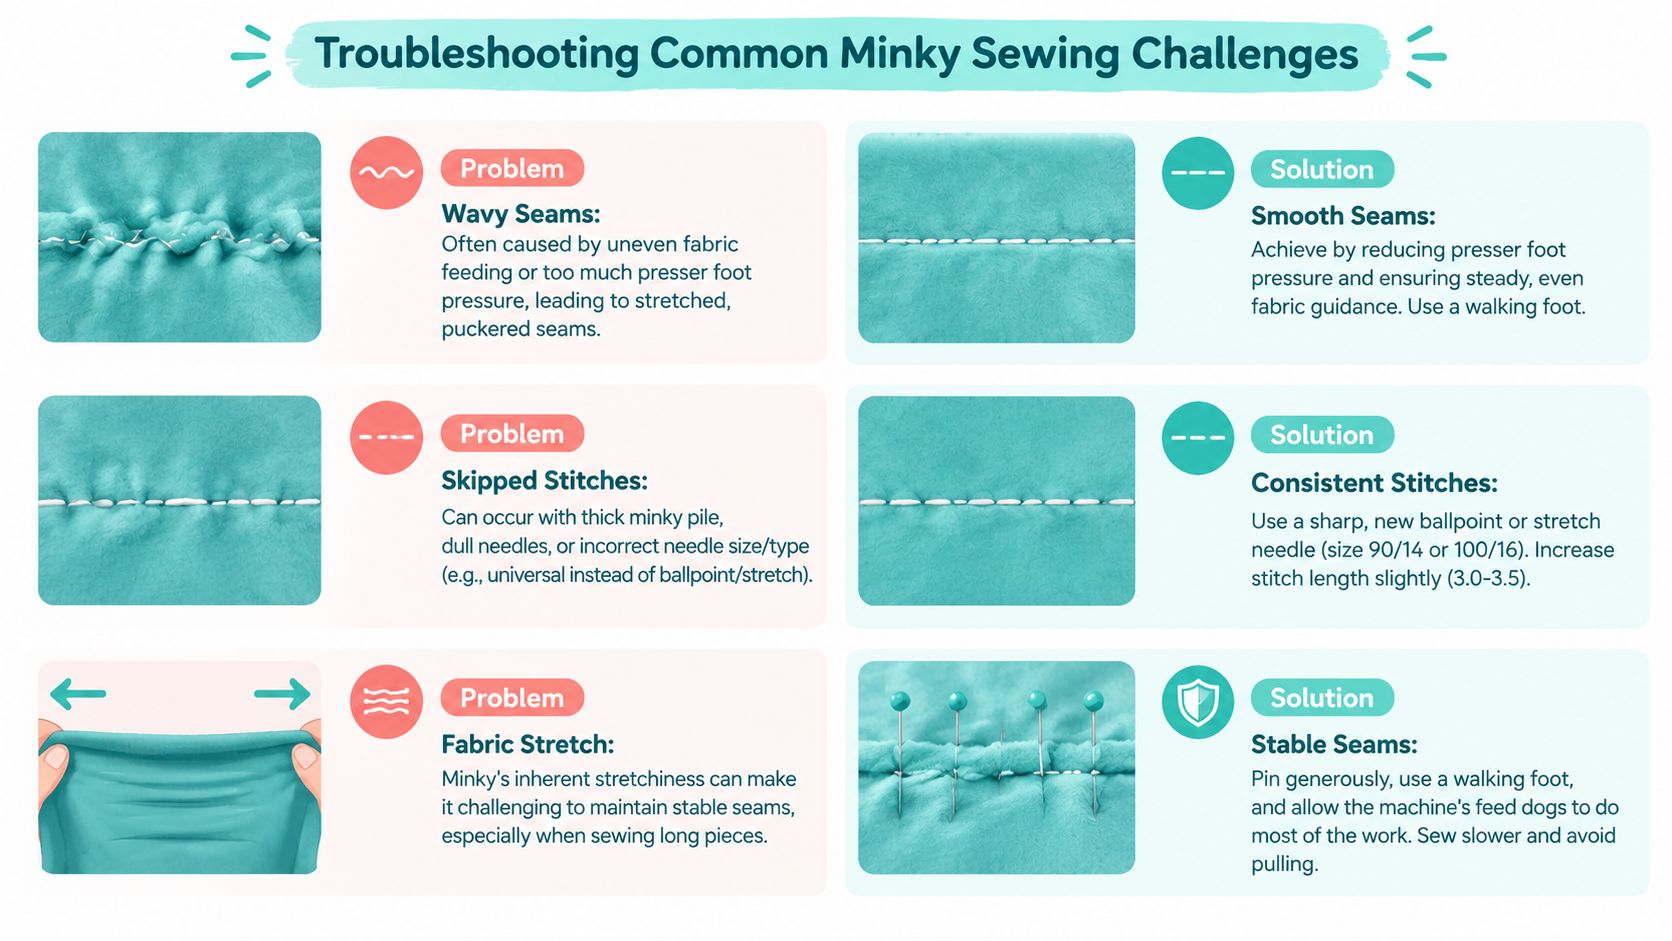
Most failed minky scarves don't fail because the tube construction is difficult. They fail because the fabric stretches between the presser foot and feed dogs, the pile creates drag, or the maker tries to correct alignment by pulling. Seam stability is the central issue, particularly when plush minky is sewn against a more stable fabric.
Why do minky seams turn wavy?
A wavy seam usually means the layers fed at different rates. Excessive presser-foot pressure can compress the pile and drag the upper layer, while pulling the fabric changes the length of the seam as you sew.
Reduce presser-foot pressure if your machine allows it, place the minky against the feed dogs, and use a walking foot to help both layers advance more evenly. Sew slowly enough to watch the edge, but don't stop repeatedly to force the fabric flat. The machine should do most of the feeding.
How can you prevent skipped stitches?
Thick pile can interfere with needle penetration, especially if the needle is dull or poorly suited to stretch fabrics. Install a fresh ballpoint or stretch needle, selecting size 90/14 or 100/16 when the pile and backing require additional clearance, then test on a scrap.
Increase the stitch length slightly to 3.0 to 3.5, and check that the thread is seated correctly. If the machine still skips, inspect the needle for damage and reduce the number of layers under the foot at the problem area.
Should you sew minky to minky or add cotton?
Minky-to-minky produces the softest, most unified result, but it also creates more pile and stretch at the seam. A cotton lining can add stability and reduce bulk in some designs, yet the different fabrics may feed at different rates and create distortion if you don't clip carefully.
For a straightforward scarf, minky-to-minky is usually the cleaner choice when you use a walking foot, longer stitch, and controlled handling. A lining becomes more useful when you want reversibility, a lighter drape, or a less plush surface against the neck. See how to prevent fabric pilling for maintenance considerations that matter when the scarf will be worn often.
Machine rule: If the seam starts to wave, stop pulling first. Change the feeding setup before changing the pattern dimensions.
Explore Variations and Care Tips
The basic loop supports several practical variations. Add a contrasting lining to make the scarf reversible and give the twist a deliberate flash of color. Stable cotton reduces bulk, but its feeding rate differs from minky, so clip carefully and check alignment as you sew.
A hidden zipper pocket fits neatly into the lining for keys or lip balm. Place it away from the twist, where bulk can affect the scarf's hang. Pom-pom trim adds a playful edge, but keep embellishments light. Heavy trim can pull on the seam and distort the loop.
Which minky texture works for daily wear?
High-pile textures such as Luxe Cuddle Hide, Snowy Owl, and Fawn make a warm, dramatic accessory. Their pile can crowd the twist and make topstitching less precise. Lower-pile Cuddle is usually easier for daily wear because it folds more readily and adds less bulk around the neck.
Keep the nap direction consistent in every variation. Reversible designs require extra checking, since the surface should look intentional on both sides, not merely correct on the outer layer. Mark the nap on the fabric backing before cutting, then compare both layers before joining them.
How should you wash a minky infinity scarf?
Treat the finished scarf gently. Wash fleece-like polyester plush fabric in cold water, below 30°C, on a gentle cycle. Use low heat only for machine drying, since high heat can contribute to pilling, shrinkage, and static. Air drying is the safest option when practical, and fleece care guidance supports this low-impact routine.
- Use mild detergent: Avoid harsh treatment that can flatten the surface.
- Skip high heat: Low heat or air drying protects the plush texture.
- Restore the nap: Once dry, shake the scarf gently and smooth the pile in its natural direction.
- Store loosely: Avoid compressing the loop under heavy items.
Faux-fur-related shopping interest can change with the seasons. The linked sewing discussion on seasonal faux-fur search patterns supports planning scarf inventory and photography around colder-weather demand, without relying on unsupported search figures. A quick, giftable design remains useful when interest shifts during the year.
Wrap Up and Next Steps
A smooth minky infinity scarf comes from disciplined preparation: keep the nap aligned, cut from the backing, sew with a controlled 3/8-inch seam allowance, and close the turning gap by hand. OPN Quilting offers curated Shannon Cuddle and Luxe Cuddle textures, along with a Mail-in Longarm service for quilters who want professional finishing on larger projects.
If you photograph your finished scarf for a shop listing or gift portfolio, this guide to consistent product imagery can help you present texture and drape consistently. Share your finished scarf, then explore OPN's quilt backing options for your next project.
Use the Luxe Cuddle Collection to choose a texture, Book Your Longarm Service Today when your quilt needs finishing, and Get 15% Off Your First Order when you're ready to purchase.
On Pins & Needles Quilting Co. offers Shannon Cuddle and Luxe Cuddle fabric, minky scarf kits, finished scarves, and Mail-in Longarm quilting for projects that need a polished finish. Visit On Pins & Needles Quilting Co. to shop plush fabric and turn your next minky infinity scarf pattern into a professional-looking gift.