

You're midway through cutting borders for a minky quilt, the ruler slips a fraction, and the strip that should've matched its partner doesn't. The Fiskars Rotary Cutter and Ruler Combo solves that specific problem by attaching the cutter to the ruler on a rail, so you measure, align, and cut in one setup without holding two separate tools steady at once. That sounds simple, and for long straight work it is faster.
It isn't faster for everything, though. Plush, stretchy soft fabric shifts under pressure, narrow pieces expose the limits of an attached ruler, and curves need a free cutter. We cut a lot of Shannon Cuddle and Luxe Cuddle at our tables, so we'll walk through where this combo earns its place, where it frustrates, and how we adapt it for minky.
What Is the Fiskars Rotary Cutter and Ruler Combo
Think of it as a measuring ruler with its own cutter riding along one edge. You position the ruler on your fabric, line up the grid with an edge or fold, then slide the cutter along the integrated rail instead of running a loose rotary cutter against a ruler you're also trying to hold still. Fewer moving parts in your hands means fewer chances for the ruler to creep mid-cut.
That single change alters your workflow more than you'd expect. With separate tools, one hand anchors the ruler while the other pushes the cutter, and any shift in the anchoring hand shows up in the strip. Here, downward pressure on the ruler and forward pressure on the cutter happen through the same unit, which is why beginners often get straighter first strips with it.
How Is It Different From a Separate Ruler and Cutter
A separate setup gives you freedom. You can swap ruler sizes, angle a small square anywhere on the fabric, or trace around templates. The combo trades that freedom for repeatability on the cuts quilters make most often, long strips and borders where consistency matters more than maneuverability.
- Separate tools: You choose any ruler for any job, cut curves, and reposition quickly for short or intricate pieces.
- The combo: You give up some repositioning speed, but the blade path is fixed relative to the measurement, so strip after strip comes out the same width.
- Your hands: Instead of splitting attention between holding and cutting, you focus on stabilizing one tool and making one controlled pass.
Neither setup replaces the other completely. Most of us who like the combo still keep a standalone cutter and a few acrylic rulers within reach, because patchwork involves plenty of small trimming that a long attached ruler handles awkwardly. The combo is a specialist for volume straight cutting, not a universal replacement.
What Should You Expect From the Learning Curve
Your first few cuts will feel different, not difficult. The cutter travels on its rail, so you push along a set track rather than steering freely, and that constraint takes a couple of strips to trust. Once you stop trying to steer, the tool does the guiding and your job narrows to placement and pressure.
If your strips have been drifting because your ruler hand tires before your cutting hand does, a guided rail removes the exact variable that's been causing the drift.
Set it up on a flat, hard surface, not a padded ironing board or a wobbly folding table. An unstable base lets the whole unit flex, and flex shows up as a wavy edge no matter how good the tool is. Get the surface right first, then judge the tool.
Key Features That Make This Combo Stand Out
The core specification tells most of the story. The Fiskars Rotary Cutter and Ruler Combo product listing describes a 45 mm spring-action rotary blade attached to a 6 x 24 inch ruler, creating a 144-square-inch measuring and cutting surface in one tool. That long reach is the point. It covers strip and border cutting across folded yardage without stopping to realign halfway through a cut.
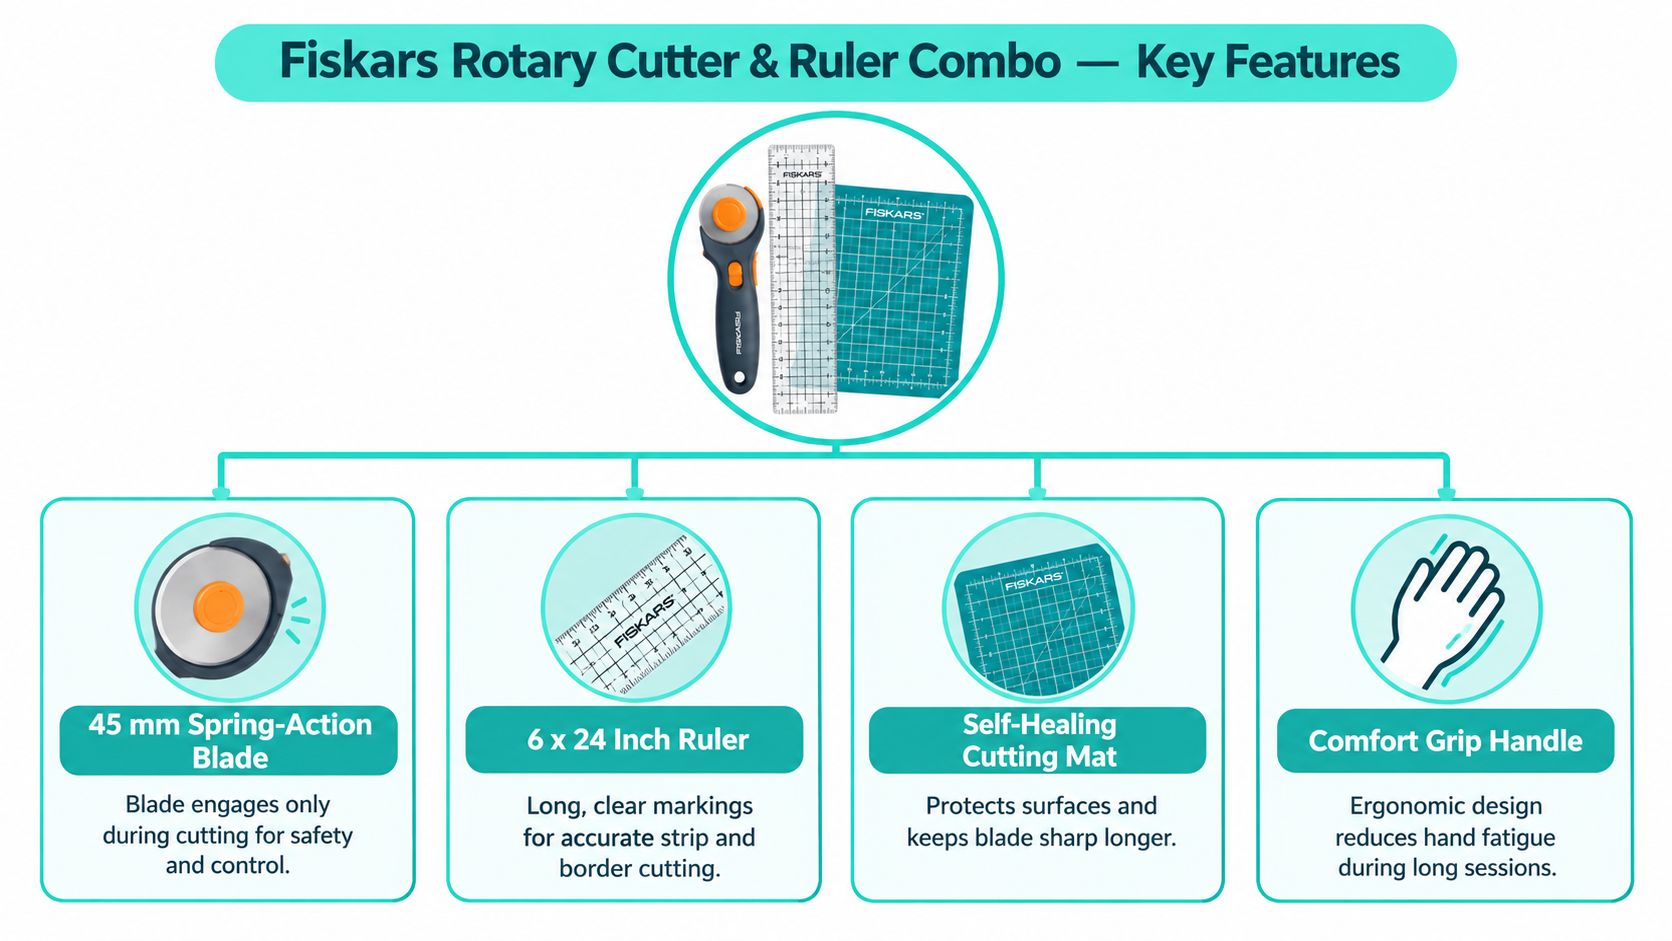
The markings do quiet but important work. That same listing notes highlighted numbers and 30-, 45-, and 60-degree guide lines, so you can set up bias and diagonal cuts from the grid itself. On busy prints, highlighted numbering saves you from squinting and miscounting, which is where most strip errors start.
Why Do Double-Sided Markings Matter
The ruler markings are printed on both sides, making the tool usable by right- and left-handed cutters without reading numbers upside down or cutting across your body. Left-handed quilters usually adapt to right-handed tools and absorb the awkwardness. Here you flip the tool and cut from your natural side, which keeps your wrist straighter and your fingers farther from the blade path.
Direction matters on minky too. Pile has a nap, and sometimes you need to approach a cut from a particular side so the fabric isn't dragged against its grain. Being able to work from either direction without losing readable markings gives you that choice.
What Does the Rail Actually Do
Beyond guiding the blade, product listings describe an integrated rail intended to reduce lint accumulation during fabric cutting. Anyone who cuts plush quilt textures knows lint is not cosmetic. Packed fibers around a blade housing increase drag, drag invites extra pressure, and extra pressure pushes fabric out of square.
- Guided travel: The blade follows the rail, so lateral wobble mostly disappears on long cuts.
- Lint management: Less buildup around the cutting path means more consistent passes through a cutting session.
- Carrying handle: Current descriptions identify a handle for moving the tool, which sounds trivial until you're carrying a long ruler across a crowded cutting table.
The tool weighs approximately 0.55 kg, or about 1.21 pounds, per product listings. That's light enough for repeated repositioning during a strip-cutting session, but it also means the tool won't hold itself down. Your stabilizing hand still does real work, a point we'll return to with slippery fabrics.
If angled work is new to you, our guide to using a 45-degree ruler for accurate angled cuts walks through reading those diagonal lines before you commit fabric to them. Practice the alignment on quilting cotton first. Cotton forgives, minky records every hesitation in its pile.
Safety Features and How to Use Them
Rotary blades cut fabric effortlessly, which means they cut skin effortlessly too. The combo's main protection is mechanical. Empress Mills' description of the Fiskars combo cutter explains a spring-activated blade that engages during use and retracts when pressure is released, so the edge isn't continuously exposed while you carry or reposition the tool.
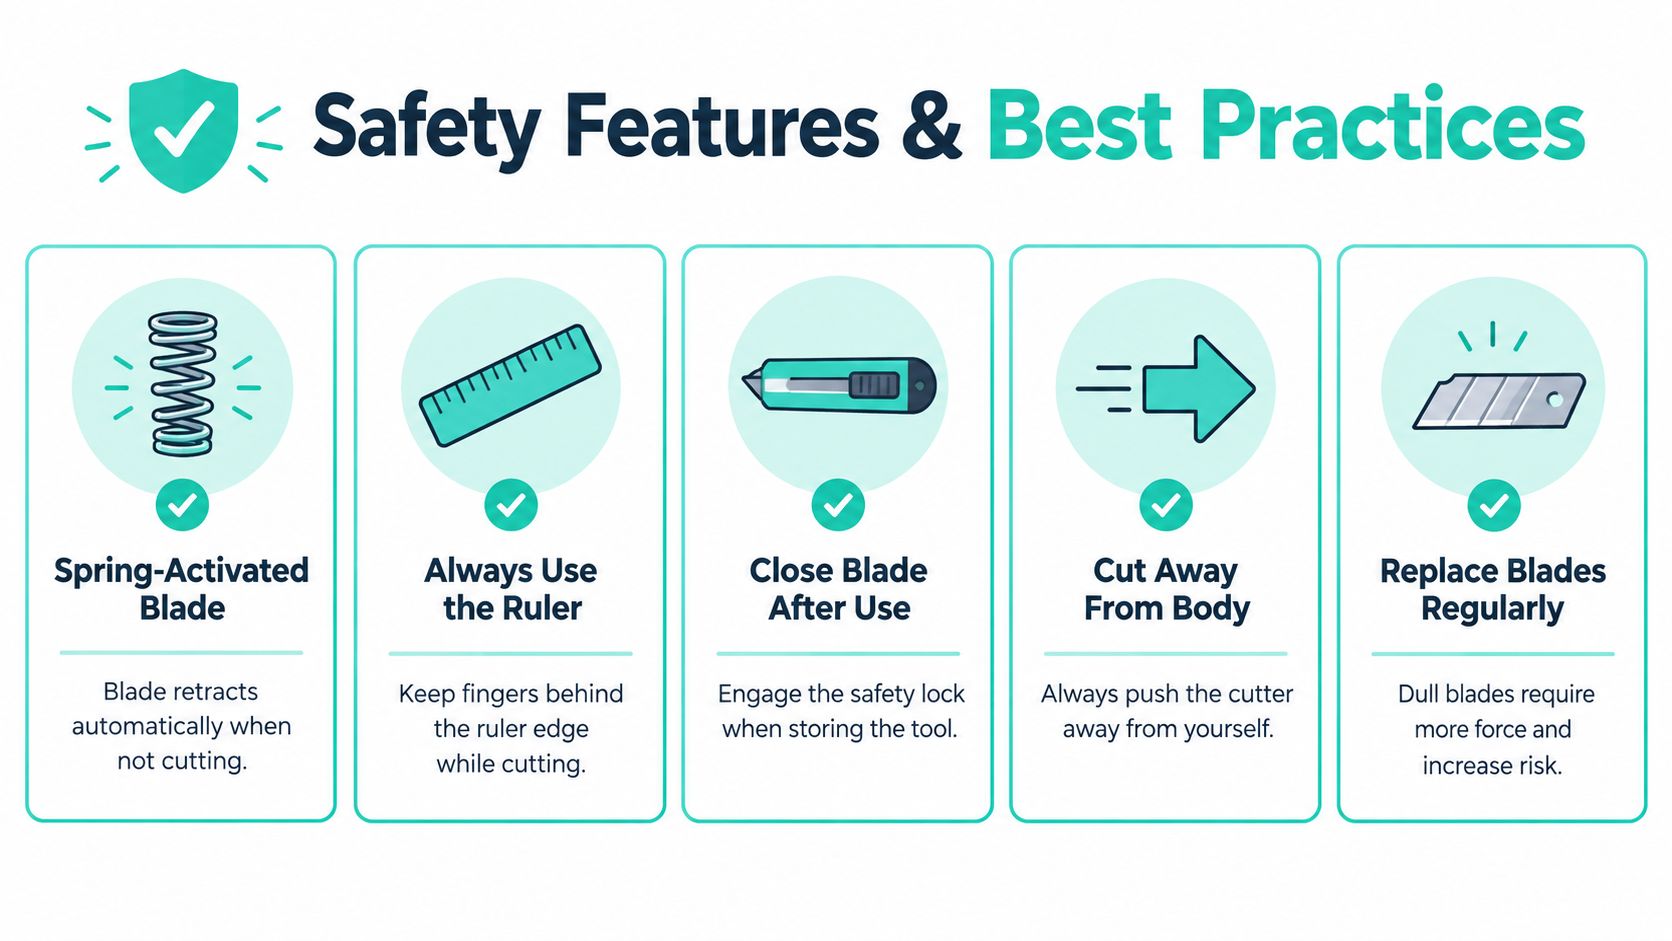
That retraction reduces accidental contact, but it doesn't make the tool safe to wave around. The blade engages the moment you press to cut, so your habits around placement matter as much as the mechanism. Treat the spring as a backup, not as permission to relax.
How Do You Change the Blade Without Touching It
Product descriptions also identify a no-touch magnetic blade-change system designed to remove and replace blades without directly handling the sharp portion, and the system can store used blades. Blade changes are when experienced quilters get nicked, usually while fumbling a loose blade over a cluttered table. Removing fingers from that moment is a genuine safety gain, not a marketing flourish.
Store used blades in the system rather than dropping them loose into a drawer or trash bin. A dull blade is still sharp enough to cut whoever reaches in later. Label the storage if other people share your sewing space.
What Habits Keep Your Fingers Safe
Safe operation still requires a few essential routines.
- Stabilize first: Place the ruler on a stable surface and confirm it isn't rocking before you engage the blade.
- Keep fingers behind the rail: Your stabilizing hand stays behind the rail or on the handle, never alongside the blade path.
- Engage only when ready: Release the safety mechanism only when the tool is positioned and you're about to cut.
- Lock before setting down: Lock or cover the blade every time the tool leaves your hand, even for a few seconds.
Cutting multiple layers raises the stakes. More layers demand more pressure, and more pressure increases the chance of the ruler slipping if it isn't firmly stabilized. If you feel yourself pushing hard enough that your shoulders are involved, stop and check whether the blade has dulled, because forcing a dull blade is how slips happen.
Our standing rule: If a cut needs a second forceful pass, change the blade or reduce the layers. Never solve resistance with muscle.
For a fuller grounding in grip and body position, see our walkthrough on how to use a rotary cutter safely and accurately. Good mechanics protect accuracy and fingers at the same time. The two aren't separate concerns.
Best Uses in Quilting and Fabric Work
This tool shines on the unglamorous, repetitive cutting that determines whether a quilt top goes together smoothly. You're cutting a stack of identical strips for piecing, borders for a throw, or long sections of backing, and every strip needs to match the last. That's exactly the workload the design targets.
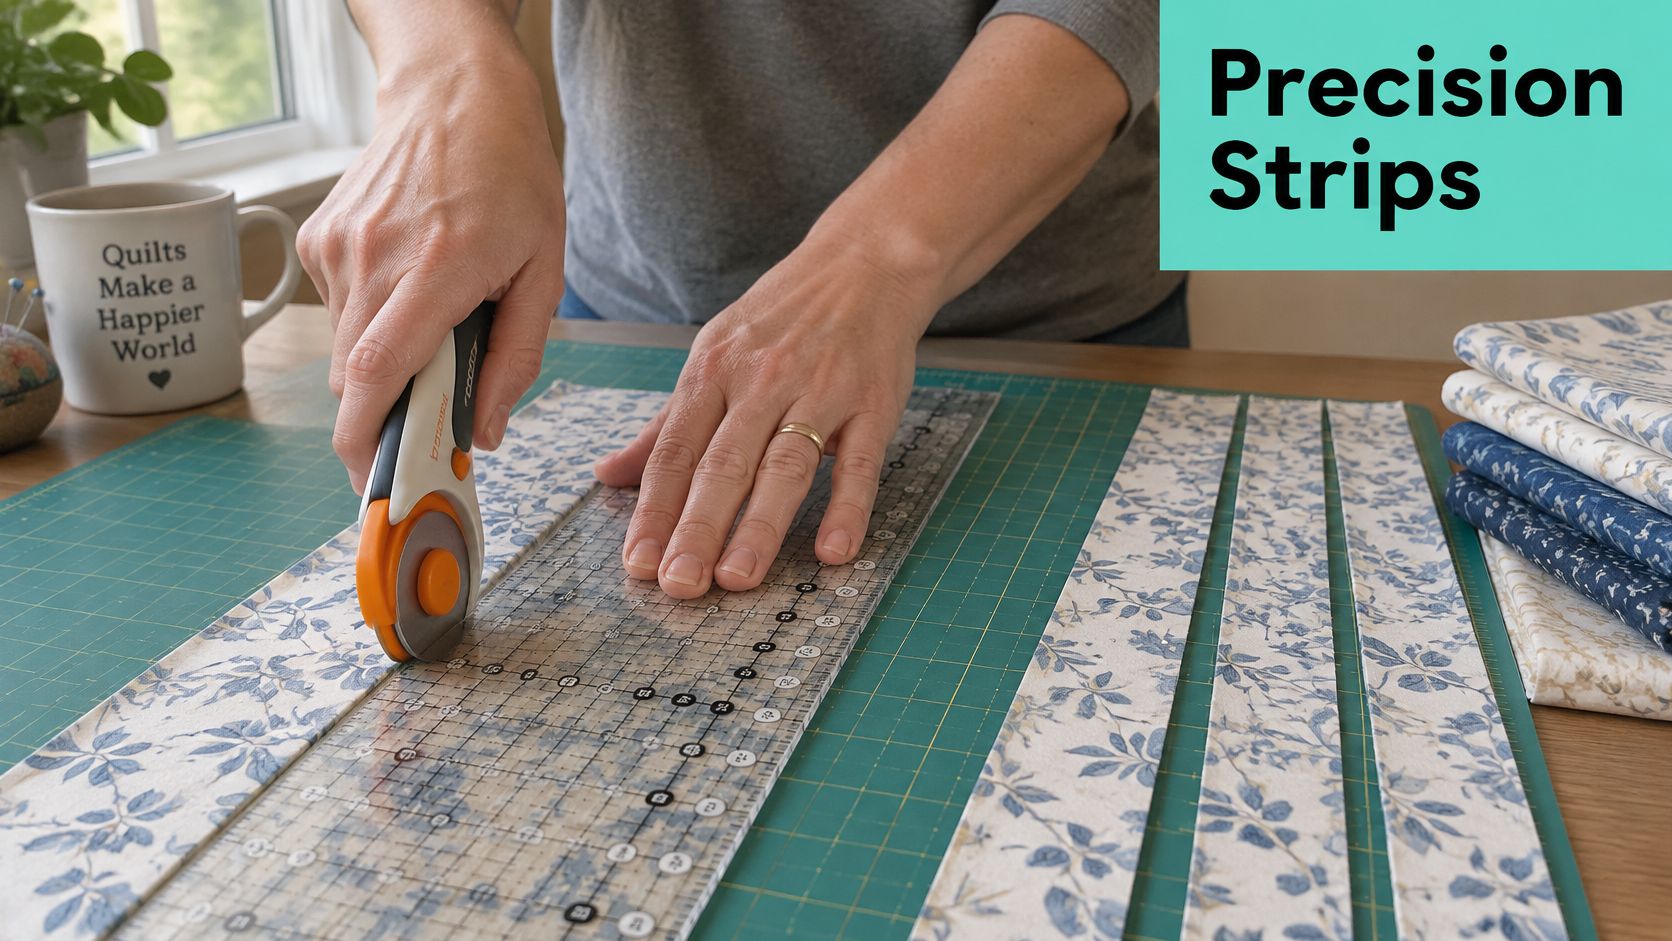
Strip piecing is the clearest case. You align the grid to your fabric edge once, cut, slide the ruler over by your strip width, and cut again. Because measurement and cutting happen in the same setup, you skip the separate step of checking a loose ruler against the cut edge each time, and your strip widths stay consistent across a whole cutting session.
Which Cuts Does the Grid Handle Best
The Fiskars rotary blade listing describes a built-in ruler designed for straight and angled quilting cuts, with a grid for strips, squares, borders, and rectangular pieces, plus 30-, 45-, and 60-degree lines supporting common bias and triangle layouts. In practice, that covers a large share of everyday quilt prep.
- Strips and borders: Align, cut, shift, repeat, with the grid confirming width each time.
- Squares and rectangles: Cut a strip first, then crosscut it into units using the perpendicular markings.
- Bias and triangles: Use the angled lines against a fold or straight edge to establish the diagonal before cutting.
- Long backing sections: Trim wide fabric to length in one pass instead of stitching together two shorter cuts that never quite match.
The long format also corresponds closely to the width of many quilting fabrics. Folded yardage sits under the ruler with room to spare, so you work across substantial sections in a single setup. Fewer setups means fewer opportunities to introduce a half-degree error that compounds across a quilt top.
How Many Layers Can You Cut at Once
The blade is described as suitable for cutting multiple layers of fabric, although the exact number depends on fabric thickness, pressure, and mat condition. Keep that in mind. Several layers of quilting cotton behave nothing like several layers of plush minky, where pile compresses unevenly and the bottom layer can shift.
Watch the guided cutting motion in action before you stack layers high.
A flat, hard work surface and a self-healing cutting mat remain necessary to protect your table and maintain consistent blade travel. A worn mat with deep grooves will steer any blade, guided or not. If your cuts start curving, inspect the mat before blaming the cutter.
For backings, this is where wide fabric changes the job entirely. Stop struggling with bulky seams in your quilt backs when one clean lengthwise trim on extra-wide minky gives you a seamless finish. If you're new to the material itself, our explainer on what Cuddle minky fabric is and how it behaves covers pile, stretch, and backing basics.
Before you order fabric for your next backing: Get 15% off your first order and free U.S. shipping on orders over $70 when you stock up on Shannon Cuddle and Luxe Cuddle yardage.
How to Choose the Right Combo for Your Needs
Fiskars makes this concept in more than one shape, and shape should drive your decision. Homestead Cotton's overview of the Fiskars rotary cutter and ruler combo notes that a Fiskars sewing catalogue lists both a 45 mm rotary cutter combined with a 6 x 24 inch ruler and a second version paired with a 12 x 12 inch ruler. Both provide 144 square inches of nominal ruler area, so the difference isn't size. It's geometry.
The long version offers 24 inches of reach for strips, borders, and long fabric cuts. The square version offers a compact workspace for blocks and smaller pieces, where you're squaring units and trimming rather than slicing yardage. Buying by area would miss the point entirely.
How Do the Two Formats Compare Side by Side
| Feature | 6 x 24 Inch Version | 12 x 12 Inch Version |
|---|---|---|
| Nominal ruler area | 144 square inches | 144 square inches |
| Reach | 24 inches along the long edge | Compact square footprint |
| Strongest work | Strips, borders, long yardage cuts | Blocks and smaller pieces |
| Workspace need | Long mat and table space | Smaller cutting area |
| Weak spot | Cumbersome for tiny trimming | Stops short on long borders |
Match the format to your last five projects, not your aspirational ones. If most of your cutting is strip sets, sashing, and backings, reach wins. If you spend your time trimming pieced blocks to size, the square workspace will feel less like steering a plank around small units.
When Should You Skip a Combo Altogether
Be candid about the trade-off. An integrated ruler removes measuring and alignment steps, but it also removes flexibility. If your work leans toward intricate patchwork, appliqué shapes, or garments with curved pattern pieces, separate tools will serve you better as your primary setup, and a combo becomes an occasional strip-cutting helper at most.
Workspace matters too. A long combo needs a mat and table that accommodate its full length without an overhang that flexes mid-cut. Measure your actual cutting surface before ordering, including the room your hands need beyond the tool.
Whatever you choose, technique carries more weight than gear. Our guide on how to improve cutting and piecing accuracy covers the habits that make any ruler perform better. Buy the format that fits your projects, then invest your practice time in placement and pressure.
Practical Tips for Accurate Cutting With Minky and Cuddle
Minky breaks the assumptions cotton taught you. The pile compresses under a ruler, the knit backing stretches, and the whole piece wants to glide on its own fibers. A guided cutter helps by holding a fixed blade path, but only if you stabilize the fabric before you start.
Work from the wrong side when you can. Marking and aligning against the smooth knit backing gives you truer lines than trying to read a grid through plush pile like Hide, Snowy Owl, or Fawn, where the texture itself hides the markings. Smooth the fabric flat without stretching it, because a stretched cut relaxes into a shorter, wavy piece once you pick it up.
How Do You Keep Plush Fabric From Shifting
Stabilization is a sequence, not a single trick.
- Rest the fabric flat: Let folded minky relax on the mat so creases ease out before you place the ruler.
- Smooth, don't pull: Flatten with open palms moving outward, never dragging the piece taut.
- Weight the far end: Pattern weights or a spare ruler beyond your cut line stop the yardage from creeping as the blade advances.
- Press straight down: Anchor through the ruler with firm vertical pressure, since sideways pressure on pile just slides the top layer.
- Cut in one steady pass: Hesitation lets compressed pile rebound unevenly, which can nudge the fabric before you finish the cut.
Shake cut pieces outdoors or over a bin, and expect loose fluff along fresh edges. That's the cut pile releasing, not your fabric fraying apart. Our step-by-step on how to cut minky fabric without the mess covers cleanup and edge management in more detail.
When Is the Combo the Wrong Tool
Here's the boundary product pages don't draw for you. Sky Warrior Books' comparison of fabric cutting tools for quilters reports limitations for cuts narrower than approximately 1.5 inches and concerns that the ruler may feel less sturdy than expected. That matches our bench experience. Below that width, there isn't enough ruler sitting on the strip side to stabilize plush fabric, and the piece rolls or shifts.
- Use the combo: Long straight strips, borders, backing trims, and angled cuts on larger pieces.
- Switch to separate tools: Sub-1.5-inch strips, narrow binding, intricate patchwork, curves, and pieces needing frequent repositioning.
- Watch for flex: If you feel the ruler bow under heavy pressure on thick Luxe textures, lighten up and make a second gentle pass instead.
A word on hand strength. The combo is often marketed as easier for users with weaker hands, since the rail guides the blade, but available coverage doesn't provide measured force or fatigue comparisons against ergonomic cutters or scissors. What we can say from use is that guiding removes steering effort, while downward stabilizing pressure remains, and a dulling blade increases the force any cutter demands. Keep blades fresh and let the tool's sharpness do the work.
Cut one test strip from a scrap of the exact texture you're using, measure it after it relaxes, and adjust your placement before touching the good yardage.
Final Thoughts and Where to Buy
The Fiskars Rotary Cutter and Ruler Combo earns its space on our cutting tables for one job done well, repeatable long straight cuts with measurement built in. It weakens on narrow strips, small blocks, and curves, where separate tools remain faster and more precise. Knowing that boundary is what turns a decent purchase into a tool you'll enjoy using.
On minky, your results will hinge on stabilization more than on the cutter itself. Smooth without stretching, weight the far end, anchor straight down, and switch tools without guilt when pieces get small. Those habits transfer to every soft fabric you'll ever cut.
At On Pins & Needles Quilting Co., we stock Shannon Fabrics Cuddle and Luxe Cuddle textures including Hide, Snowy Owl, and Fawn, extra-wide backings for clean finishes, and curated cuts for blankets and gifts. Our Mail-in Longarm service finishes your quilt tops edge to edge with batting and thread included, and we're backed by hundreds of verified reviews from quilters who trust our cutting accuracy.
Shop the Luxe Cuddle Collection for your next backing, use your 15% first-order discount, and remember free U.S. shipping on orders over $70. When your top is pieced, Book Your Longarm Service Today and let us handle the finishing.
Cut your strips straight the first time with fresh Shannon Cuddle yardage, extra-wide backings, and mail-in longarm finishing from On Pins & Needles Quilting Co. Get 15% off your first order, free U.S. shipping over $70, and shop the Luxe Cuddle textures your next quilt deserves today.