You’ve probably got fabric on the table, a free pattern tab open, and one practical question in front of you. The best rail fence quilt patterns free options are the ones built around simple strip piecing, fast block assembly, and a finish that matches how the quilt will be used, especially if you want a soft minky back.
A rail fence quilt is one of the most forgiving projects to start and one of the easiest to make look polished. The construction is straightforward, the layout can shift from traditional to modern just by rotating blocks, and it’s an excellent choice when you want a fast finish without settling for a boring quilt.
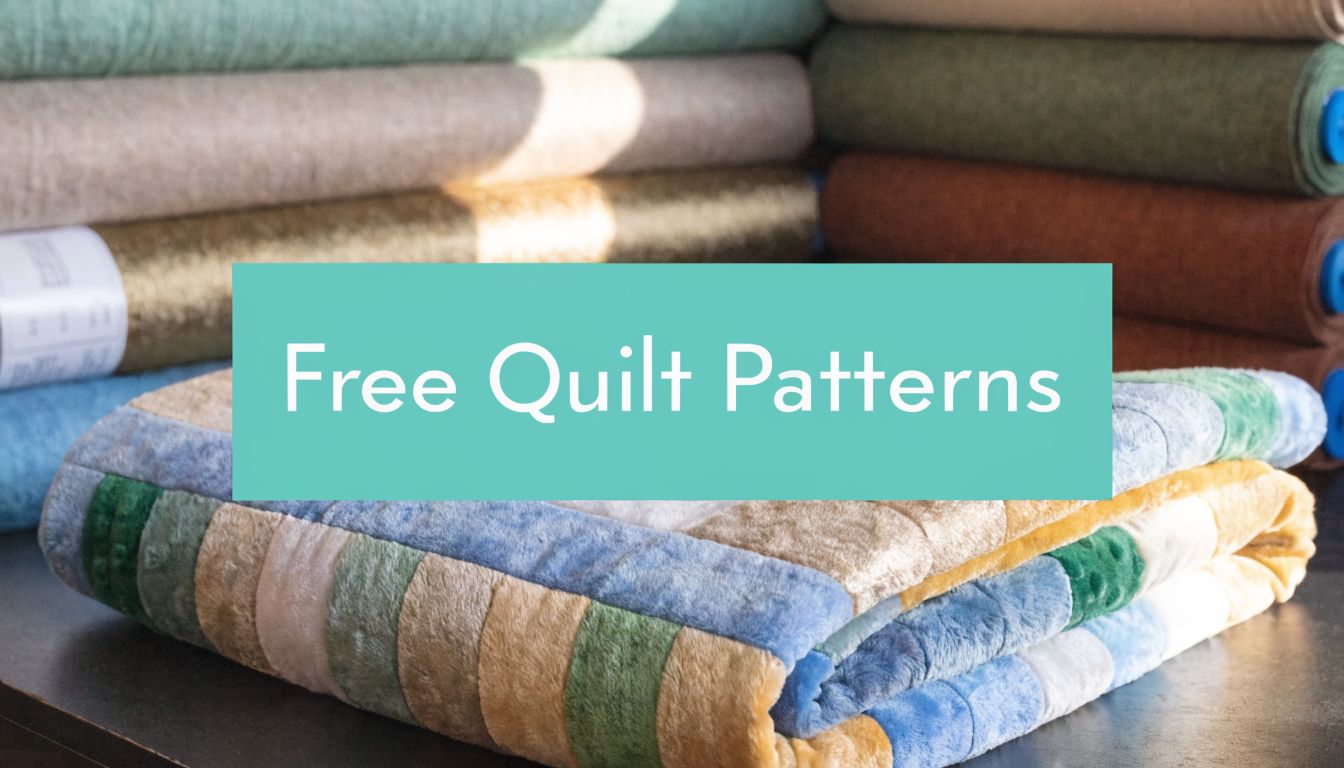
Your Guide to Free Rail Fence Quilt Patterns
If you want a pattern that’s easy to cut, easy to sew, and hard to mess up, rail fence quilt patterns free downloads and tutorials are where I’d begin. The block dates back to the 1800s and was inspired by split-rail fences seen across the American countryside, which helps explain why it still feels so grounded and useful today, as noted in this traditional quilt block history overview.

Why does this pattern work so well
Rail fence quilts are built from strips sewn together into blocks. That sounds basic, and it is, but that simplicity is exactly why the pattern has lasted for nearly two centuries.
You don’t need specialty piecing skills. You need accurate cutting, a dependable quarter-inch seam, and enough contrast in your fabrics to let the layout show.
What makes a free rail fence pattern worth using
A good free pattern should do three things well:
- Keep cutting simple so you can move quickly without constant rechecking
- Use repeated units that let you chain piece efficiently
- Leave room for layout changes because block rotation does most of the design work
Rail fence is one of those patterns that rewards clean basics. If your strips are straight and your seams are consistent, the quilt looks intentional very quickly.
That’s also why this pattern works for both first quilts and weekend gifts. It doesn’t ask you to master curves, set-in seams, or fussy points. It asks you to be steady.
What Fabric Do You Need for a Rail Fence Quilt?
A rail fence quilt usually starts with an easy fabric pull and ends with a backing decision that affects the whole finish. I see quilters choose their top fabrics in minutes, then lose time later because the backing was an afterthought.
For the quilt top, quilting cotton gives the best control. Rail fence blocks depend on straight strips, accurate subcuts, and stable seams. Cotton handles all three well. Plush, stretchy, or loosely woven fabrics can work in other projects, but they fight this one.
A reliable mix is three values rather than three exact colors:
- Light for contrast and breathing room
- Medium to connect the palette
- Dark to show block rotation clearly
That value contrast matters more than chasing a perfect print collection. If the lights, mediums, and darks read clearly from a few feet away, the layout will hold together.
Precuts also make sense here. Jelly Roll strips keep the cutting simple and reduce waste, especially if speed matters. Yardage gives more control over color balance and scale, so I still prefer it when I want a more intentional finish.
How much fabric should you plan for
The exact amount depends on your block size and layout, so I plan from the pattern first, then buy backing after the top size is settled. That keeps you from guessing and ending up short once borders or size changes are added.
For the top, expect to need enough strip-friendly fabric to repeat the same few values across the quilt. For the back, buy with quilting and shrinkage in mind, not just the top measurement.
That is even more important if you want a plush back.
Why backing deserves more thought
Backing fabric changes how the quilt feels, how it feeds through the machine, and how polished the finished piece looks. Cotton backing is familiar, flat, and easy to press. Minky backing adds warmth and a richer hand, but it asks for better preparation and calmer handling during quilting.
If you are still deciding, this guide to what cuddle minky fabric is will help you choose the right texture and weight.
I recommend premium minky when the quilt is meant to be used hard, gifted, or mailed to a finisher. It turns a simple rail fence top into a quilt people keep on the couch, not in the closet.
Which backing widths make practical sense
Wide backing saves work. Fewer seams in the back means less bulk, less matching, and fewer places for the quilt to shift while it is being finished.
| Quilt Size | Finished Dimensions (Approx.) | Top Fabric Planning | Unpieced Minky Backing 44"/60" | Unpieced Minky Backing 90"/110" |
|---|---|---|---|---|
| Baby | Baby-size project | Small yardage or precuts work well | Works for many baby quilts with careful planning | Gives extra drape and trimming room |
| Lap | Around 48x60 inches | Jelly Rolls or cut yardage both work | May require piecing depending on quilting allowance | Usually the cleaner choice |
| Throw | Throw-size project | Plan by block count and border width | Often less convenient if you want fewer seams | A practical option for a smooth back |
| Queen | Queen-size project | Full yardage planning is usually easier | Back seams are hard to avoid | The better choice if you want one wide backing panel |
What I choose in the shop
For a classic everyday quilt, I use quilting cotton on top and a low-pile or gently textured minky on the back. It keeps the piecing crisp and gives the finished quilt that soft, weighted feel customers ask for again.
For a gift quilt, I often choose richer textures such as Hide, Snowy Owl, or Fawn. Those backings cost more than basic cotton, and they do require more care during quilting, but the result feels finished in a different way. If the quilt is headed to a professional mail-in quilting service, premium wide minky is often the cleaner path because it reduces pieced-backing issues before the quilt ever reaches the frame.
How Do You Cut Strips for a Rail Fence Quilt?
A rail fence quilt can look easy right up until the blocks refuse to line up. In my shop, that problem usually starts on the cutting mat, not at the sewing machine.
For the standard version, cut 2.5-inch strips. That size works well with Jelly Rolls, makes block math straightforward, and gives you enough width to sew accurate strip sets without fussing over tiny pieces.
Start with fabric that is pressed flat and fully supported on the mat. A wrinkle, a bowed fold, or a dull blade can throw off every strip you cut after it. Rail fence blocks are repetitive, so one small cutting error tends to repeat across the whole quilt.
What width should you cut
Use 2.5 inches if you want the classic look and the easiest assembly. If you are cutting from yardage instead of precuts, square the fabric first so your ruler starts from a true edge.
I cut fewer layers at a time than many beginners expect. That takes a little longer, but the strips stay straighter from selvage to selvage, and the subcut pieces match later without extra trimming.
How to keep strips accurate
A long acrylic ruler helps, especially if you are cutting width-of-fabric strips. Set the ruler down once, check that the horizontal lines stay parallel to the fold, and make the cut without dragging the ruler sideways.
My usual sequence is simple:
- Trim one clean starting edge
- Align the ruler at 2.5 inches
- Hold the ruler firmly and cut in one steady pass
- Restack the strips without stretching the edges
Accuracy here saves time later. If the strips vary, the pieced units vary, and then the quilt top starts fighting you at every seam.
Where quilters usually lose accuracy
The two trouble spots are cutting drift and seam allowance. If the strip is a little wide or narrow, and the seam is not a true scant quarter inch, the finished unit comes out off-size. By the time you have sewn several blocks, that difference is hard to hide.
That is why I test one strip set before cutting an entire quilt. Sew three strips together, press them, subcut one unit, and measure it. If the size is off, adjust before you commit the whole stack. Good cutting and a consistent seam allowance work together, and the thread choice can help keep those seams clean and flat, especially if you are sewing long strip sets. OPN's guide to the best quilting thread for accurate piecing covers that in more detail.
A quick cutting checklist
- Fabric is pressed flat before cutting
- One edge is squared before measuring strip width
- The ruler lines match the grain or fold
- The blade is sharp enough to cut cleanly
- Only a manageable number of layers are stacked
- Cut strips are stored flat so they do not warp
Clean cutting matters even more if you plan to add a premium minky backing and send the quilt out for mail-in finishing. A square, accurate top loads better on the frame, quilts more smoothly, and gives you a cleaner final result.
How Do You Assemble Your Rail Fence Quilt Top?
Once the strips are cut, this quilt starts moving fast. That’s the appeal.

How should you pair the strips
Start with groups of three strips. A light, medium, and dark combination usually gives the best definition.
Sew the first two strips right sides together. Then add the third strip to make one strip set.
A practical sequence looks like this:
- Choose contrast on purpose so the rail effect doesn’t disappear
- Use a scant quarter-inch seam to protect finished unit size
- Press consistently either open for flatness or toward the darker fabric to reduce show-through
In one widely used Jelly Roll workflow, sewing three strips into a strip set and then subcutting into 6.5-inch segments creates 6.5x6.5-inch units, with four units per set in the example method. The guide also notes that pressing seams open can create a flatter result, while pressing toward the darker fabric can reduce bulk and help nesting in later assembly, all detailed in this best quilting thread article.
What helps the blocks stay square
Chain piecing helps speed, but pressing controls accuracy. If the strip set bows, the blocks won’t sit flat no matter how neatly you sew rows later.
Trim one end of each strip set before subcutting. Don’t skip that. A crooked starting edge gives you a whole stack of slightly off segments.
Practical rule: Press after each seam, then let the strip set rest flat before cutting. Warm fabric shifts more easily than quilters expect.
Later in the process, layout turns matter. Rotating every other block is a traditional approach because the vertical and horizontal changes create movement and make the rails read clearly across the quilt.
This quick visual demo can help if you want to see the sequence in action:
How to assemble rows without fighting the quilt
After subcutting, put blocks on a table or floor before sewing rows together. That pause saves unpicking.
Then sew with intention:
- Match seam intersections instead of tugging blocks into place
- Alternate orientation to create the visual rhythm you want
- Press row seams with care so the quilt top stays flat
What doesn’t work is sewing every block in the same direction and hoping the quilt will look dynamic. Rail fence quilts depend on orientation. The block itself is simple. The arrangement does the heavy lifting.
What Are Some Creative Rail Fence Layout Variations?
Rail fence ceases to be basic. One block can produce several distinct quilts just by rotating it.

Which layouts are easiest to try
The simplest option is a straight set. Every block faces the same direction, and the quilt looks clean, graphic, and quiet.
If you alternate vertical and horizontal blocks, the quilt picks up movement immediately. That often reads as zigzag or stair-step, depending on your value placement.
Four layouts worth testing on the floor
-
Straight set
Good for bold prints or strong color changes. It keeps the eye on fabric rather than motion. -
Zigzag
Rotate every other block and the rails begin to travel across the surface. This is the version many quilters picture first. -
Diagonal flow
Keep the strip direction moving on a slant through multiple rows. It feels more modern and works especially well with ombré or closely related colors. -
Pinwheel effect
Group blocks in fours and rotate them inward. The center creates a secondary motif that looks more complex than it is.
How should you choose a layout
Lay out at least a few rows before committing. Rail fence quilts can surprise you. A combination that looks flat in a stack can wake up once the blocks turn.
Put the blocks farther away than arm’s length when you evaluate. Up close, you see fabric. From a distance, you see the design.
That’s the useful tension with this pattern. The sewing is repetitive, but the layout gives you room to be inventive.
How Do You Add a Minky Backing to Your Quilt?
A rail fence top paired with minky turns a simple quilt into one people reach for every day. It also changes the finishing process. Plush backing has more stretch, more drag, and less forgiveness than quilting cotton, so the best results come from controlling the layers before they ever go under the needle.
What should you do before basting
Keep minky unwashed. Washing first can increase lint and make the cut edges harder to manage.
Lay the backing wrong side up on a large table or clean floor, then smooth it with your hands instead of pulling it tight. Add the batting and quilt top on top of that stack. I like to let minky relax flat for a bit before basting, especially if it came off the bolt with a curl.
What tools work better with plush backing
Minky shifts more easily than cotton, so basting method matters. Safety pins work. Spray baste also works well if you apply it evenly and avoid stretching the backing as you smooth the layers.
At the machine, a few adjustments help right away:
- Use a walking foot to feed the top and backing more evenly
- Lengthen the stitch so the quilting does not disappear into the pile
- Support the quilt's weight on the table or your lap so the backing does not drag
- Guide the layers gently because pushing creates puckers faster with plush fabric
For larger quilts, backing width matters as much as handling. Choosing the right extra wide quilt backing can save you from piecing a bulky seam into an already soft, stretchy back.
Why extra-wide minky is often the better choice
You can piece minky, but it adds another variable to manage. On a rail fence quilt, the front already has strong linear structure. A bulky backing seam can fight that clean look and create one more place for shifting during quilting.
Extra-wide minky keeps the back simpler and usually gives a cleaner finish. That is one reason I recommend it so often for mail-in quilting clients who want the softness of plush fabric without adding avoidable complications.
What doesn’t work with minky
High heat is the fastest way to damage plush backing. Press from the quilt top side when possible, and keep heat low.
Skip the instinct to tug the backing through the machine. Let the feed system do the work. Your job is to keep the layers flat, supported, and square so the quilt finishes smooth instead of stretched out of shape.
How Can You Professionally Finish Your Rail Fence Quilt?
Piecing the top is one skill. Quilting the full sandwich well is another.
That’s especially true when you’ve added a soft backing that can feel heavier, loftier, or just less cooperative under a domestic machine. Small quilts are manageable at home. Larger quilts, or quilts meant as gifts, often benefit from a professional finish.
When should you outsource the quilting
A few situations make that decision easy:
- The quilt is too bulky for comfortable domestic-machine quilting
- The backing is plush and you don’t want drag or shifting
- The project is a gift and you want a cleaner result
- You want edge-to-edge texture without wrestling the layers yourself
Professional longarm quilting is also a good choice when your energy is better spent piecing the next top than forcing yourself through a finishing stage you don’t enjoy.
What should you do before sending a quilt out
Preparation matters. A longarmer can work best when the top is square, threads are trimmed, and backing choices are settled before shipping.
If your binding plan is still undecided, this beginner guide on how to bind a quilt for beginners helps clarify what comes after quilting.
A good finish starts before the quilt reaches the frame. Square tops, clear seams, and a backing that suits the project always make the result better.
For many quilters, mail-in service is the most practical path. It removes the hardest physical part of the process while preserving the handmade top you already built.
Your Next Steps for a Beautiful Quilt
Rail fence quilt patterns free tutorials are worth using because they give you speed without sacrificing design options. The pattern is simple, but it doesn’t have to look plain.
Choose stable cotton for the top, cut carefully, rotate blocks before sewing rows, and give real thought to the backing. If you want a soft quilt people reach for again and again, minky is a strong finish.
For extra prep help before sending off a top, this guide to longarm quilting top 10 quilt prep tips is a smart last stop.
Meta description: Rail fence quilt patterns free guide with cutting, layout, minky backing tips, and finishing help. Get 15% off your first order and free shipping over $70!
URL slug: /blog/rail-fence-quilt-patterns-free
Ready to turn your rail fence quilt into a soft, polished finish? Visit On Pins & Needles Quilting Co. to shop extra-wide minky backing, explore Shannon Cuddle textures like Hide, Snowy Owl, and Fawn, or Book Your Longarm Service Today.