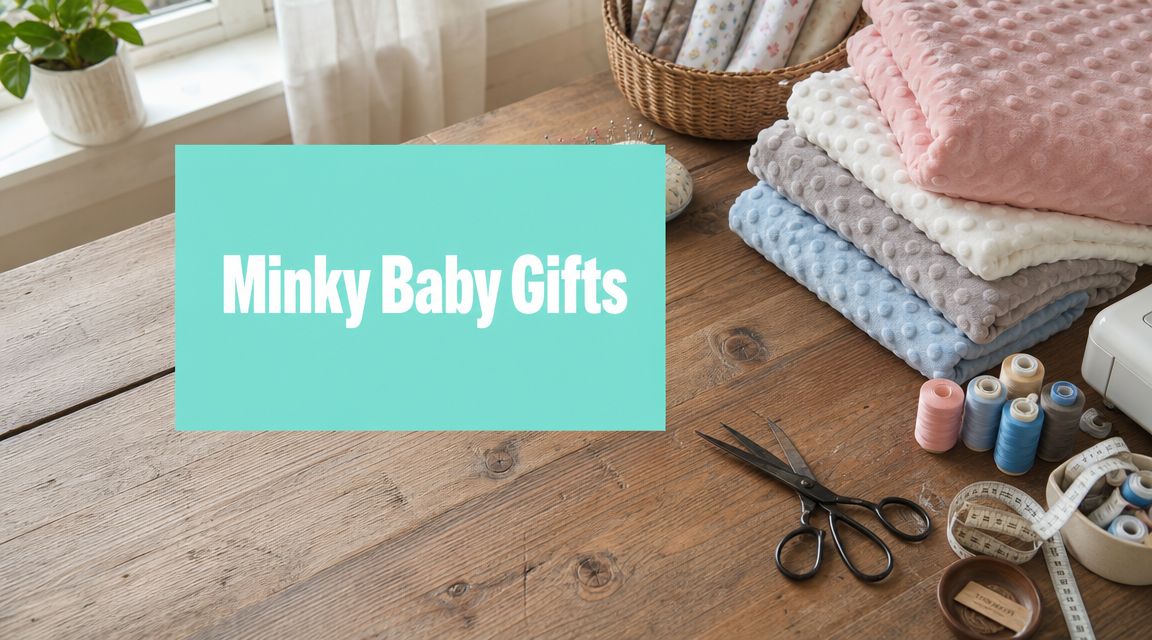
Searching for a baby shower gift that feels personal, useful, and worth keeping? The best handmade minky baby shower gift ideas pair premium softness with thoughtful construction, so the finished piece feels like a keepsake instead of a last-minute craft. That's why minky works so well. It turns everyday baby items into gifts parents reach for often and remember for years.
At On Pins & Needles Quilting, we see that pattern every day. Handmade marketplaces have dedicated search pages for personalized baby minky with stats, which tells you custom name-and-birth-detail blankets are an established gift category, not a passing novelty. In our studio, the winning projects are usually the ones that balance softness, washability, and a finish that still looks polished after real use.
If you're choosing between cute and practical, don't. Handmade minky baby shower gift ideas work best when they do both. OPN carries the Shannon Cuddle and Luxe Cuddle textures we rely on for baby projects, and our team brings hands-on quilting experience from fabric selection through finishing.
1. How Do I Sew a Simple and Classic Minky Baby Blanket?
 Alt text: Close-up of plush minky fabric prepared for a handmade baby blanket project
Want a baby shower gift that looks polished without turning into an all-weekend sewing project? Start with a single-layer minky blanket. It is the project I recommend most often because it gives you a generous finished size, a giftable look, and very few chances to fight bulky seams or tricky corners.
For this style, I like Luxe Cuddle Hide because the embossed texture does some of the design work for you. It reads special right away, even with simple construction. Luxe Cuddle Hide Silver by Shannon Fabrics is a strong choice if you want a soft neutral that works for nearly any nursery.
Sewing recipe
- Fabric: 1 yard of Luxe Cuddle Hide Silver
- Thread: Coordinating polyester thread
- Needle: Ballpoint 90/14
- Foot: Walking foot or dual feed
- Finish: Double-fold self-binding hem
- Size: Use the full yard cut for an easy stroller or cuddle blanket
That yard cut is a smart starting point. You avoid piecing, the blanket still feels substantial in the hands, and the whole project stays beginner-friendly.
Construction tips from a quilter's perspective
Minky behaves differently than quilting cotton. It stretches more on the crosswise grain, the nap shifts under the presser foot, and short stitches can sink into the pile. I set a slightly longer stitch length and let the machine feed the fabric without tugging from either side.
If minky tends to creep on you, use clips instead of pins and review OPN's guide on how to sew with minky fabric without it sliding before you start.
I do not prewash minky for this project. The fabric does not need the same shrink prep as cotton, and prewashing can make the cut edges fuzzier and harder to handle cleanly.
A double-fold hem is my preferred finish here. Minky does not fray, so you do not need binding for edge protection. Skipping binding also keeps the edge softer, which matters on a blanket meant for cuddling, stroller rides, and floor time.
Shop tip: Press with your fingers and clips, not a hot iron. Too much heat can flatten the pile and leave the blanket looking tired before it is even gifted.
Personalization that still looks good a year later
Simple works best. Add a woven name label in one corner, embroider initials on a cotton tag before inserting it into the hem, or stitch one side with a contrast thread if you want a subtle custom detail.
If you want the blanket to feel more like a keepsake, choose a texture or color tied to the nursery theme instead of adding a large graphic. That approach holds up better as the baby grows, and parents usually reach for it longer.
If you are deciding whether minky makes sense for baby quilts and blankets in general, OPN's guide on whether minky fabric is breathable for baby quilts is a helpful next read.
2. What's the Easiest Way to Make a Sensory Tag Blanket?
 Alt text: Small handmade minky lovey blanket with soft texture for sensory play
Need a fast handmade gift that still feels thoughtful? A sensory tag blanket is one of the easiest minky projects to sew well, and it uses small cuts that are easy to coordinate with a larger gift set.
I like this project because the scale works in your favor. You can practice clean corners, manage minky stretch on a simple shape, and finish with a useful little lovey that babies grab, rub, and carry. If you are still getting familiar with plush fabric, this quick guide to what cuddle minky fabric is and how it behaves gives helpful context before you cut.
For a polished version, pair Cuddle Dimple Baby Blue by Shannon Fabrics with a second minky texture that has a different hand. Dimple adds tactile interest, while a smoother backing keeps the piece flexible instead of bulky.
A simple sewing recipe
- Base squares: Two 10-inch to 12-inch minky squares
- Main texture: Cuddle Dimple Baby Blue
- Tag accents: Grosgrain, satin, and ric-rac ribbon cut into short lengths
- Tools: Wonder clips, ballpoint needle, polyester thread
Keep the ribbon selection varied in texture, but limit the colors to two or three. That choice usually looks better than using every ribbon in the drawer, and it gives the finished gift a more intentional, boutique feel.
Construction tips from a quilter's perspective
Fold each ribbon in half and baste the loops to one square before assembling the front and back. That extra pass is worth it. It keeps the tags from shifting when the minky starts creeping under the presser foot.
Use plenty of clips, especially near the corners. On small minky pieces, one stretched edge can throw the whole square off by the time you get back to where you started.
Leave a generous turning gap. Four inches is usually comfortable on a lovey this size. Any smaller, and you end up tugging too hard on the seam allowance while turning, which can distort the edge or pop stitches at the corners.
After turning, topstitch slowly around the perimeter to close the opening and keep the layers flat. I prefer a slightly longer stitch length here because it rides over the plush surface more cleanly and gives the edge a neater finish after washing.
Shop tip: Mix high-loft and low-loft ribbons, but skip anything glittery, stiff, or wired. Soft texture is the point, and stiff trims can make the blanket feel fussy instead of comforting.
Personalization that feels like a keepsake
Small projects do not need much decoration. The best personalization is often in the fabric and trim choices. Match the ribbon palette to the nursery, use one print or texture from a larger blanket in the gift set, or stitch in a woven label at the edge if you want the maker's touch to show.
A tag blanket also works well as the "little extra" in a shower gift. It gives parents something portable for the car seat or diaper bag, and it lets you use leftover minky from a bigger project without the result looking like an afterthought.
3. Can I Make Practical Burp Cloths Feel Luxurious?
 Alt text: Soft baby gift set inspiration with plush minky and coordinating fabric
Yes. Burp cloths are one of the smartest places to add minky because parents reach for them constantly, and a soft hand makes an everyday item feel gift-worthy without making it fussy.
I sew these with absorbent cotton or flannel on the front and smooth minky on the back. That combination wears well, washes well, and still gives you the plush finish people expect from a handmade baby gift. For the backing, Solid Cuddle 3 Saltwater by Shannon Fabrics is a reliable choice. The lower pile turns cleanly on curves and is easier to control than a higher-loft texture on a narrow pattern piece.
Sewing recipe for a polished set
- Top layer: Print cotton from OPN's quilting cottons collection
- Back layer: Solid Cuddle 3 Saltwater
- Shape: Hourglass or contoured burp cloth template
- Thread: Polyester thread for frequent washing
- Needle: A ballpoint or stretch needle. OPN's guide to best needle size for Shannon Cuddle fabric helps you match the needle to the fabric weight
I skip all-minky burp cloths for this project. They feel soft, but they do not absorb as well, and they can get bulky at the shoulder fold. Cotton on one side gives the cloth a job to do. Minky on the other side gives it the handmade finish that makes a shower gift stand out.
Construction tips from my sewing table
Sew with the cotton side facing up and the minky against the feed dogs. On a small curved project, that setup usually feeds more evenly and keeps the top layer from drifting off the edge.
Use more clips than you think you need, especially around the inner curves. Burp cloths look simple, but the shape will expose every bit of stretch if the layers shift during stitching.
Clip the seam allowance after sewing, then turn gently. If you leave the curves untrimmed, the edge feels thick and rounded instead of smooth. I also like a narrow topstitch to keep the layers flat after washing. It gives the set a cleaner, more finished look.
A set of three works well for gifting. I usually make one in a subtle print, one in a small-scale floral or geometric, and one in a solid-backed combination that ties the set together.
Personalization that still feels usable
Keep embellishment on the cotton side. A name, monogram, or tiny heart motif stitched near one end adds personality without putting dense stitching against the baby's skin.
For a keepsake touch, repeat the same minky color from a blanket or taggie in the larger gift set. That small detail makes the bundle feel coordinated, and it is a practical way to use fabric across multiple projects without making any piece feel like leftover yardage.
4. How Do I Tackle a Wearable Minky Blanket or Sleep Sack?
 Alt text: Handmade baby blanket and soft sewn accessories arranged as shower gift inspiration
Want to make a baby gift that feels special and still gets used every day? A wearable blanket or sleep sack can be a smart choice if you treat it like a precision sewing project, not a quick blanket with a zipper added on.
The main challenge is control. Curved seams, a zipper, and a fabric with pile all meet in a small garment, so fabric choice matters more here than it does on a basic throw. I get the cleanest results with quilting cotton on the outside and a low-pile minky lining, because it feeds more predictably, layers better, and stays comfortable without becoming bulky.
A simple sewing recipe
Use a trusted sleep sack pattern sized for the baby's age range and build from there.
- Outer fabric: Quilting cotton
- Lining: Low-pile minky, such as a smooth Cuddle-style solid already noted earlier in the article
- Accent option: A small piece of Luxe Cuddle for one appliqué detail
- Closure: Zipper installed with a zipper foot
- Helpful notion: Wash-away tape or fabric tape to hold the zipper in place before stitching
If you are quilting this style of project or want more detail on how plush backing behaves under the needle, OPN's guide to longarm quilting for minky-backed quilts gives useful context on drag, stretch, and stitch control.
The one detail to decide before cutting
Check the nap direction first.
Run your hand across the minky, choose the direction you want the pile to fall, and keep every pattern piece aligned the same way. On a wearable item, mismatched nap is easy to spot. The light hits each piece differently, and the finished sack can look pieced together even when the sewing is accurate.
Construction tips from my sewing table
Stabilize the zipper area before you sew. I like wash-away tape because pins can distort the edge and let the minky creep. Baste first if the pattern has a long front curve. That extra step saves time compared with ripping out a wavy zipper later.
Let the machine feed the layers. Do not stretch the minky to match the zipper tape. If rippling shows up, the cause is usually handling pressure or too much presser foot drag, not a bad zipper.
A walking foot helps on domestic machines, especially near the zipper and neckline. Slightly longer stitches also reduce tunneling and keep the seam from looking cramped. For needle setup, OPN's post on the best needle size for Shannon Cuddle fabric is a helpful reference if you run into skipped stitches or drag marks.
Personalization that still feels gift-worthy
Keep it restrained. One appliqué shape, such as a moon, star, or heart, is usually enough. Cut it from Luxe Cuddle if you want contrast, then secure it before final assembly so the inside stays neat against the baby's skin.
Name embroidery can work too, but place it on the cotton outer layer only. Dense stitching through both layers can make the front stiff, and sleep sacks need to stay soft and flexible to be practical.
This project suits gift-givers who know the family well enough to choose the right size and closure style. If sizing feels uncertain, save the wearable version for later and make one after the baby arrives.
5. What Should I Know Before Backing a Quilt with Minky?
 Alt text: Baby quilt with soft minky backing prepared for quilting and finishing
Want the look of a traditional baby quilt with the softness parents reach for every day? Minky backing can give you both, but it changes how the whole quilt behaves under the needle.
The biggest mistake is stretching the backing during prep. Quilting cotton tolerates being pulled snug. Minky does not. Once it gets stretched into the sandwich, those ripples usually stay there and can turn into pleats when you quilt.
A simple setup that works
Choose a backing size that gives you comfortable overage, especially if your quilt top has a lot of piecing and you want room to square up after quilting. Wider minky backs are useful here because fewer seams mean fewer places for bulk and drag to build up.
For a reliable sewing recipe, use:
- Backing: Wide minky or Cuddle with enough extra on all sides
- Batting: Low-loft cotton or cotton blend to keep the quilt from feeling too puffy
- Basting: Temporary spray baste, plus a flat work surface
- Quilting plan: Moderate spacing and simple motifs that do not overwork the plush backing
I smooth minky into place with my hands and let it relax naturally before the top goes on. No tugging. No snapping it tight at the corners.
What changes when you quilt it
Minky has stretch and pile. That combination affects feed, stitch definition, and how clearly your quilting shows on the back. Dense designs can look busy and flatten the softness that made you choose minky in the first place. Open quilting usually gives a better result for baby gifts.
On a domestic machine, a walking foot and slightly longer stitch length help the layers move together. On a longarm, good loading matters just as much as the quilting design. If you want a clearer explanation of setup, tension, and finish choices, OPN covers that in this guide to longarm quilting for minky-backed quilts.
Where the trade-offs show up
Quilting a minky-backed baby quilt at home is absolutely doable. It just asks for restraint. The more intricate the piecing on top, the more carefully you need to baste and the less aggressive your quilting should be. If the quilt is a shower gift with a deadline, sending the finished top to OPN's Mail-in Longarm Quilting Service can be a practical choice because the finish tends to be flatter, cleaner, and easier to bind neatly.
That matters most on keepsake quilts, where one twisted backing corner can spoil a lot of careful piecing.
Personalization that suits a keepsake quilt
Keep the customization soft and durable. A printed label or stitched fabric label on the back works better than heavy embroidery through the minky itself. If you want birth details, place them on the binding label or in one corner of the quilt back where they can be read easily without stiffening the center of the quilt.
For baby gifts, that kind of personalization ages well. It feels thoughtful now and still makes sense years later when the quilt comes out of storage.
6. How Can I Create a Coordinated Minky Gift Set?
Want your baby shower gift to look custom instead of pieced together at the last minute? Sew the set as one project, not three separate ones.
The cleanest formula is a three-piece set: a receiving blanket, a small lovey, and two or three burp cloths. That mix gives the parent something cuddly, something portable, and something practical. From a maker's standpoint, it also uses yardage efficiently and keeps the whole set visually tied together.
Build around one hero minky
Choose one standout texture or print first, such as Luxe Cuddle Seal print search at OPN. Then pair it with one supporting fabric in a quieter texture or solid color. I like a higher-texture minky for the blanket and lovey, then a flatter or simpler coordinate for burp cloth backs so the set does not feel overworked.
That balance matters. If every piece uses the busiest texture, the gift can start to look heavy instead of polished.
A simple sewing recipe for the full set
Cut the blanket from your feature minky first. Then use the remaining fabric for the lovey front or back. Reserve smaller coordinated cuts for the burp cloths, and pair those with cotton on the front where absorbency matters most.
A practical layout looks like this:
- Main blanket: Largest cut from the hero minky
- Lovey: One square from the leftover feature fabric or matching texture
- Burp cloth backs: Smaller cuts from the coordinate minky
- Burp cloth fronts: Quilting cotton or flannel
Batching the work saves more time than people expect. Cut all pieces in one session, stay aware of nap direction, and sew similar seams back to back so machine settings stay consistent.
From a longarm quilter's perspective, the trade-off is simple. Matching textures look beautiful, but thick pile on every item creates more bulk at seams, corners, and turn openings. For gift sets, I usually keep one plush statement fabric and let the supporting pieces do quieter work.
Personal details that make the set feel intentional
Repeat one color in all three projects. That could be a sage binding, cream topstitching, or the same ribbon shade on the lovey and gift wrap. Small choices like that make the set read as coordinated without forcing every item to match exactly.
For keepsake value, add personalization where it wears well. A name tag on the lovey seam, a printed fabric label on the blanket, or a monogram on the cotton side of a burp cloth will hold up better than heavy stitching through thick minky pile.
Soft, giftable items continue to perform well in the broader market. One industry forecast projects continued growth in plush products in the Dataintelo stuffed plush toys market report. Baby gift sets are a different category, but the appeal overlaps. People respond to softness, usefulness, and presentation.
Finish it like a gift, not just a stack of projects
Fold the blanket flat, roll the burp cloths, and tuck the lovey on top so the textures are visible right away. A fabric bin, basket, or reusable tote works well for presentation and gives the parents something useful after the shower. Add a handwritten care card with washing instructions, especially if you mixed cotton and minky in the set.
This approach works especially well for close friends, grandbabies, and nursery-specific gifts. You get a thoughtful result, better fabric yield, and a set that looks planned from the first cut.
6-Project Comparison: Handmade Minky Baby Shower Gifts
| Project | 🔄 Complexity | ⚡ Resources & Speed | ⭐ Expected Outcomes | 📊 Ideal Use Cases | 💡 Key Advantages |
|---|---|---|---|---|---|
| How Do I Sew a Simple and Classic Minky Baby Blanket? | Low, straight sewing, forgiving fabric | 1 yd minky, polyester thread, 90/14 needle; quick (1–2 hrs) | ⭐⭐⭐ Ultra-soft, polished finish | Tummy time, stroller, naptime, shower gift | Easy to personalize; high impact for little effort |
| What's the Easiest Way to Make a Sensory Tag Blanket? | Very Low, minimal pieces, beginner-friendly | Two 12"x12" minky squares, assorted ribbons; very fast (30–60 min) | ⭐⭐ High tactile engagement, durable | Lovey for infants, scrap-buster, small gift | Uses scraps; highly customizable; portable |
| Can I Make Practical Burp Cloths Feel Luxurious? | Low–Medium, manage different fabric stretches | Cotton/flannel + minky backing, pins/clips; moderate time per set | ⭐⭐ Practical and upscale; absorbent | Everyday use, gift sets, registry essentials | Affordable upgrade to essentials; easy embroidery personalization |
| How Do I Tackle a Wearable Minky Blanket or Sleep Sack? | High, pattern work, zippers, directional pile | Pattern, 1–2 yds lightweight minky, zipper, more time/skill | ⭐⭐⭐ Very cozy and safe alternative to loose blankets | Nighttime sleep, premium gift, heirloom item | Highly useful and impressive; requires careful handling |
| What Should I Know Before Backing a Quilt with Minky? | Medium–High, large fabric handling, avoid stretching | Quilt top, batting, extra-wide minky (90"), spray baste; time-consuming | ⭐⭐⭐ Luxurious, very cuddly when correctly finished | Heirloom baby quilts, cozy throws | Combines quilting with plush comfort; consider pro longarm service |
| How Can I Create a Coordinated Minky Gift Set? | Medium, planning and multiple small projects | 1.5 yd feature + 1 yd coordinating + cotton + ribbons; efficient if planned | ⭐⭐⭐ High visual impact and perceived value | Baby shower centerpiece, curated gift baskets | Maximizes yardage; assembly-line workflow yields polished presentation |
Ready to Create Your Minky Masterpiece?
Which handmade minky gift will parents reach for a month after the shower, not just admire when they open it?
The answer is usually the project that feels good in daily life. Soft enough to become a favorite, sturdy enough for frequent washing, and simple enough that the finish stays neat after real use. That is why the strongest choices in this guide pair a clear purpose with careful fabric selection and clean construction.
For a first minky project, start small and get comfortable with the fabric itself. A simple blanket or tag lovey gives you practice with nap direction, pinning or clipping, and feeding plush yardage through the machine without adding zippers, heavy quilting, or pattern fitting. More advanced gifts, such as a sleep sack or minky-backed quilt, can be beautiful keepsakes, but they ask for better control and more patience at each step.
Minky rewards a steady approach.
It hides tiny stitching wobbles better than many woven fabrics, but it also stretches if handled carelessly. I get the cleanest results by choosing one standout texture, basting thoroughly, and resisting the urge to over-design the project. A polished blanket in Luxe Cuddle, Cuddle 3, or Dimple often looks more refined than a busier gift with extra trims that fight the pile or add bulk at the seams.
On Pins & Needles Quilting Co. keeps that practical approach in mind. The shop carries premium Shannon Fabrics textures, extra-wide options for larger backs, and finishing support for makers who want help with the final quilting stage. That matters most on projects where fabric choice and scale change the sewing plan, especially if you are matching a quilt top to a plush backing or building a coordinated gift set from a few cuts of minky.
Choose the project parents will use. Match the texture to the job. Then sew it with enough care that it still looks beautiful after the first wash, the fifth wash, and the hundredth snuggle.