

Pick the simplest motif you can find. That's the most common advice we hear, and it's only half right. A tiny stipple looks basic on screen, yet it asks for tight spacing, constant turns, and hours of steady hands. On plush minky, the pile can hide all that work anyway.
Which Beginner Pattern Fits Your Quilt
The safest long arm quilting patterns for beginners are open continuous edge-to-edge motifs, a large meander, roomy loops, or a simple wavy pantograph, because the head travels across a supported quilt instead of drawing dense custom fills. We start there for a practical reason. The machine moves, the quilt stays supported, and one forgiving line can cover the whole top.
A motif that looks basic can still fail when its lines sit too close for the cloth. Dense stitching makes a throw stiffer, takes longer, and leaves less room when your spacing wanders. An open design gives you space to recover without turning one uneven gap into a whole row you want to pick out.
What four checks should you make first
Check motor difficulty first. Ask how often your hands must stop, backtrack, pivot, or hit an exact point. A large meander lets you keep moving in soft curves, while a sharp geometric repeat punishes every late turn.
Check density second. Spread the design at full scale and look at the space between lines, not the pretty thumbnail. If you can't fit a fingertip comfortably between passes, you're choosing a pattern that needs tighter control than most first quilts need.
Check quilting time third. A throw is big enough to expose fatigue, and tired hands make smaller, jerkier shapes as the rows go on. A short, open pattern protects the last row from looking rushed compared with the first.
Check texture compatibility last. Busy cotton prints forgive an open meander because the print breaks up small wobbles. Smooth solids show every wobble, while high pile swallows fine detail instead of showing it off.
Community beginners keep coming back to that spacing problem in a getting started with a longarm discussion, where paper tracing for roughly 20 minutes a day is suggested to build movement control. That matches how we'd judge a design. If you can't trace it evenly on paper, don't expect a frame to fix it for you.
Beginner longarm patterns by skill and fabric
| Pattern | Motor difficulty | Density | Time on a throw | Shows on plush minky |
|---|---|---|---|---|
| Large meander | Low | Open | Short | Yes, if loops stay wide |
| Roomy continuous loops | Low to medium | Open | Short to medium | Yes on Hide, Snowy Owl, and Fawn |
| Simple wavy pantograph | Low | Open | Short | Yes |
| Wide gentle arc or Baptist fan | Medium | Medium-open | Medium | Fair only if arcs stay wide |
| Open geometric crosshatch | Medium | Medium | Medium | Poor on high pile |
| Dense stipple or micro meander | High | Dense | Long | No, pile hides the line |
Read the table from right to left if your back is minky. High-pile Shannon textures such as Hide, Snowy Owl, and Fawn need large loops or a wide wave so the stitch line reads as texture across the pile. Micro stippling sinks in and mostly adds stiffness, time, and thread breaks.
A medium crosshatch belongs on smooth cotton only after your open motif already looks even. Straight lines show ruler slips and uneven channels fast. Curves forgive more, which is why we point first quilts toward waves and loops.
What is the difference between a pantograph and custom quilting
A pantograph is one continuous design that travels across the quilt in repeated rows. You trace it with a stylus or laser along the table, or your computerized system follows the same row logic. One decision covers the whole quilt.
Custom quilting plans a separate motif for each block, border, or background area. It can look wonderful, but it multiplies start and stop points, thread changes, and scale choices. For a first finish, that extra planning is usually the problem, not the solution.
You can compare how single overall designs read across finished tops in our computerized longarm quilting gallery before you commit to a scale. Look for repeats with breathing room between lines. Ignore any design you'd need to shrink down to recognize.
Before you stitch, preview your pick at full scale and mark one row. Negative gaps nest or overlap rows, while positive gaps leave a visible channel between them. Either can work, but you need to know which one you've set before the needle drops.
How to Stitch One Pantograph Row at a Time
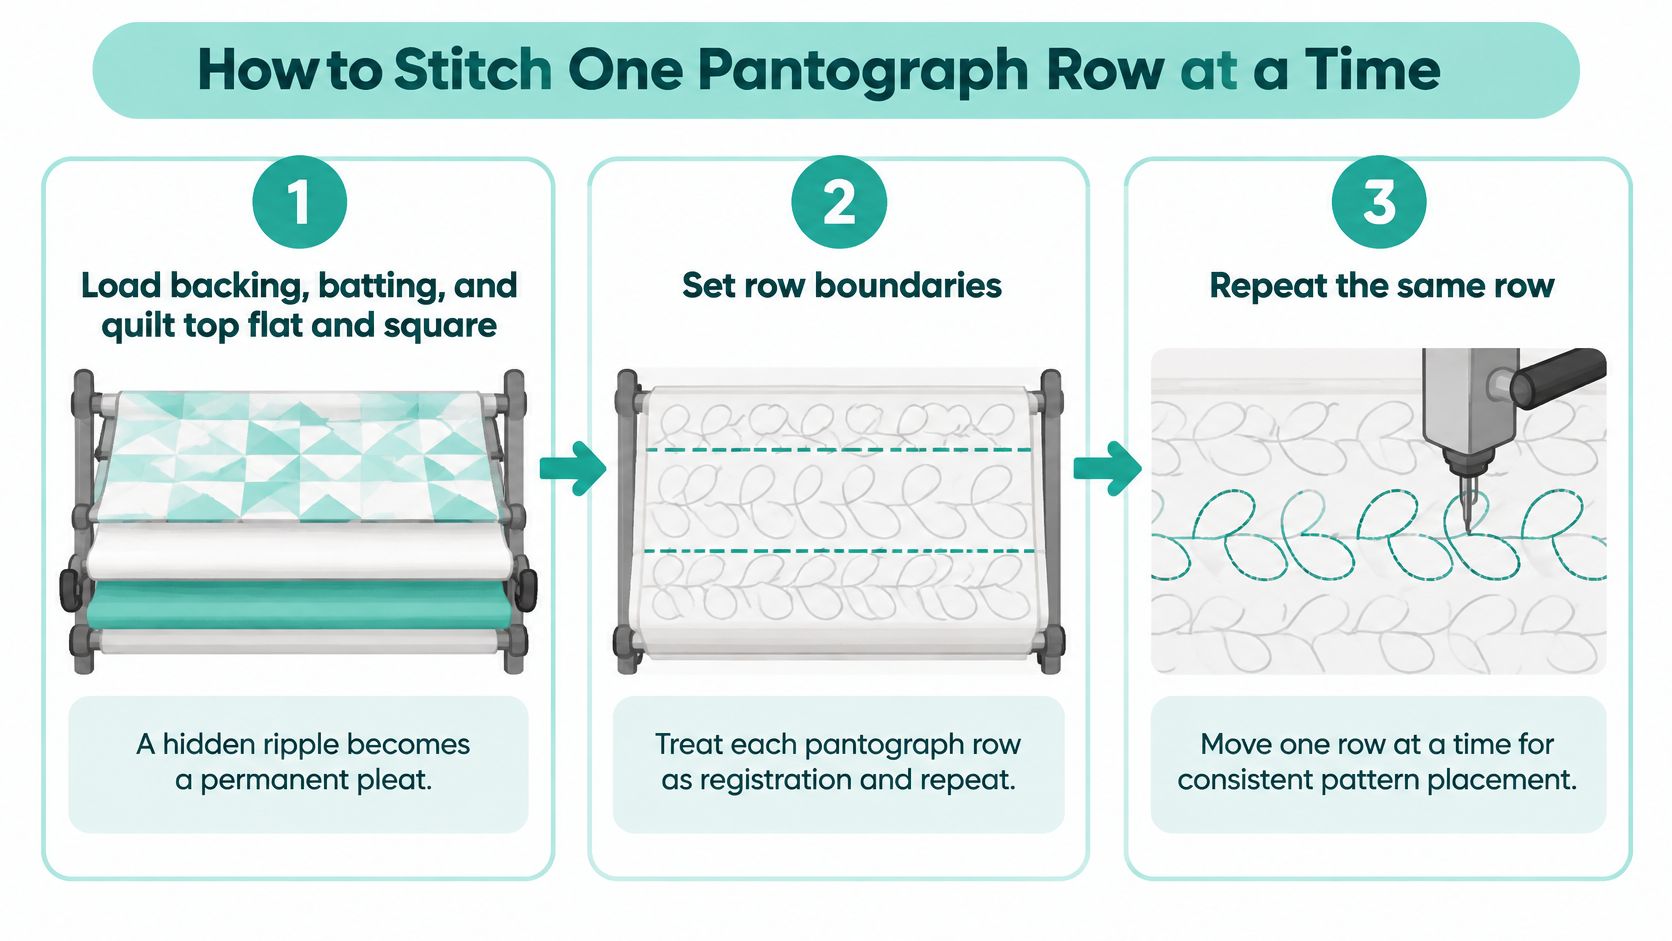
Treat every pantograph row as registration and repeat, not freehand drawing. Your job is to start in the same place, stitch the same repeat cleanly, and stop where the next row can line up without guessing. That mindset keeps an easy pattern easy from top to bottom.
The process below keeps each row contained. Finish it, roll it, realign it, then repeat.
What are the six steps for one clean row
- Load flat and square. Load the backing, batting, and quilt top flat and square, smoothing each layer before the next goes on. A hidden ripple in the backing or a fold in the batting doesn't ease out later. It gets stitched in as a permanent pleat.
- Set the row from the measured field. Set row height and gap from the quilting field on your frame, not from a guess on the screen. Measure the space the needle can reach between the bars. Your repeat has to fit that space with room for the row above and below it.
- Preview or test stitch first. Preview the design at full scale, or test stitch it on a practice sandwich made from the same backing, batting, and thread. Watch whether curves stay round at that size. A loop that looks graceful on screen can turn pointy when you shrink it.
- Start at the registration point. Begin near the upper-left registration point, baste or secure the top edge, and stitch across while watching both the needle path and the stylus or laser guide. Don't stare only at the guide. The needle tells you what's landing on the quilt.
- Stop on a fixed boundary. At the row boundary, stop on a channel-lock line, a registration mark, or a software alignment point. That fixed stop is your promise to the next row. Without it, you're estimating, and estimates drift.
- Roll only after the row is done. Roll the quilt forward only after that section is finished, then realign before stitching the next row. Rolling early feels faster for about ten seconds. It costs you the alignment you just worked to set.
That roll-later rule exists to stop cumulative vertical drift, the slow slide that happens when each row starts a little lower than planned. One row off by a fraction is invisible. Six rows of the same small error can crowd the bottom of the quilt and leave the last repeat squeezed.
How should you set the gap between rows
A negative gap overlaps or nests the repeats, so the bottom of one row tucks into the top of the next. Nesting works well for waves and loops because the curves interlock without a hard line. It fails when the overlap gets so deep that lines cross where they shouldn't.
A positive gap leaves visible separation between rows. That channel can look intentional on a simple wave, especially on busy prints. It looks like a mistake when the channel changes width from one row to the next.
Verify the gap at full scale on paper or a sample before the project quilt. Screens shrink spacing problems until they're stitched in thread.
Keep the marked motif uncomplicated and open while you learn this rhythm. The B Sew Inn longarm quilting guide lays out the same order, loading flat, setting row height and gap, and rolling only after a section is complete. Repeat one clean row before you chase a fancier repeat.
What should you watch while the row is stitching
Watch your hands as much as the pattern. Keep your grip light enough that the head glides instead of lurching from point to point. If your shoulders climb toward your ears, stop at the row boundary and reset your stance.
Watch the edges too. It's easy to give the middle of the quilt your best spacing and rush the last few inches before the end of the row. Slow down near the boundary so the repeat finishes at the same scale it started.
If a row goes wrong, finish it to the boundary if you safely can. Stopping mid-row to fix, roll, and restart creates a second alignment problem on top of the first. One imperfect repeat in an open pattern usually disappears once the quilt is washed and in use.
Your goal by the end of a first session isn't speed. It's a repeat you can start, stop, roll, and start again without hunting for your place. Once that cycle feels boring, your spacing usually looks much better.
How to Set Stitch Length Before the Real Quilt
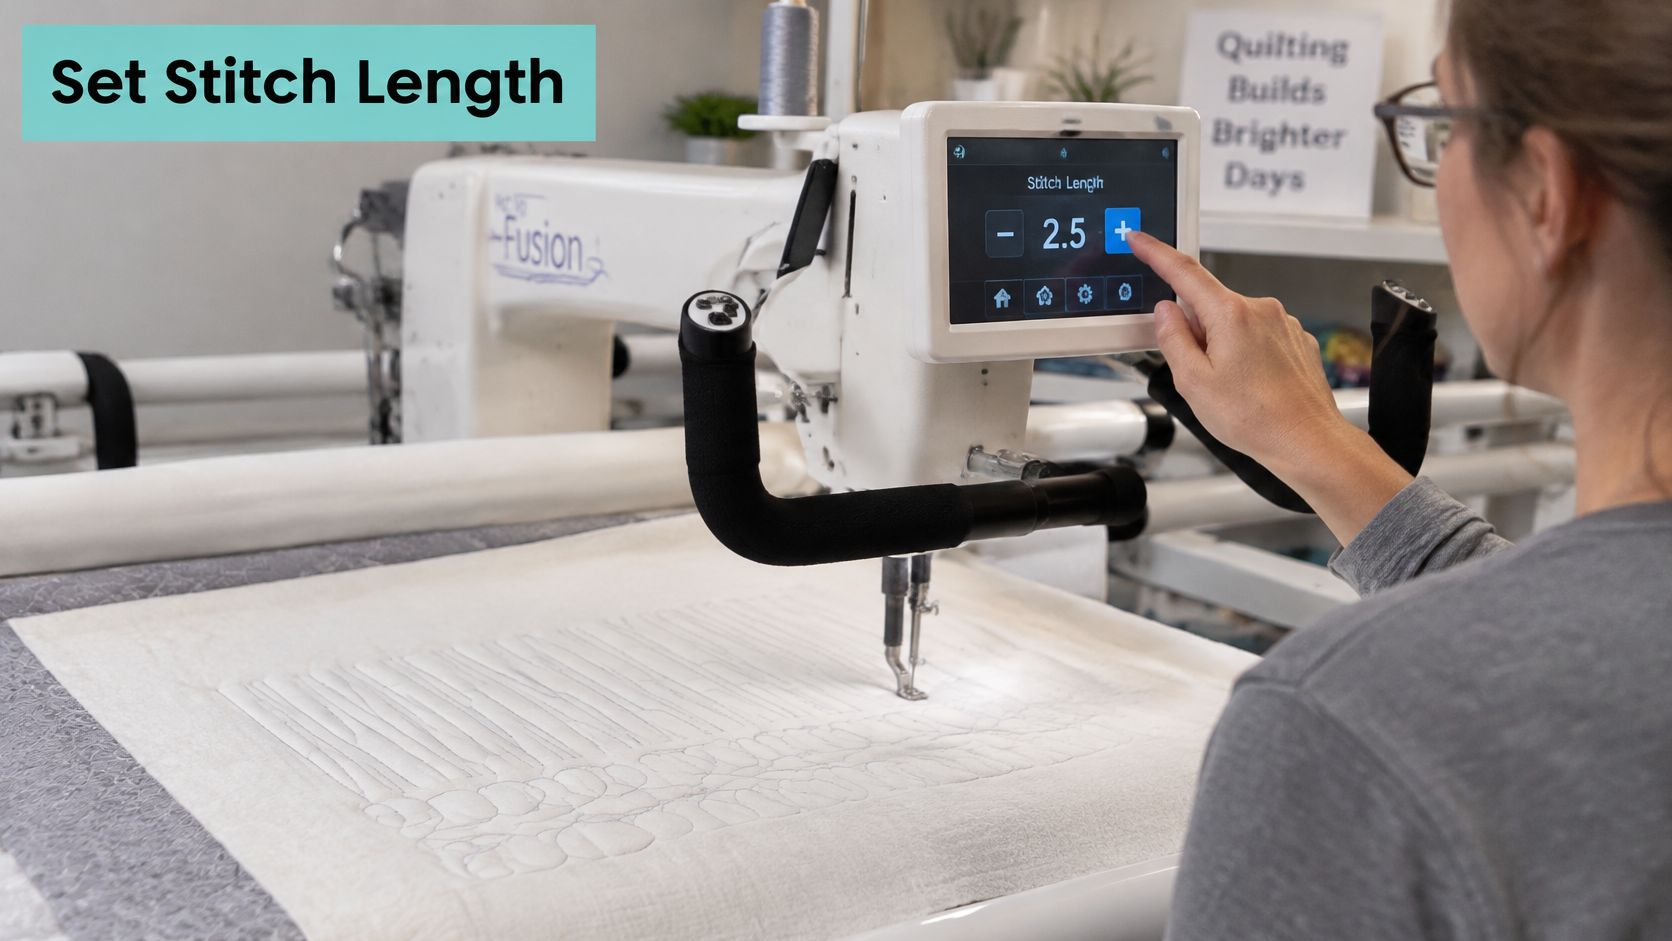
Start with 16 stitches per inch in regulated mode as your test setting. That number gives you a concrete benchmark to judge against instead of a vague hope that the stitches look fine. Consistent stitch length matters more than a fast machine on a first quilt.
Regulation coordinates machine movement with your selected stitches per inch, but it can't rescue jerky steering. Smooth, slow movement gives the regulator something workable. Snapping the head around corners gives you long stitches in one spot and tiny ones in the next.
The setup screen is only the starting point, so check your settings before a test run.
How do you build a useful practice sandwich
- Use the project layers. Build the sandwich from the same backing, batting, and thread as the quilt. If the back will be Shannon Cuddle or Luxe Cuddle, include a plush scrap, because cotton muslin won't tell you how the stitch sits in pile.
- Stitch straights and curves. Run several straight lines, then several curves at the same scale as your chosen motif. Straights expose speed changes. Curves expose steering problems.
- Turn it over. Inspect both sides before you touch a dial. The top can look tidy while the back tells a different story.
Bobbin thread shouldn't pull up to the top in dots along the line. Needle thread shouldn't form loops underneath that you can snag with a fingernail. Balanced thread meets inside the layers, so neither side looks like it's winning.
Our notes on stitch length for quilting walk through how length choices change the look of a line. Use that as your reference while you compare samples. Keep the sample beside the machine so you're judging against thread, not memory.
What should you change when stitches look uneven
If the start of a line looks long, slow your first movement so regulation can catch up. Beginners often push off like they're starting a lawn mower. Ease in instead, and let the first inch settle before you pick up pace.
If a stop looks tiny and packed, pause only after the needle has stopped. Stopping the head while the needle is still running piles stitches into one knot of thread. That knot is hard on the needle and ugly on a solid fabric.
Change tension a little at a time. Don't move speed, tension, and pattern size together, because then you won't know which change helped. One small adjustment, one short test line, one look at the back.
The Leah Day longarm quilting guide describes regulated modes set by stitches per inch and gives 16 SPI as an example setting while recommending tension testing before quilting. That test and adjust cycle is the whole point. A balanced scrap predicts a balanced quilt far better than confidence does.
Watch how regulated stitching behaves at starts, stops, and curves before you run your own sample.
Jerky steering bends an otherwise easy meander into angles. If your loops look like rounded triangles, the motif isn't too hard, your movement is too abrupt. Slow down until the curves round out again.
On days away from the machine, paper trace the same open design for about twenty minutes. You're teaching your hands the path without risking a finished top. Boring practice, yes, but it's cheaper than unpicking.
Keep the successful sample with your project notes. Write the SPI, thread, batting, and backing on the corner with a fabric marker. Later fixes start faster when you know exactly what already worked.
How to Prep Layers So the Pattern Stays Even
Even spacing starts before the quilt reaches the frame. A flat top, square backing, and enough overage give the machine room to follow the pattern without pulling a short edge or carrying a twist across the quilt. The simplest-looking motif is not automatically the safest choice: spacing, stitch density, working time, and whether stitches show on plush minky all affect the result.
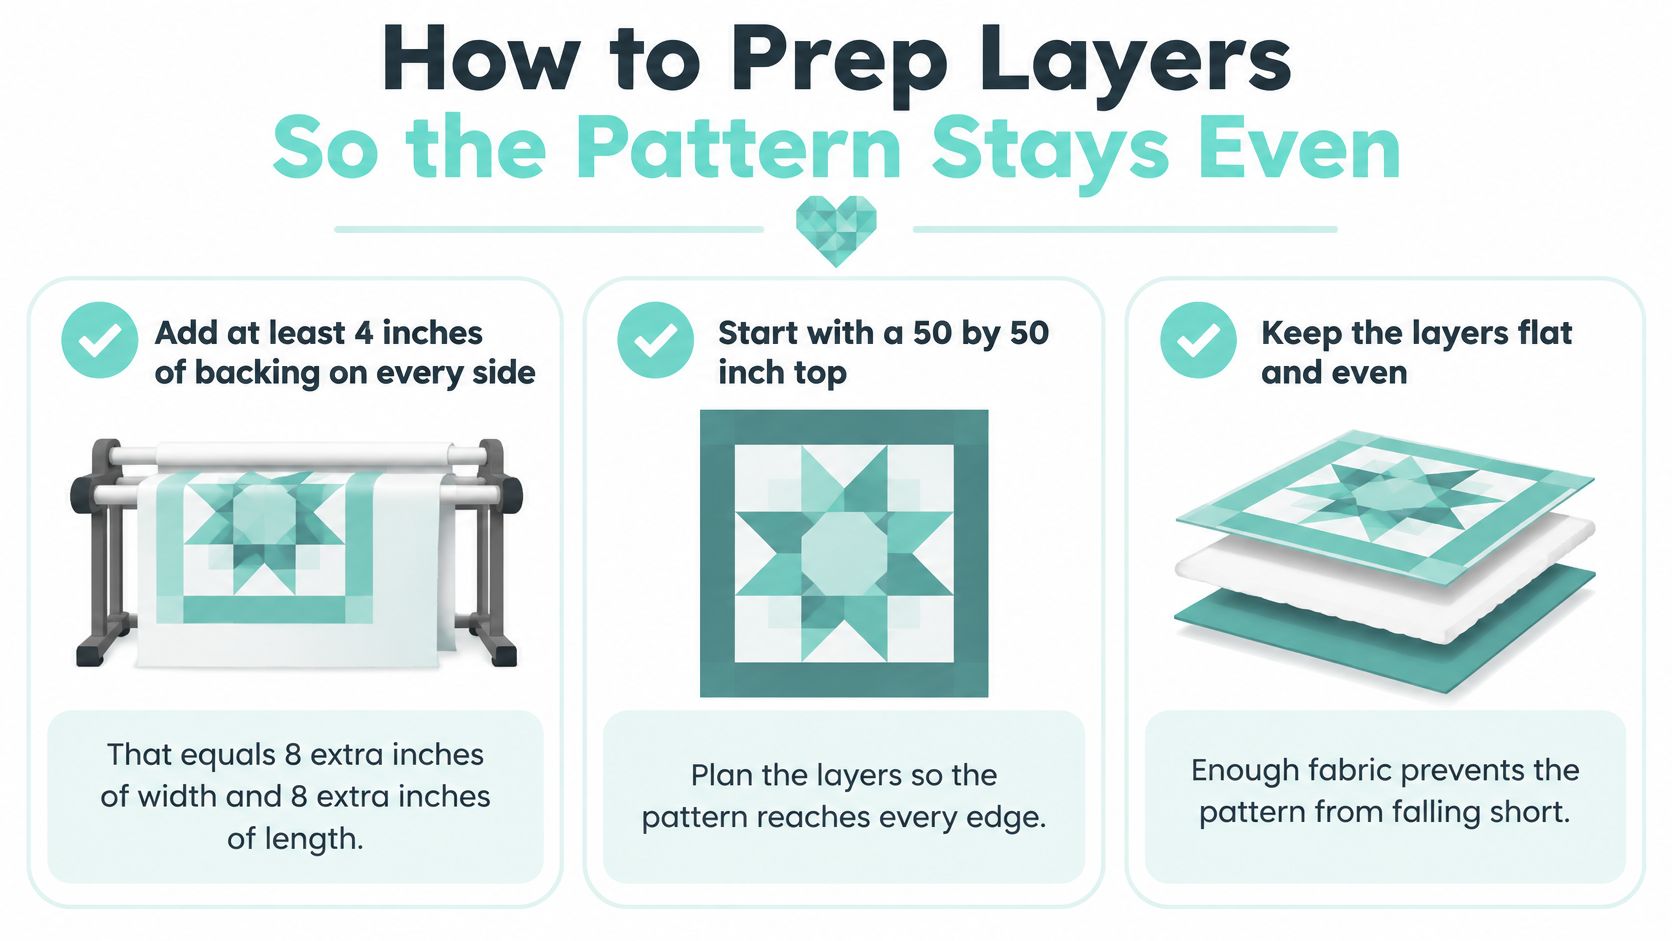
For backing, allow at least 4 inches beyond the quilt top on every side. That provides room for the frame to hold the layers and leaves quilting margin near the edges. A 50 by 50 inch top needs backing at least 58 by 58 inches, following the quilt backing seam and overage guide.
Use the finished quilt top dimensions when entering an order, not the backing dimensions. The top is the piece being quilted; extra backing is working room and does not change the finished quilt size. The same measurement rule applies when you are preparing a quilt for any longarm service.
How much batting and backing do other shops ask for
If you are supplying your own batting to On Pins & Needles, it must extend at least 3 inches beyond the quilt top on each side. Check the requirements of the shop you choose, since preparation instructions can differ. Batting trimmed flush to the top leaves no margin for loading.
Square the backing before packing it. Fold it corner to corner and check whether the edges line up, then trim uneven edges straight. If the backing is skewed, it can load with a twist, and the quilting lines will not correct that distortion.
The backing should also lie flat. A wide seam ridge or uneven edge can affect how the fabric sits, while a twist can make an otherwise open pattern look uneven from row to row. If backing needs joined widths, take care with the seams before the quilt is loaded.
How do you prep seams and threads
- Remove selvages from seams. Selvages are denser than the fabric around them and can pull a backing seam off grain. Cut them out before joining widths.
- Press seams flat. Press backing seams so they lie flat, and press the quilt top carefully too. A ridge beneath the foot can nudge a stitch line sideways.
- Clip dark threads. Trim loose dark threads on the back of the top, especially behind light fabrics. Loose threads can show through once the layers are held under tension.
- Check your borders. Measure across the top, middle, and bottom. Wavy borders need attention before quilting, since the machine cannot make a loose edge lie flat.
Keep the backing, batting, and top smooth and free of pins or basting until they are loaded on the frame. That advice is about avoiding snags and keeping each layer ready for loading, not a mail-in shipping requirement. For machine quilting orders, On Pins & Needles asks customers to enter the finished top dimensions, rather than adding the backing overage to the measurement.
When loading, each layer needs to sit flat and aligned with the others. The backing, batting, and top should not be twisted or folded under. A wrinkle caught beneath a row can remain stitched into the quilt, while a short edge can leave too little fabric to hold securely.
Why does extra wide backing help beginners
Extra-wide backing avoids a center seam that would otherwise need to stay straight during loading. With plush fabrics such as Cuddle, a one-piece back also avoids a seam across the pile. But plush pile brings a different trade-off: a dense pattern may be harder to see than a more open motif. Prepare the quilt carefully, then choose a pattern whose spacing suits the surface.
The top ten quilt prep tips cover measuring and pressing checks to make before packing a quilt. Keep the top flat in a bag inside the box rather than folding it into a tight bundle. Smooth layers and squared edges give the chosen pattern a better chance of staying even across the quilt.
Good prep will not make a difficult pattern easy. It removes avoidable wrinkles, twists, and short edges, so you can focus on controlling the motif instead of correcting problems in the layers.
What to Fix When Spacing Drifts
Long stitches at the start of a row are the fault we hear about first. Your hands moved before regulation settled, so the first inch stretched out while the rest of the row looks fine. Slow the entry, and give the machine a breath before you travel.
Change one cause at a time, using the stitch you can see. Every fault below has a look, a likely reason, and one next move. Work down the list instead of restarting the whole quilt over a single bad row.
Longarm stitch problems and the one fix
| What you see | Likely cause | One fix |
|---|---|---|
| Long stitches as a row starts | Movement before regulation catches | Slow the first inches |
| Tiny stitches at a stop | Needle still running as the head halts | Pause only after the needle stops |
| Thread nest | Tension off, or several settings changed at once | Adjust one variable on the practice sandwich |
| Pleat quilted in | Fold left in backing or batting | Reload and smooth outward from the center |
| Rows drifting down the quilt | Gap judged by eye | Realign with a mark, then roll |
| Motif vanishes on minky | Dense line on high pile | Enlarge to loops or a wide wave |
Tiny stitches at a stop mean the needle was still running when the head halted. Wait for the needle to stop, then pause, reposition your hands, or check your guide. That half second saves you a hard knot of thread at every corner.
A thread nest is a tension problem until proven otherwise. It belongs back on the practice sandwich, not in a new pantograph choice. Rethread, check the bobbin, adjust one variable, and stitch the same line again.
What if the rows themselves are wandering
Rows that walk downhill are cumulative drift from eyeballing the gap. Use the channel lock, a registration mark, or the software alignment point, and roll only after the row is done. Your eye is a good judge of color and a poor ruler.
Pleats mean the backing or batting went on with a fold. There's no steering trick that fixes a fold under tension, so reload and smooth from the center outward. Catching it after one row is annoying. Catching it after five rows is a weekend with a seam ripper.
Our guidance on how to improve accuracy focuses on that repeatable alignment habit. Mark, stitch, stop on the mark, roll, realign. Same order every time, even when a row looks perfect.
What if the motif disappears on plush backing
If an open meander vanishes on Hide, Snowy Owl, or Fawn, the pile is hiding the line. Adding more stitching makes the quilt stiffer without making the pattern clearer. Switch to larger loops or a wider wave so each pass parts the pile enough to read.
When a line disappears in pile, enlarge the motif. Do not densify it.
Test that change on your plush scrap first. Brush the pile with your hand after stitching and look at the sample from across the room. If the wave reads at couch distance, it will read on the finished throw.
Leave your stitch settings and backing allowances alone while you chase spacing. One visible problem gets one fix, then one test row. That discipline is what turns a bad first row into a usable lesson instead of a full restart.
Send the Top or Keep Practicing the Open Pattern
Decide from the sample, not from a bigger pattern library. When your practice sandwich shows balanced thread on both sides and one clean pantograph row at full scale, quilt that same open motif across the quilt top. Don't upgrade to a harder design as a reward for one good row.
When there's no longarm in your life, or the top is due as a gift next month, mailing it in is a sound beginner path. It isn't giving up on learning. It's separating piecing, which you've finished, from frame time you don't have.
Beginner handoff questions come up often in a discussion about what to send to a longarmer, mostly around backing, batting, and prep requirements that vary by provider. That's why we publish our numbers plainly. You shouldn't have to guess what goes in the box.
Practice on your frame or mail the top
| Path | Equipment | Risk | Prep you still do | Best when |
|---|---|---|---|---|
| Keep practicing the open motif | Your own longarm | Higher until spacing is even | Load and test the three layers yourself | The sample row already looks even |
| Mail-in edge-to-edge | None | Lower if the top is prepped | Press, clip threads, no pins, 4 inch backing overage | No machine, or a gift deadline |
Either way, the prep list doesn't change. The top gets pressed, loose threads get clipped, the layers stay separate, and the back stays 4 inches larger on every side. Mailing a top out doesn't skip prep, it just moves the stitching to our frame.
What does our mail in service include
Our most popular service is edge-to-edge quilting, one pattern over the whole quilt. That's the same open, continuous logic we've recommended throughout for a first finish. You pick the pattern, or you don't have to.
If the design choice is what's stalling you, Quilter's Choice lets us match one of our favorite patterns to your top. Tell us the fabric and who the quilt is for. We'll favor an open motif at a scale that suits the piecing.
Mail-in quilting is $0.03 per square inch and includes the quilting, batting, thread and supplies, and free return shipping to the lower 48. You enter the finished top size, choose pattern and thread, and ship the prepared layers. Our mail-in longarm quilting services with free shipping page walks through the order steps before you box anything up.
We have hundreds of verified reviews, and they come back to the same point. Clear prep makes the finish look intentional, whether the pattern is loops or a soft wave. A wrinkled, short backing limits what any quilter can do for you.
Which path fits your quilt today
If your sample row is even and you enjoyed stitching it, keep going. Frame time is how spacing turns into muscle memory, and an open throw is the right size to learn on. Finish it, bind it, wash it, and use it.
If the sample fights you, the calendar is tight, or the quilt back is high-pile Luxe Cuddle you don't want to experiment on, send it. Long arm quilting patterns for beginners stay open on purpose, especially on plush textures. That restraint is what makes the quilt soft, clear, and finished.
Ready when you are. Book Your Longarm Service Today, take 15% off your first order, and use free U.S. shipping on orders over $70. If the top still needs a back, shop the Luxe Cuddle collection, including Snowy Owl or Fawn, and cut it with that 4 inch overage on every side.
Bring us the top you've already pieced and we'll finish it with open edge-to-edge long arm quilting patterns for beginners that suit cotton prints or plush Shannon Cuddle backs, with batting, thread, and free return shipping included. Shop backing, pick a pattern, or choose Quilter's Choice at On Pins & Needles Quilting Co. and get that quilt off the to do pile and onto the couch.