Finished the top and feeling equal parts proud and nervous about putting it in the mail? How to prep a quilt for mail-in longarm services comes down to four things: make the backing and batting larger than the quilt top, press everything flat, trim loose threads, and clearly mark the top edge. Get those right, and the quilting itself goes much more smoothly.
A well-prepped quilt gives your longarmer room to load it correctly, stitch it evenly, and return it ready for binding instead of emailing you with avoidable questions. If you're sending a cotton top with a premium minky back, the prep matters even more because softness and stretch change how the quilt behaves on the frame.
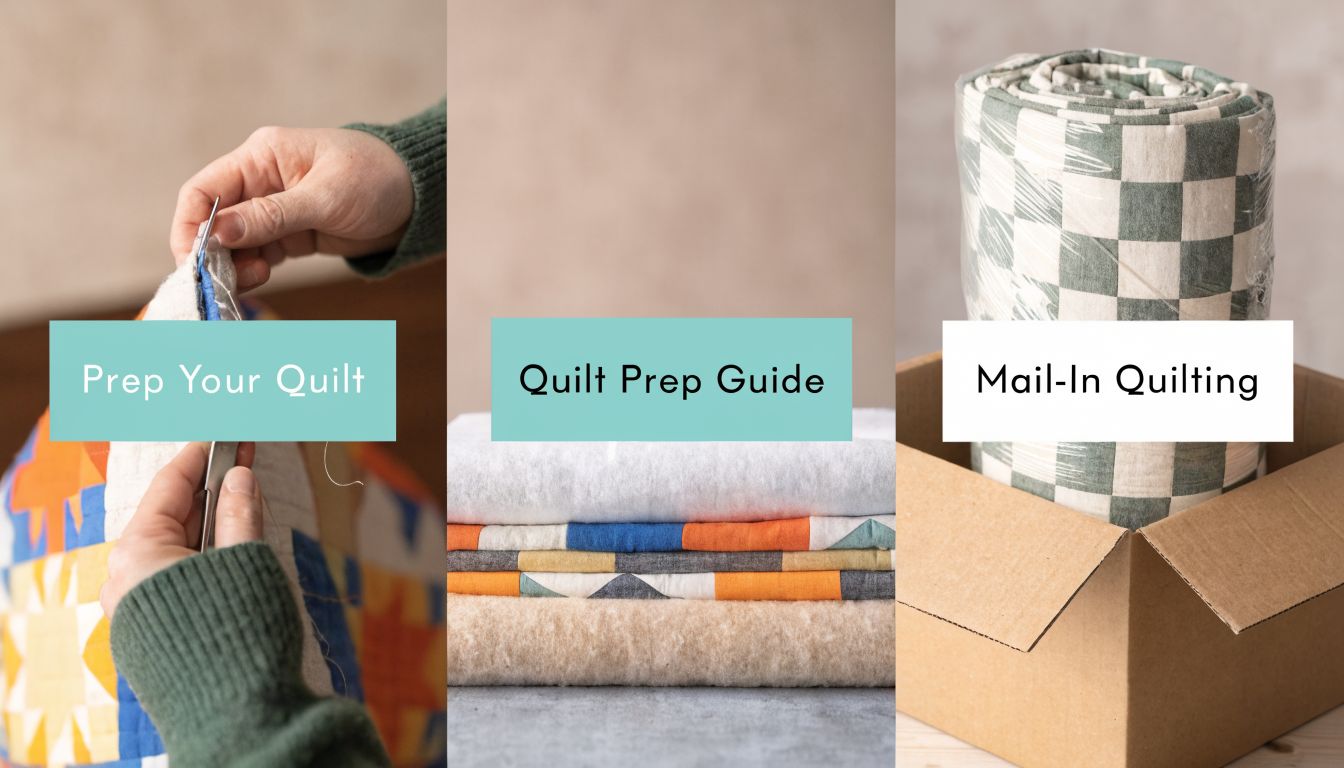
Your Essential Guide on How to Prep a Quilt for Mail-in Longarm Services
When you finish piecing a quilt top, the next step isn't just boxing it up and hoping for the best. The cleanest mail-in results come from treating prep as part of the quilting process, not as an afterthought.
If you're wondering how to prep a quilt for mail-in longarm services, start with this short checklist:
- Measure the quilt top carefully at multiple points.
- Cut backing and batting larger than the top.
- Press the top and backing flat so seams and folds don't fight the machine.
- Trim stray threads from both sides of the top.
- Mark the top edge of the quilt and backing if direction matters.
- Leave the layers separate unless your longarmer specifically asks otherwise.
At our mail-in longarm service page, you'll see the same basic principle we give customers every day. Prep is a partnership. You piece the quilt with care, and the longarmer finishes it with the same care, but the handoff has to be clean.
Practical rule: If a quilt arrives flat, square, labeled, and with enough backing, most common mail-in problems disappear before quilting even starts.
That matters whether your backing is standard quilting cotton, wide backing, or a plush Shannon Cuddle finish like Hide, Snowy Owl, or Fawn. The softer and loftier the backing, the more important good prep becomes.
Why Do Longarmers Need Extra Fabric?
A quilt can look perfectly generous on the floor and still arrive too small for the frame. I see that more often than you might think, especially with mail-in quilts where the backing was cut to match the top too closely.

Longarm quilting needs extra backing and batting because the quilt is loaded onto rollers by the backing, not by the pieced top. The machine needs fabric beyond the edges of the quilt top so the layers can be attached, tensioned, advanced, and stitched without distorting the quilt. If that margin is missing, the problem starts before quilting even begins.
Modish Quilter's prep guide lays out the standard many longarmers use: backing and batting should extend 4 to 6 inches beyond the quilt top on every side. For a 50" x 60" quilt top, that means a minimum backing of 58" x 68".
How much extra fabric should you cut?
Use the quilt top's actual measured size, then add room on all four sides.
- Left and right sides: Extra width gives the frame room to hold the backing securely.
- Top and bottom: The rollers need enough length to attach and advance the quilt.
- Batting too: Batting should be larger than the top for the same reason.
That margin matters even more with high-end backings like minky and Shannon Cuddle. Plush fabrics have more stretch, more loft, and more drag on the frame than quilting cotton. If the backing is skimpy, there is less control during loading and fewer options for getting the quilt to run straight. Good prep gives your longarmer room to handle that fabric well instead of fighting it.
At OPN, that is part of the partnership. Customers send a quilt with enough usable backing. We use that margin to load it carefully, keep the layers balanced, and get the soft finish people want from luxe backings without adding avoidable stress to the quilt.
Size helps, but square helps just as much
A backing can be technically large enough and still cause trouble if it is not square. The same goes for the quilt top. If one edge stretches longer than another, the quilt may load unevenly, and that can show up later as rippling, fullness, or borders that refuse to behave.
Check your measurements in several places:
- Width at the top, middle, and bottom
- Length at the left side, center, and right side
As noted in the Modish Quilter prep guidance, those measurements should stay within about 1 inch of each other. If they do not, trim or correct the issue before shipping. That small step gives the longarm frame a fair starting point.
Quilting can add texture and structure. It cannot create missing backing or square up a quilt that arrives distorted.
If you are planning a larger quilt and want to avoid piecing extra seams into the back, extra-wide quilt backing options for longarm quilting can make prep much easier.
A quick visual can help if you're new to frame loading:
What works and what doesn't
| Approach | What happens on the frame |
|---|---|
| Backing with enough extra on all sides | Loads securely and gives the quilter room to tension the layers evenly |
| Backing cut close to the quilt top size | Limits loading options and may delay or stop quilting |
| Measured in several places before cutting | Catches stretching, bowing, and uneven edges early |
| Cut from the pattern size without remeasuring | Misses changes caused by piecing, pressing, or border distortion |
The simplest way to prevent trouble is to give the frame room to work. That extra fabric is not waste. It is what helps your longarmer finish the quilt cleanly, especially when the backing is soft, stretchy, or precious.
What Is the Best Fabric for My Quilt Back?
A quilt back has one job on the frame and another job in daily life. It needs to load cleanly for quilting, and it needs to suit the way the finished quilt will be used. The best choice for a guest-room quilt is not always the best choice for a baby quilt that will be washed often or a cuddle quilt that is meant to feel soft the second it lands on the couch.
For many projects, quilting cotton is still the easiest path. It presses flat, stays stable, and behaves well during prep. Wide backing cotton gives you that same predictability with fewer seams, which can be a relief on larger quilts.

Minky is different. It gives a quilt immediate warmth, drape, and a more luxurious hand, but it also asks for better prep. That trade-off is usually worth it for quilts that are meant to be snuggled, gifted to babies, or used hard and loved often.
How do cotton, wide backing, and minky compare?
| Backing type | What works well | What to watch for |
|---|---|---|
| Standard quilting cotton | Crisp finish, easy to press, easy to match to pieced tops | Larger quilts usually need seams |
| Wide backing fabric | Fewer seams and simpler prep for bigger quilts | Print and color choices may feel narrower |
| Shannon Cuddle and Luxe Cuddle | Soft hand, plush finish, beautiful drape, often wide enough to avoid a center seam | Stretch and nap need careful handling |
If you want the back of the quilt to feel as special as the front, minky is often the right answer. For larger quilts, 90-inch wide minky fabric for quilt backs can reduce piecing and remove one of the places trouble starts. Fewer seams usually means a smoother load on the frame and less bulk under the quilting.
Why minky needs different prep
Minky has loft, stretch, and nap. Those three qualities are exactly why people love it, and exactly why longarm prep matters more.
A cotton backing will forgive a little rough handling. Minky usually will not. If it gets pulled while measuring, cut off grain, or pieced without care, the longarmer has to spend extra time correcting problems that could have been prevented at the cutting table.
The safest approach is simple:
- Use one clean piece if you can
- Skip extra seams unless the size requires them
- Smooth the fabric flat instead of stretching it
- Mark the top edge if the nap or design has a direction
A few mistakes show up over and over with plush backings:
- Measuring while the fabric is hanging off the table
- Pulling it taut to “square it up”
- Forgetting to check nap direction before cutting
- Choosing a heavily textured backing without considering how it will pair with the quilt top
That last point matters more than many quilters expect. A busy pieced top and an aggressive backing texture can compete with each other. If the quilt top already has a lot of movement, a quieter plush texture often gives a more balanced result. Luxe Cuddle Hide Natural is a good example. It adds softness and depth without stealing attention from the patchwork.
A beautiful longarm result is a partnership. Your prep gives the quilt a stable start, and the quilting adds the finish that brings the whole piece together.
What about batting?
Batting choice matters even more when the backing is plush. The batting affects how the quilting sits, how much the stitches sink into the backing, and how the finished quilt drapes. With minky, many quilters prefer to keep that middle layer straightforward so the backing remains the star.
One practical option is to use a service that already includes batting. This mail-in longarm quilting service removes the guesswork of sourcing, packing, and shipping an extra layer yourself.
If you are still deciding, start by asking two questions. Do you want the quilt to feel crisp or drapey? Do you want the backing to blend quietly into the quilt, or be part of the experience every time someone picks it up?
For quilters who know they want softness first, browsing 110-inch extra-wide minky fabric can help you plan around fewer seams and cleaner prep.
How Should I Prepare My Quilt Top for Longarming?
You finish the last seam, fold the top, and it looks done. Then it reaches the longarm frame, and the small things start to matter. A twisted border, a dark thread tail under a cream patch, or a loose edge on a bias corner can change how smoothly the quilt loads and how cleanly it quilts.

Good prep gives your quilt the best chance to succeed on the frame. That is even more important if you've chosen a premium backing such as minky. Plush backings show puckers, trapped lint, and tension issues differently than standard cotton, so the quilt top needs to arrive flat, clean, and stable. My job is to quilt it well. Your job is to send me a top that is ready to be loaded without guesswork.
The prep steps I want every customer to finish are simple. Press the top well. Trim every loose thread. Stabilize the outer edge if the quilt needs it. Those three steps prevent a surprising number of avoidable problems.
How should you press the quilt top?
Press for accuracy. A longarm can stitch through fullness, but it cannot make a distorted top square again.
Start with the back so the seam allowances settle where they belong. Then press from the front to smooth the surface and check that blocks are lying flat. Let the quilt cool on a flat surface before you fold it or measure it. Warm fabric can relax into a different shape once it cools.
Be careful with steam on borders and bias edges. Too much heat and pressure can stretch one area while the rest of the quilt stays true. If a border still waves after pressing, the issue is usually in the piecing or border length, not a wrinkle that needs more ironing.
Why thread trimming matters
Thread tails hide until quilting makes them permanent. On light patchwork, dark threads can shadow through. On high-pile backings like minky, lint and clipped threads can migrate into the quilt sandwich and get caught where you do not want them.
Check these areas closely:
- Dark thread tails behind light fabrics
- Clipped threads in seam intersections
- Lint, pet hair, and batting fuzz
- Border edges and corners
I tell customers to trim as if the quilt will be photographed in bright daylight, because quilting adds texture and texture draws the eye.
If you want a solid before-you-ship reference, keep these longarm quilting top prep tips nearby while you do your final check.
Should you stitch around the edge?
Often, yes.
A stay stitch about 1/8 inch inside the outer edge helps hold the quilt together during handling, shipping, and loading. It is especially useful on quilts with lots of small pieces at the edge, bias borders, sharp points that extend into the seam allowance, or appliqué that wants to lift.
This step matters because mail-in quilting includes more handling than a local drop-off. The top gets folded, packed, unpacked, measured, and mounted to the frame. A quick victory lap helps the edges stay neat through that process.
A quick top-prep checklist
| Task | Why it matters |
|---|---|
| Final press | Helps the top lie flat and gives more accurate measurements |
| Trim all loose threads | Prevents show-through and keeps debris out of the quilt sandwich |
| Stay stitch the edge | Supports seams and points during shipping and loading |
| Remove pins and temporary basting | Keeps the top ready for frame loading |
| Mark the top edge if directional | Helps the quilt load in the direction you intended |
A well-prepped quilt top looks calm and intentional. Flat. Clean. Clearly marked if direction matters. That kind of prep gives the longarmer room to focus on what you are really paying for: quilting that suits the quilt, respects your fabric choices, and finishes the piece the way you pictured it.
What Are the Most Common Mail-in Quilting Mistakes?
Most mail-in issues aren't dramatic. They're ordinary prep decisions that create unnecessary delays. The fastest way to avoid them is to know what your longarmer can't easily fix once the box is opened.
Below is the checklist we wish every first-time mail-in customer could see before sealing the package.
Common Quilt Prep Mistakes and How to Avoid Them
| The Mistake | Why It's a Problem | The OPN Solution |
|---|---|---|
| Basting the quilt top, batting, and backing together | Longarm frames load each layer separately. A pre-basted sandwich has to be undone before quilting can begin. | Ship the layers separately unless your longarmer specifically requests something different. |
| Sending backing that isn't squared or is barely larger than the top | The quilt may not tension evenly on the frame, and loading can stop before quilting starts. | Measure the top and backing carefully and confirm the backing gives proper margin on every side. |
| Leaving embellishments attached | Buttons, beads, charms, and dimensional trims can interfere with quilting and risk needle or machine problems. | Add embellishments after quilting unless you've discussed them in advance. |
| Forgetting to mark the top edge | Directional prints, directional piecing, and nap can be loaded the wrong way if nothing is labeled. | Pin a note or label the top edge of both the top and backing. |
| Using decorative cuts or rough edges on the backing | Uneven or jagged edges make loading harder and can introduce distortion. | Cut straight, clean edges with quilting tools rather than decorative scissors. |
Which mistakes matter most with minky?
Minky adds one more layer of decision-making because softness can hide problems until the fabric is on the frame. A backing can look fine folded on your table and still show stretch, skew, or nap direction issues once opened.
The most common minky-specific trouble spots are:
- Unmarked nap direction
- Unnecessary piecing on a large backing
- Lint and thread clippings left on the fabric
- Backing folded tightly with creases that need time to relax
A quilt doesn't need perfect piecing to be successfully longarmed. It does need honest prep. Clean edges, clear labeling, and separate layers make the whole process smoother for everyone involved.
Hundreds of verified reviews often reflect the same thing customers appreciate most. Clear instructions before the quilt ships.
If you're ready to move from prep to booking, the mail-in longarm quilting service is the step where your finished top becomes a finished quilt.
How Do I Safely Package and Ship My Quilt?
Once your quilt is prepped, shipping is mostly about protection and clarity. You want the box to keep moisture out, hold its shape, and tell the longarmer exactly what's inside.

What should go in the box?
Pack the quilt top and backing neatly folded, but not compressed so tightly that deep creases set in. Place them in a sealed plastic bag first, then put that bag inside a sturdy cardboard box.
Include:
- Your printed order information
- Any notes about orientation
- Pattern preferences, if you've selected an edge-to-edge design
- Contact details in case the longarmer has a question
If you're choosing a quilting design before shipping, the edge-to-edge pattern gallery helps you narrow down what suits the quilt's style.
What shipping habits make the process easier?
Use a shipping method with tracking. Insurance is also worth considering when the quilt is irreplaceable or highly sentimental.
One more useful step is reviewing a shipping-specific guide before you tape the box shut. This mail-in longarm quilting services with free shipping overview gives a helpful final check before drop-off.
Keep your note simple and specific. "Top edge marked with blue tape. Use the floral pantograph chosen on my order." That's far more useful than a long paragraph.
When prep, labeling, and packaging all line up, your longarmer can focus on the quilting itself instead of problem-solving avoidable issues. That's the whole point of learning how to prep a quilt for mail-in longarm services well. It protects the work you've already done.
If your quilt top is ready and you want a smooth handoff, book your longarm service today with On Pins & Needles Quilting Co.. You can also shop 110-inch extra-wide minky, choose Luxe Cuddle Hide Natural, view edge-to-edge patterns, or get 15% off your first order.