The easiest patchwork quilt designs for beginners are the Four-Patch, Nine-Patch, and simple precut panel quilts. These square-based patterns keep cutting simple, use straight seams, and give new quilters a realistic path to a finished quilt without a lot of math or tricky piecing.
If you're standing in your sewing space with fabric you love and no idea where to start, start there. Beginners do best with patterns that repeat one skill at a time, and these three do exactly that. They also adapt well if you want a classic cotton top, a plush minky project, or a quilt top you plan to send out for professional finishing.
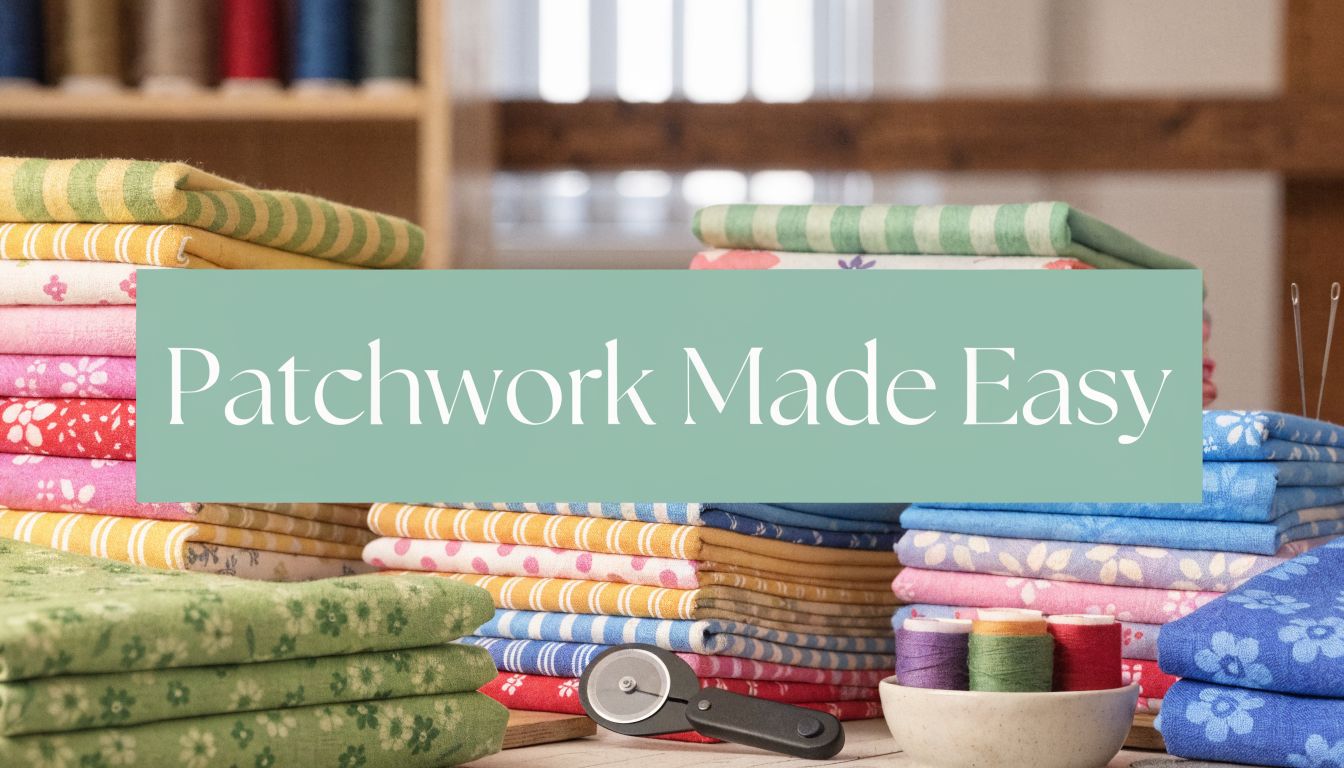
What Supplies Do You Need for Your First Quilt?
A first quilt doesn't require a giant tool collection. It does require a few tools that make accuracy easier, because accurate cutting and consistent seams are what make patchwork enjoyable instead of frustrating.
Which tools are worth buying first?
Keep your starter kit tight:
- Rotary cutter for clean, straight cuts. Scissors work for many sewing jobs, but patchwork improves fast when your pieces are cut consistently.
- Self-healing mat so you can cut safely and measure against clear grid lines.
- Acrylic ruler to square fabric and trim repeatable units.
- Sewing machine with a reliable straight stitch because beginner patchwork is built on straight seams, not decorative stitches.
- Iron and pressing surface since pressing keeps blocks flat and helps seams line up.
- Pins or clips to control shifting, especially if you're sewing plush or slippery fabric.
- Thread you trust in a neutral shade for piecing.
Practical rule: Bad cutting creates problems that no amount of careful sewing can fully fix.
A quarter-inch seam matters, too. If your machine has a quarter-inch foot, use it. If it doesn't, mark your seam guide and sew a test strip before touching your real fabric.
What fabric makes a first quilt easier?
Stable quilting cotton is the usual starting point, but beginners also do well with precuts because they remove a lot of measuring pressure. Charm packs, layer cakes, and coordinated squares help you get to sewing faster and spend less energy wondering whether your colors work together.
Here’s a simple way to choose:
| Fabric option | Why beginners like it | Best use |
|---|---|---|
| Precut squares | Less measuring and trimming | Four-Patch and Nine-Patch |
| Coordinated bundles | Colors already play nicely together | Small quilts and gifts |
| Yardage | Flexible, but more cutting | When you're ready for more control |
| Minky or Cuddle | Very soft, wonderful for gifts | Best with simple blocks and larger pieces |
Batting is the other piece people often leave until too late. If you're not sure what type you need, this guide on what quilt batting is and how it affects your finish is worth reading before you buy backing and plan your quilting.
What should you skip for now?
Skip specialty rulers, tiny pieces, and any pattern that relies on curves or lots of points. Your first quilt should teach rhythm, not rescue work.
If you want an easy win, start with square-based precuts or a small baby-size project. That gives you enough repetition to learn, without turning your first quilt into a marathon.
How Do You Make a Simple Four-Patch Quilt Block?
A Four-Patch is the block I hand to beginners who want a real finish, not just practice pieces. It teaches accurate cutting, a steady quarter-inch seam, and clean matching at the center, all without asking you to manage tricky points or curves. That matters even more if your goal is a soft minky quilt, because simple blocks give plush fabrics far fewer chances to shift.

How do you sew the block step by step?
Start with four equal squares. For a first block, use two dark and two light fabrics so the checkerboard layout is easy to see at a glance.
- Lay out the four squares in a checkerboard pattern.
- Sew the top two squares together with right sides facing.
- Sew the bottom two squares together the same way.
- Press the seam on each pair.
- Place the two pairs right sides together and match the center seam.
- Sew the pairs together to complete the block.
- Press the final seam and trim the block square if needed.
A Four-Patch goes together fast, but accuracy shows up at the center. If that intersection meets neatly, your seam allowance is doing its job.
Which pressing choice helps most?
Press one unit’s seam to the left and the other unit’s seam to the right. That lets the seams nest together when you join the rows, which is the easiest way to get a crisp center without pinning every inch.
I usually tell beginners not to chase speed here. A careful press after each seam gives you flatter units, and flatter units are much easier to match.
What works best for fabric choices?
High contrast gives the Four-Patch its shape. If all four squares sit close in value, the block can look muddy and it becomes harder to spot layout mistakes before sewing.
Good beginner combinations include:
- A small floral with a solid-look print
- A novelty print with a quiet background
- Two dark squares and two light squares
- Simple, larger-cut minky pieces for a baby quilt with fewer seams to manage
Cotton is still the easiest fabric for the very first block, but Four-Patch also adapts well to minky if you keep the pieces a little larger and avoid tiny cuts. That is one reason I like it as a starter design for quilts that will eventually go to longarm quilting. Simple patchwork stays soft, reads clearly, and holds its shape better through quilting.
If you want a few more square-based options after this one, this collection of easy quilt blocks and patterns is a good place to continue.
A visual demo helps here:
What Makes the Nine-Patch a Classic Beginner Design?
The Nine-Patch is the next natural step after a Four-Patch. Instead of joining two pairs, you build three rows of three squares, then sew the rows together. It feels more like making a real quilt block, but it still stays square, repetitive, and manageable.
The design dates back to at least the 18th century, where it served as an accessible entry point for novice quilters in British and American traditions. The Victoria and Albert Museum notes its simple 3x3 grid helped quilters make durable patchwork from scrap fabrics, including in resource-scarce periods such as the U.S. Civil War era, and you can read that background in their article on quilting and patchwork history.

How do you build a Nine-Patch without getting mixed up?
Think in rows, not in nine separate pieces.
- Row one might be dark, light, dark
- Row two could be light, dark, light
- Row three repeats row one
Sew each row first. Press the seams in opposite directions on neighboring rows so they nest when you join them. Then sew row one to row two, and add row three last.
That row-by-row method keeps the layout readable and reduces twisting or accidental flips.
How is it different from a Four-Patch?
Here’s the practical comparison:
| Design | Grid | Best for learning | Common challenge |
|---|---|---|---|
| Four-Patch | 2x2 | Straight seams and center matching | Rotating one unit the wrong way |
| Nine-Patch | 3x3 | Row construction and seam nesting | Keeping all rows in order |
| Precut panel quilt | Grid of larger squares | Fast assembly and confidence | Resisting overcomplication |
The Nine-Patch asks for a little more organization, but not much more skill. That’s why it remains one of the strongest patchwork quilt designs for beginners.
Why does it build confidence so well?
A Nine-Patch teaches three habits that matter later:
- Reading a layout before sewing
- Keeping rows organized
- Matching intersections neatly
It also uses scraps beautifully. If your fabric stash includes prints you don't know how to feature, the Nine-Patch gives each one a small, clear role.
When a beginner wants a quilt that looks classic fast, I point them to the Nine-Patch. It has enough structure to look impressive and enough repetition to stay calm.
If you enjoy a traditional look but want a more modern finish, make several Nine-Patch blocks in minky-friendly larger sizes, then separate them with plain sashing. That keeps the softness front and center without overloading the quilt with seam bulk.
Can You Use Precut Panels for an Even Faster Quilt?
A lot of first quilts stall at the cutting mat. The sewing is usually not the problem. Measuring, trimming, and keeping every stack in order wears beginners out before the top even starts to look like a quilt.
Precut panels solve that problem well. They give you larger coordinated pieces, a clear layout, and fewer chances to make a cutting mistake. For beginners, that often means more time sewing and less time second-guessing.

Why are panel quilts so beginner-friendly?
They remove three common sticking points right away:
- Less measuring because the design is already planned
- Less cutting which saves time and reduces errors
- Less layout stress because the prints are made to work together
That trade-off is worth naming clearly. You get speed and confidence, but you give up some of the piecing practice that a Four-Patch or Nine-Patch teaches. If your first priority is finishing a quilt you feel proud to gift or keep, that is usually a smart trade.
What does assembly usually look like?
Most precut panel quilts go together in straight rows or simple framed sections. Lay out the pieces first, take a quick photo, sew the rows, then join them into a top. The process stays manageable because you are handling bigger units instead of a pile of small patches.
That larger scale also pairs nicely with plush fabrics. Fewer seams mean less bulk, less shifting, and a softer finished quilt. If you want a fast project with coordinated prints, cut and sew fabric panels are a practical place to start.
When a beginner tells me, "I just want my first quilt to turn out well," panels are high on my list. They keep the project moving, and that matters.
Who should choose this option?
Precut panels are a strong fit for:
- Gift quilters making a baby quilt on a deadline
- Beginners who do not enjoy cutting
- Anyone working on a dining table and needing quick setup and cleanup
- Minky fans who want larger pieces and fewer seams to manage
They are especially helpful if you want the look and feel of a finished quilt quickly, then plan to send it out for longarm quilting so the final result looks polished from the start.
How Do You Adapt These Designs for Minky Fabric?
A lot of first quilts get planned in cotton, then the maker falls in love with the feel of minky and changes course. That can work beautifully, but minky asks for a different approach if you want clean seams and a quilt that still looks polished after quilting.
If you are new to plush fabric, start with the basics of cuddle and minky fabric. The biggest practical difference is simple. Minky has more give and a slippery nap, so it shifts more easily than quilting cotton while you sew.

What changes when you switch from cotton to minky?
Keep the pattern easy. Change the way you handle the fabric.
A beginner usually gets the best result by sizing up the pieces. Four-Patch blocks made with larger squares, roomy Nine-Patch blocks, and simple panel-based layouts all give you the soft look people want from minky without asking for fussy precision. Tiny patchwork is possible, but it turns a pleasant first project into a fabric-control exercise.
A few habits make a real difference:
- Cut larger shapes and use fewer seams so the fabric has fewer opportunities to stretch or creep
- Sew with a walking foot so the layers feed more evenly
- Pin or clip generously because plush surfaces shift against each other
- Use low heat and press carefully so you do not flatten the pile
- Test your stitch on scraps first to check feeding, seam appearance, and bulk
Which beginner patterns work best in minky?
The best minky quilts are usually the simplest ones. Texture does a lot of design work for you, especially with raised or embossed finishes, so the piecing does not need to be complicated.
Here is the trade-off I usually point out to beginners:
| Pattern type | How it behaves in cotton | Better choice for minky |
|---|---|---|
| Tiny scrappy block | Precise and traditional | Usually frustrating for a first minky quilt |
| Four-Patch | Straightforward | Excellent with larger squares |
| Nine-Patch | Manageable | Good if you increase the block size |
| Panel quilt | Fast and forgiving | Excellent |
Shannon textures such as Luxe Cuddle Fawn, Snowy Owl, and Hide stand out in clean layouts because the surface already gives you movement and depth. Simple blocks let that softness show instead of burying it under too many seams.
Worth remembering: Minky usually looks richer in a simple design than in a busy one.
If you want your first project to finish well, start small. A baby quilt, stroller quilt, or pillow front gives you room to learn how the fabric feeds, how much pinning you prefer, and which layouts stay square without a fight. That is often the better first win, especially if you plan to pair your quilt top with professional longarm finishing later.
How Do You Get a Professional Finish on Your Quilt?
The part that surprises many first-time quilters is not the piecing. It is what happens after the top is done. A quilt top can look great on the table and still become frustrating once you add batting, backing, and all that bulk under a home machine.
For a first quilt, I usually suggest choosing your finish before you sew the last border on. That decision affects how carefully you square the top, how you press, and whether a plush minky backing will feel exciting or a little overwhelming.
What are the real trade-offs between DIY and longarm finishing?
Both options are good. They serve different goals.
| Finishing path | Best when | Main challenge |
|---|---|---|
| DIY straight-line quilting | You want to learn the full process on a small quilt | Bulk under the machine and keeping spacing consistent |
| DIY free-motion quilting | You want to practice free-motion from the start | Control, stitch quality, and fatigue on a real project |
| Mail-in longarm quilting | You want a polished finish without wrestling the whole quilt at home | Sending in a top that is square, flat, and ready to load |
I have seen plenty of beginners piece a lovely top, then stall at the quilting stage because the project suddenly gets heavy and awkward. That happens even faster with minky, since the extra loft and stretch make the quilt sandwich harder to manage on a domestic machine.
A longarm service does not make the quilt less handmade. It solves a specific mechanical problem. You still chose the fabrics, pieced the blocks, and made the design decisions. For many beginners, that is the smartest way to finish strong.
How should you prep a quilt top for the best result?
A good finish starts with a top that lies flat. Longarm quilting cannot correct major waviness, stretched borders, or bulky seam intersections. It will quilt what you send.
These prep steps make a real difference:
- Check the top for square before you pack or baste it
- Clip loose threads, especially behind light fabrics
- Press for flat seams so the machine can move across the top cleanly
- Fix any popped seams before quilting starts
- Measure the quilt in both directions if your finisher asks for size confirmation
If your quilt includes minky, keep the pieced top simple and stable. A clean patchwork top paired with minky backing usually quilts better than a heavily pieced top with lots of tiny seam allowances. That is one of the most useful trade-offs for beginners to understand. Simpler construction often gives you a better finished quilt.
When should a beginner quilt at home?
Quilt at home if the project is small, your layers stay manageable, and you want practice with the whole process. Baby quilts, stroller quilts, and pillow fronts are all reasonable first candidates. Straight-line quilting with a walking foot is the most forgiving place to start.
Binding is also a good skill to keep for yourself, even if you send the quilt out for stitching. If that step feels new, this guide on how to bind a quilt for beginners walks through the process clearly.
For larger throws, quilts with plush backing, or any first project where you mainly want a beautiful result, professional longarm quilting is often the calmer choice. Finishing the quilt matters more than proving you can do every step on attempt one.
Start Your First Patchwork Quilt Today
You pick out a soft backing, cut a few simple squares, and suddenly the project feels real. That is a good place to start. A first quilt does not need complicated blocks to feel satisfying. It needs a pattern you can finish with confidence.
Four-Patch, Nine-Patch, and precut panel quilts all earn their place because they teach useful skills without burying a beginner in fussy cutting or hard seam matching. I recommend them often because they also adapt well to minky, which changes the feel of the finished quilt in the best way. The trade-off is simple. Plush fabric asks for cleaner construction and less complicated piecing, so classic beginner patchwork usually performs better than intricate designs.
That flexibility is what makes these patterns so practical. A cotton top with a soft minky backing works well for a first baby quilt. A panel quilt gets a gift finished quickly. A simple patchwork top paired with professional longarm quilting gives many beginners the best shot at a polished result on attempt one.
Keep the goal clear. Finish one quilt that looks good, feels good, and teaches you enough to start the next one with less hesitation.
Good supplies help, but pattern choice matters just as much. Start with blocks large enough to handle comfortably, stay consistent with your seam allowance, and let the project be a learning piece. I have seen many first quilts turn out beautifully when the maker chose a forgiving design and did not overcomplicate the fabric mix.
If you want your first project to feel especially soft and gift-worthy, look for quality minky options, specialty textures you enjoy working with, backs without seams, and finishing support if quilting the layers yourself feels like too much. That combination removes a lot of the usual beginner frustration and gives you a much better chance of ending with a quilt you are proud to use, gift, or keep on the couch.